We don’t all need super high quality electronic testing gear. Sometimes second-hand or inexpensive equipment is accurate enough to get the job done. Though it can be a bit annoying to miss out on some of those “luxury” features. [Ekriirke] had this problem with his cheap multimeter. He wished the LCD screen had a backlight for easier visibility, so rather than upgrade to a more expensive unit he just added one himself.
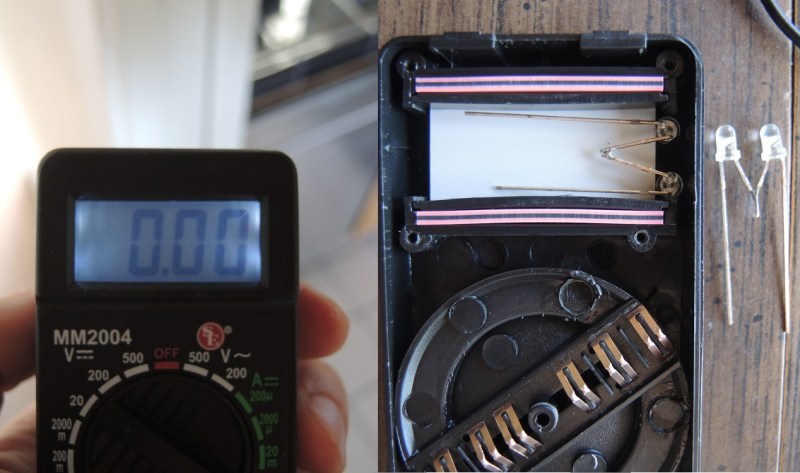
After opening up the multimeter [Ekriirke] found that it ran on a single 12V battery. He realized that the simplest thing to do would be to wire up four white LEDs in series. The four LEDs were arranged within the case off to each side of the LCD, one in each corner. The leads were bent at 90 degree angles and soldered together “dead bug” style. Thin strips of copper foil tape were attached to the PCB in such a way that the anode and cathode from the LEDs would make contact when the case was closed back up.
The tape wraps around to the other side of the PCB where there was more room for the next piece of the circuit. A capacitor, resistor, and transistor are used in conjunction with a momentary switch. This circuit allows [Ekriirke] to turn on the light for about ten seconds by pressing the button one time. The circuit also runs through the meter’s dial switch, preventing the LEDs from being turned on while the meter itself is turned off.
[via Reddit]


This is a fine execution of an idea. Kudos!
God dang it… I just thought of this yesterday and didn’t do it because I haven’t got my leds in the mail yet! I just bought a new $3 dollar multimeter I saw at a goodwill yesterday, brought it home and it needed fixing already (piece of junk really). I took it apart and resoldered the probe connectors ports and a few other things. After I put it back together I turned it on to see if it was working or not but couldn’t since it got dark… I thought “man I should stick a couple leds in here like I did to my gameboy”… A god dang day ago…
Haha, featured by proxy again. These photos are from over a year ago, I only uploaded them in response to another user’s hack to add a meter power timeout [augustocampos] via https://pay.reddit.com/r/electronics/comments/38lpvq/i_hacked_my_multimeter_from_the_dollar_store_so/
Aww
Check Instructable =>http://www.instructables.com/id/Mini-DMM-enhancement/ for DMM auto shut off is considerations.
Fluke’s lawyers just called. They’re really PO’d.and claim only they can use yellow LEDs.
I see what you did there.
That’s not a backlight.
I see that the fuse is NOT in a holder – it’s soldered to the PCB – as it is in my Cheapo Centech from Harbor Freight.
I wonder why the use is not in a holder???
I wonder why the FUSE is not in a holder???
A holder would add to the materials cost. Sure, it’s only a few cents, but that adds up when you’re doing a factory run of several thousand units.
Probably for the simple reason that the fuse holders would add $0.02 to the bill of materials, and reduce their profit margin.
In this cheap of a piece of equipment, do you expect anything else?
I have one of these multimeters and hate the short-lived expensive 12V battery, so I glued a 9V battery+holder on the back. Works but a bit ugly. Next time, I’ll spend more than $7….
I get these all the time as “Free with $25 purchase” deals. They make pretty decent disposable DMM’s. Mine actually came with a battery compartment and 9V battery snaps. No fuse though, just a thin trace that acts as a fuse.
Re. 12V meters. If you pay the $$$ and get one with a decent chip it lasts as long as a 9V. Mine burned through its supplied battery in about 2 days, put new DIall one in and it lasted 3 months.
Also there is more than one type and they can be interchanged, 1.8* capacity for a 22% increase in price.
Note, backlight will draw a lot more power so you might want to make it shorter than 10 seconds.
I used a 2K2 resistor on mine as it had fewer LEDs (3S2P) but a constant current via JFET will also work if you choose one with a low threshold say 1.2mA