Remember the good old days when machines had a stout metal badge instead of cheap vinyl decals, and nameplates on motors were engraved in metal rather than printed on a label with a QR code? Neither do we, but these raised brass labels with color filled backgrounds look great, they’re surprisingly easy to make, and just the thing your gear needs to demand respect as a cherished piece of gear.
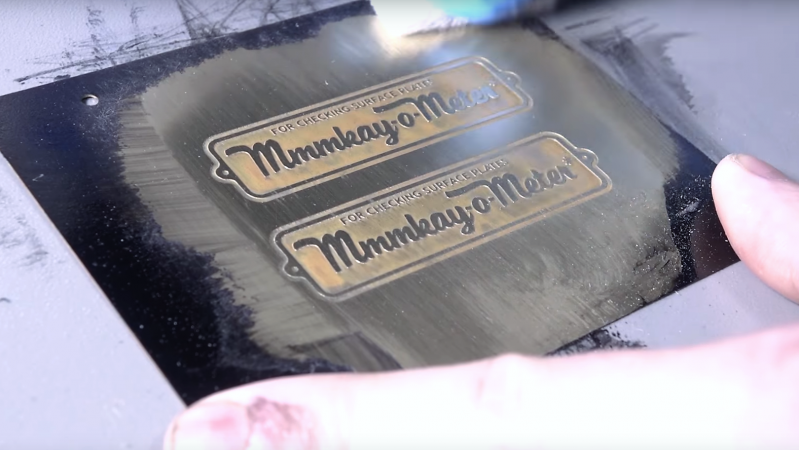
 The ‘easy’ part of this only comes if you have access to a machine shop like [John] at NYC CNC does. To be fair, the only key machine for making these plates is a laser cutter, and even a guy like [John] needed to farm that out. The process is very straightforward — a brass plate is cleaned and coated with lacquer, which is then removed by the laser in the areas that are to be etched. The plate is dipped in an electrolyte solution for etching, cleaned, and powder coated. After curing the powder coat with a heat gun rather than an oven — a tip worth the price of admission by itself — the paint is sanded off the raised areas, the metal is polished, and a clear coat applied to protect the badge.
Plates like these would look great for a little retro-flair on a new build like this Nixie power meter, or allow you to restore a vintage machine like this classic forge blower.


Its mmmkay…
Its probably some gig for Tom Lipton…
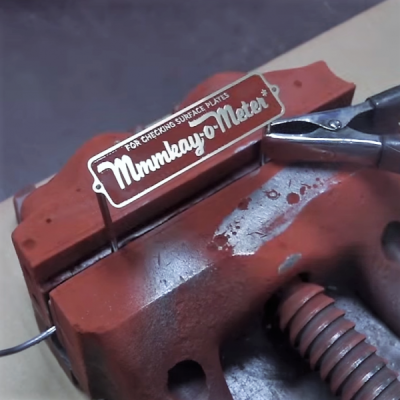
Yup, John and Tom have been built their own Rahn Repeat-O-Meters. You can see the nameplate mounted on the completed unit in the next video.
Perfect control labels for one of those digital players of the 1920’s, the player piano. Unless they stamped them this is probably how they did it, silk screen resist etch then wipe with a rubber edge of lacquer or filler into the background. I polish out a lot of these and leave the black, sometimes touch-up the black when worn.
They were stamped with a die and then filled.
I wonder whether it is feasible to use enamel instead of a powder coat. The hard part would be grinding the enamel off of the raised parts. If it would work out, you would have a piece of amazing quality that might last centuries.
Yes, enamel is what is normally used. If you bake enamel instead of letting it air dry you get a tougher coat too.
I have done this with aluminium, but I don’t use a laser. I simply use toner transfer (as for pcb’s).
As etching liquid I use draino or any other Sodium Hydroxide source.
This label looks great.
The tip about the superglue and tape was very informative. And the heatgun in combination with the powder coating was an interesting tip as well. Thanks for those.
I do have some small remarks about safety. And considering that these kind of videos are set up to be an example how to do something I noticed that the use of gloves isn’t a very good example of how to use gloves:
– at 2:12 in the video, why is he wearing only one glove? If it is about safety, shouldn’t the glove be at least on the hand that is the closest to the jar, if he spills while pouring he could hurt his hand. If for some reason this isn’t dangerous, then why use gloves at all.
– at 3:00 he’s doing it again… now with acetone, I’m sure he doesn’t die from it, but his hand (not covered by the glove) is getting dirty almost straight away. A glove on that hand would be smart.
Other then that, very nice video.
Same reaction:
– no glove on the hand closest to the acid
– bare hand close to the milling tool
– lots of “try this at home” but nothing on the need to vent the toxic fumes (acid, paint, dissolvent,….)
Just a note, you never want to where gloves while working with spinning tools. It can turn what would have been a cut finger into a skinned hand.
Fun fact, large sections of skin removal is called ‘degloving’,
https://en.m.wikipedia.org/wiki/Degloving
And that’s another Google search I won’t be repeating (thanks for the inline image results, Google).b
I certainly agree for a heavy glove but I break nitrile gloves all the time putting them on (correct size, clumsy fingers), please do correct me if I’m wrong but I have a hard time picturing one of those taking flesh with them if they’re forcibly ripped off.
They rip fairly easily when they are single layer but become surprisingly strong when twisted together into several layers. Enough that they may or may not tear.
Also, consider getting a different brand of gloves. They come in different thicknesses and strengths, helping to prevent tearing when putting on.
The reason for not using gloves near power tools is that the tool might catch a piece of the glove, and pull your entire hand/arm into the tool. Better to suffer a cut on an un-gloved hand than have a gloved hand/arm dragged into the tool.
classic
Did he actually take off any skin grease? Also “Remember Safety Precautions”. No gloves and no mask. Eyes are used when spraying the lacquer.
Using gloves later on though.
Ha, holding the acid jug with the gloved hand while pouring into a jar held with the ungloved hand.
“they’re surprisingly easy to make […] if you have access to a machine shop […] the only key machine for making these plates is a laser cutter”
Building a sky scraper is super easy, all you need is get out your 500 feet crane from your garage and drive your cement mixer truck around a lot. If you don’t have one of these, pah, just borrow your neighbor’s.
should be able to do with a laser printer and uv box
In addition, they disparaged vinyl decals. Guess what works really well as a resist for galvanic etching? Adhesive vinyl, and you can use a standard cutting plotter to fab your resist.
As pointed earlier, you can do the same at home with tone transfer, etch in a simple PP tray, cutout the rectangular shape with a standard saw+file, then paint with regular spray. ok it may not look as perfect!
It can look great. And with photoetching you can get extremely fine detail.
Here’s a brass dial plate I etched with a toner transfer resist. But instead of paint, I used electro-less tin plate solution on the relief.
http://reboots.g-cipher.net/btoxdial.jpg
Before laser cutters we used masking tape and we liked it!
If you don’t have a laser, use plain ol’ masking tape and an X-acto then paint it then peel the tape off. For repeatable results, use a cheap vinyl sticker for the stencil and paint.
Or cheat!
Order it on a thin PCB with thick-ish copper-layer, choose the desired finish, solder mask, wait… And pretend you’ve made it yourself. :)