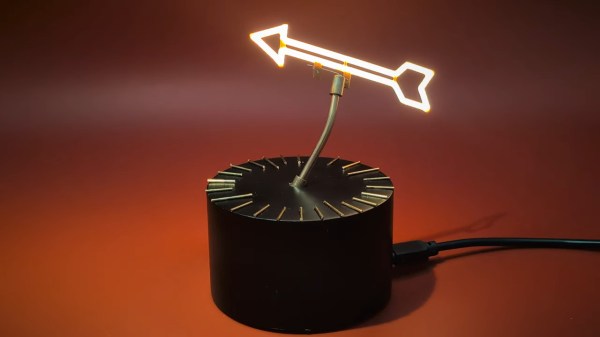
The Dutch word for sundial, zonnewijzer, can be literally translated into “Sun Pointer” according to [illusionmanager] — and he took that literal translation literally, building a reverse sundial so he would always know the precise location of our local star, even when it is occluded by clouds or the rest of the planet.
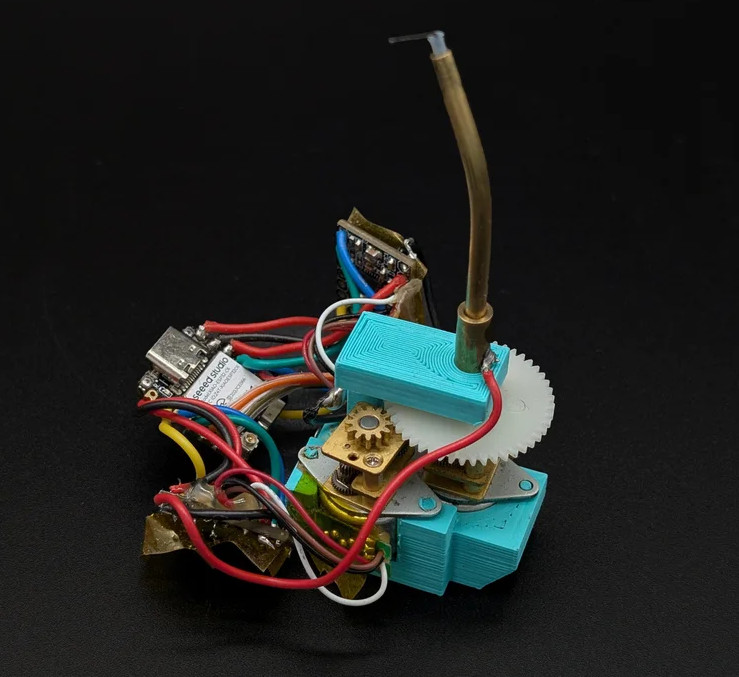 The electronics aren’t hugely complicated: an ESP32 dev board, an RTC board, and a couple of steppers. But the craftsmanship is, as usual for [illusionmanager], impeccable. You might guess that one motor controls the altitude and the other the azimuth of the LED-filament pointer (a neat find from AliExpress), but you’d be wrong.
This is more like an equatorial mount, in that the shaft the arrow spins upon is bent at a 23.5 degree angle. Through that hollow shaft a spring-steel wire connects the arrow to one stepper, to drive it through the day. The second stepper turns the shaft to keep the axis pointed correctly as Earth orbits the sun. See the demo video embedded below for full details.
Either way you can get an arrow that always points at the sun, but this is lot more elegant than an alt-az mount would have been, at the expense of a fiddlier build. Given the existence of the orrery clock we featured from him previously, it’s safe to say that [illusionmanager] is not afraid of a fiddly build. Doing it this way also lets you read the ticks on the base just as you would a real sundial, which takes this from discussion piece to (semi) usable clock.