We don’t need to tell you: lasers are awesome. Those tiny red beams aren’t just for frustrating cats, but can do real work, be a source of infinite beauty, or constitute a science project in its own right — and you can win a $150 DigiKey gift certificate simply by writing your project up on Hackaday.io. The contest runs until July 23rd.
Of course, red lasers are only the beginning. If you have enough energy to move electrons into higher orbitals, you can make nearly anything lase. RGB setups can be breathtaking. Powerful IR and UV lasers are real tools. And the DIY side of lasering combines physics and electronics, with a spicy side of danger that needs to be contained.
We love laser builds of all sorts, and we’d like to see yours! Create a new Hackaday.io project that features what you’re working on, and we’ll pick our three favorites for a $150 gift certificate courtesy of this contest’s sponsor, DigiKey.
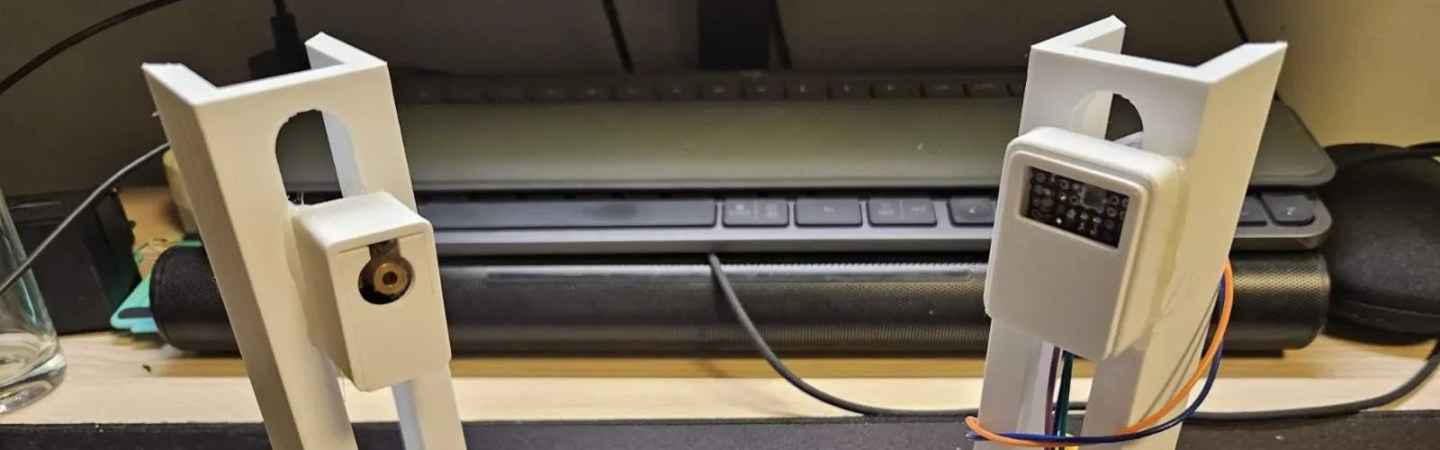
Most consumer-grade night vision devices are basically a standard camera without the usual filter to block near infrared (NIR) light, which are then paired with a NIR light source that’s not visible to the human eye. Unlike the passive night vision provided by an image intensifier tube, these can’t resolve objects beyond the beam of their illumination source. On the other hand, if, as [Project 326] did, you use an infrared laser to illuminate the scene, you can still get a very long range out of these devices.
[Project 326]’s device consists of a previously-built reflecting telescope focusing a distant scene in to a webcam with the infrared filter removed, with the infrared laser illuminating the scene. Finding a suitable laser took some effort: the first option, a secondhand fiber-coupled industrial laser, was accidentally over-volted and destroyed during testing. The second had a fiber output which proved extremely hard to terminate, and a third laser couldn’t be collimated correctly. The final laser was a Vertical-Cavity Surface-Emitting Laser (VSEL) diode array element driven at about two Watts and collimated by a small lens.
This illumination setup is safe at a long range, but only at a long range. The laser was strong enough to burn cardboard at close range, but out at about 500 meters, the beam had spread until it was less than a hundredth of the standard safety limit. To make sure that nothing else would get in the way of the beam, it was shone down from the top of a tall building. Testing with a power meter also showed that at a long range, the beam was weaker than expected. It turned out that the wavelength used (940 nm) is attenuated by water vapor, to the point that up to 70% of the beam’s strength was lost before reaching the target. Despite this, and despite a rather linear beam profile, a somewhat dark image was still visible at 650 meters.
Have you thought about building a galvonometer-based laser projector, but don’t know where to start? There are a lot of resources out there, but you could do worse than to check out [Breq] and [Mia]’s laser vector project, which provides a very well-documented and low-cost starting point. They boast that the most expensive part of the project was the ANSI-certified safety glasses, which shows a dedication to safety we wish more people would show when playing with coherent light.
The rest of the parts — from the galvos to the RGB lasers module with dichoric mirrors to keep everything on the same beamline, to the ESP32 module driving everything — was ordered from AliExpress, and not from the most expensive vendors, either. Considering that, it works remarkably well.
If you’re not playing Asteroids on your vector display, why even bother?
Like all DIY laser projectors, this one does vector graphics, sweeping the beam fast enough that the human eye registers crisp, clean lines. Galvonometers, or galvos for short, take analog input, so a DAC is needed — fortunately the ESP32-S2 comes with a pair built in. The custom PCB of course has audio-in for the usual Lissajous lightshow or oscilloscope music, but with an ESP32 as the brains, you can do a lot just inside the projector.
Like what? Well, play Asteroids, for instance, using Wiimote controllers. Project a lovely clock. Render text input in various single-stroke fonts. More to the point, since this is a projector, take arbitrary SVG data and project literally any image you’d like — as long as it doesn’t have too many lines, at least. The galvos in this project are rated at 20,000 points per second, which is not exceedingly fast: they were chosen to meet the budget, not the greatest-possible speed.
More to the point is that this is one of the better-documented projects of this type we’ve seen. [Breq] doesn’t just tell us how to build the projector, but why they designed it that way. We really encourage you to give it a read if you’ve been thinking of getting into this sort of display.
“Lights, camera, action!” might have been the call when recording back in the day, but for an awesome three-dimensional viewing experience, you might try yelling “Mist, Mirrors, Laser!” and following in the footsteps of [Ancient]’s latest adventure in voxel displays, which is also embedded below.
He starts with a naive demonstration: take a laser projector and toss an image into a flat cloud of mist. That demonstrates that yes, the mist does resolve an image, and that the viewing angle is very poor– that is, brightness drops off sharply when you’re out of line from the projector. In this case, that’s a good thing! It means more angles can be projected into that mist for a three-dimensional, hologram effect.
From laser cutters to 3D printers, having an exhaust duct at the back of a machine is a very common sight. However, these tend to be rather bulky, claiming many centimeters of precious space behind a machine even if you’d want to push it right up against a wall. This issue annoyed [TheNeedleStacker] over on YouTube so much that he had a poke at solving this problem with angled exhaust ducts, all hopefully without impairing its basic function.
Smoke machine and laser for some air ducting rave vibes.
Although there are some online offerings for angled exhaust port extenders, these do not quite fit the required 6″ diameter. Reducing the problem to just a matter of cross section area for simplicity’s sake, that means a 19″ wide duct at a depth of 1.5″. Making sure the transition from the tube to the flat duct doesn’t become an impediment is the tricky part, so the approach here was to mostly ignore it and just make a functional prototype to get an idea of how a direct approach worked.
Installing the contraption worked out fine, and subsequent testing showed that although it seems to slightly reduce the effective airflow compared to the flex tubing, it is absolutely rad to look at with the transparent cover and some laser light to illuminate all that’s happening inside.
While some optimization work on the duct transitions can undoubtedly eke out more performance, it’s certainly not bad for a quick project.
Lasers are cool and all, but they can be somewhat difficult to control at times. This is especially true when you have hundreds, thousands, or millions of lasers you need to steer. Fortunately, the MITRE Corporation might have created exactly what’s needed to accomplish this feat. While you might expect this to be done in a similar fashion as a DLP micro mirror array, these researchers have created something a bit different.
A ski slope like a MEMS array is used to contort light as needed. Each slope is able to be controlled in such a way so precise that entire images are able to be displayed by the arrays. This is done by using a “piezo-opto-mechanical photonic integrated circuit” or (POMPIC). Each slope is constructed from SiO2, Al, AlN, and Si3N4. All of these are deposited in such a way to allow the specific bending needed for control.
While quantum computing hasn’t hit these slopes yet, that doesn’t mean you can’t look into the other puzzles needed for the quantum revolution. Quantum computing is something that people have been trying for a long time to get right. Big claims come from all the big players. Take Microsoft, for example, with claims of using Majorana zero mode anyons for topological quantum computing.
Some projects need no complicated use case to justify their development, and so it was with [Janne]’s BeamInk, which mashes a Wacom pen tablet with an xTool F1 laser engraver with the help of a little digital glue. For what purpose? So one can use a digital pen to draw with a laser in real time, of course!
Pen events from the drawing tablet get translated into a stream of G-code that controls laser state and power.
Here’s how it works: a Python script grabs events from a USB drawing tablet via evdev (the Linux kernel’s event device, which allows user programs to read raw device events), scales the tablet size to the laser’s working area, and turns pen events into a stream of laser power and movement G-code. The result? Draw on tablet, receive laser engraving.
It’s a playful project, but it also exists as a highly modular concept that can be adapted to different uses. If you’re looking at this and sensing a visit from the Good Ideas Fairy, check out the GitHub repository for more technical details plus tips for adapting it to other hardware.