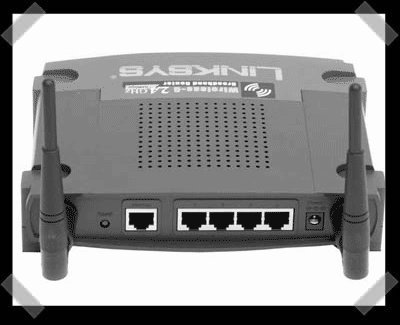
The Linksys WRT54G is probably the cheapest and most widely sold embedded Linux device in the world. It is also incredibly fun to play with. A lot of people don’t want to take the full plunge into Linux for fear of screwing up their computer. Why not screw with your router?! Your S.O. probably won’t even notice, until you break it? so try to blame it on the cable company if you can.
I’ll be walking you through installing the openWRT firmware onto a Linksys WRT54G. This is followed by setting the router up in client mode. Client mode lets you connect the computers on the wired side of the router to another router wirelessly, it doesn’t even have to be yours! Read on to find out how simple this process is.
I’m using the Linksys WRT54G ver. 2.0 with the “experimental” release. First things first: Make sure you read and
understand everything on the openwrt wiki before you attempt this.
Installing custom firmware on an embedded device is always tricky, but if you go in guns ablazin’ you will definitely
end up with a brick. I’m doing this in XP, but you can use what ever you want.
Grab the experimental binary firmware release from
the official server. Use the one that matches
your router and select squashfs since it is a failsafe device. The wiki seems to be pushing the stable builds, but
those are deprecated.
The “boot_wait” flag needs to be set “on” to allow for the firmware flashing (and reflashing if something goes
wrong). Boot_wait delays the router boot process so that in an emergency you can flash a new firmware during that time
period. Setting this flag involves typing commands into the ping.asp page built into the router. The details for how to
do this are in the wiki. I’ve already got the flag set from when I installed the Sveasoft firmware. Why aren’t we
installing that firmware? Well, Sveasoft started out with some GPL problems and I feel the web interface hides the
magic. Using openWRT will familiarize you with the command line and its lightweight nature encourages
customization.
We will be sending the firmware binary using tftp while the router is restarting. The computer must have a static ip
(not DHCP) so that it will have an active connection while the router boots. Type in the tftp command line, but don’t
press enter. Unplug the power to the router and then plug it back in. Now you can send the tftp command.

After the tftp transfer successfully completes the lights on the front of the router will flash for a bit. Then the
power and DMZ lights will turn on solid while the router boots and sets up the file system. After this is complete the
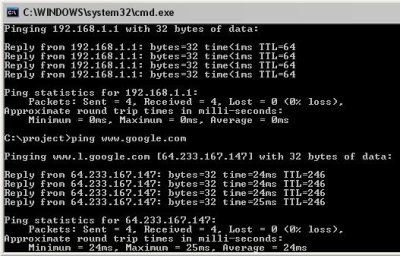
DMZ light will turn off. Congratulations you have successfully flashed your router, well, maybe; You should ping a few
things just to be sure.
You can even go to the router’s web page just to be sure. Just kidding, it doesn’t have a web interface, but the
developers were kind enough to leave a note saying as much.
Time to telnet into the box.
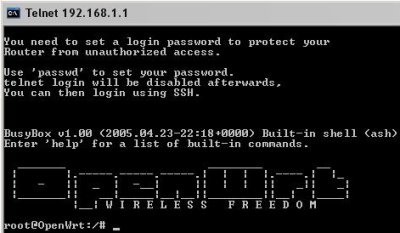
Type in “passwd” and follow the instructions to change the root password. Telnet will be removed on the next boot
and replaced with ssh because telnet is really insecure. Type in “reboot” and hit enter. Time to move to
Putty. Just type the routers ip address into the
host box and click “open”. The warning message is not a problem.
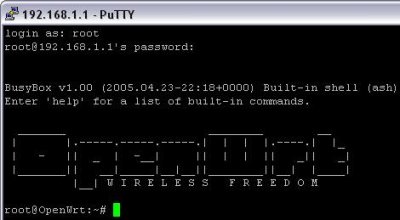
It looks the same, but is much more secure.
Now you have full control of the router. The router stores all of its operation parameters in nonvolatile ram
(NVRAM). These values can be changed at any time. If you don’t commit the changes before you reboot they will be
lost.
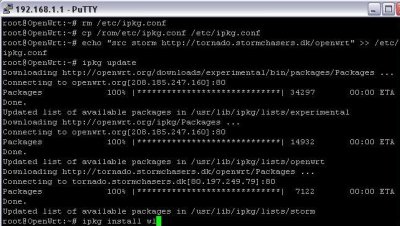
Before we tear down our good connection we need to install a piece of software. The “/etc/ipkg.conf” file is
actually a symlink to the squashfs partition. So to modify the file we remove the symlink and then make a copy of the
original file and then modify that copy. We then add the name of a package repository we’re going to use. After
updating the available software list we install the “wl” tool.
Now we need to axe the firewall since the internet will be available on the wireless side of our router. Remove the
symlink as before. If you decide to set up a new one (and you probably should) be careful because you could end up
locking yourself out of the router, I did.

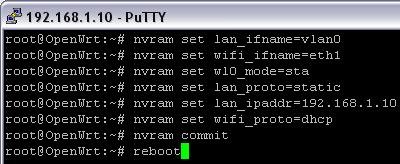
Now we break the bridge between the wifi and lan ports. This is where the wrt really shines; the grouping of lan
ports and wifi is entirely up to your creativity. After the naming has been switched we set the router to client
mode “sta” and configure the lan for a static ip and the wireless side for dhcp. The changes are commited and the
router rebooted.
Using the “wl” command we can scan for nearby access points.
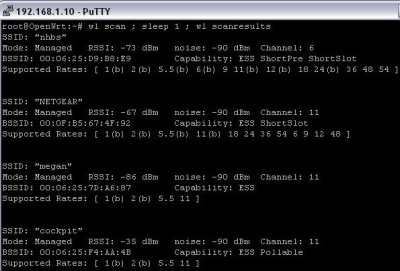
Just type “wl join ” and you’re done!
This is just scraping the surface of what the wrt54g is capable of. Using client mode you can hang your wired
network off of any wireless network you come across. You could plug in another wireless router to create a
repeater. Openwrt supports wds; which means you can make a client/repeater out of just one router. You could
set up multiple wrts in client mode like
Cringely and have a redundant internet
connection. You could install kismet_drone to do remote sniffing. Scripts like wondershaper can improve your network
performance. All of your regular traffic could be sent over the wan interface while your bittorrent was sent over
wireless to use your neighbors connection. You could separate the wireless and wired sides, giving free access to
passers-by while keep a secure wired connection for your home network.
Those are just a few possibilities that don’t require much more specialized software than is already installed.
Well, I hope you can see how easy this to do and will try it out on your own equipment. Good luck!
Oh, and Happy Birthday Vince! I hope your day goes far better than the date Friday the 13th would imply.


Answering a few question son this forum.
In Repeater mode you can use it as both an Access Point and a Client to another Access Point. You can have this as a bridge or better a router.
You can install dd-wrt onto V3 routers. Just Do It.
I have tried to flash my wrt54g v6 with the ddwrt micro without any success. Got to the admin. mode however this is far as I have gone. Trying to use Linux with firefox. Seems like this will not work. Do you have any suggestions? I had no problem with the wrt54g v2.
Thanks AC4RB
“Make sure you read and
understand everything on the openwrt wiki before you attempt this.”
Lulz from 2023