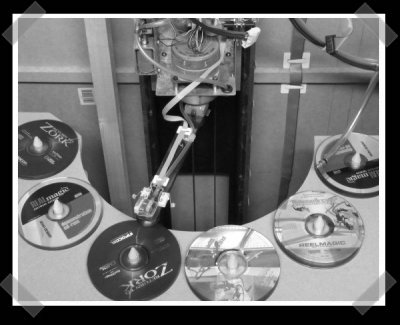
[nophead] put this creation down to its final resting place, but it still deserves some attention. A Motorola MC6809 ran the show while a stepper driven robotic arm tipped with a suction cup fetched the selected disc. [nophead] has an interesting blog covering his work on building a 3d prototyping machine. The goal is to use it to produce a reprap, but he does a nice job of covering design problems and his attempts to solve them.
6 thoughts on “DIY CD Changer”
Leave a Reply
Please be kind and respectful to help make the comments section excellent. (Comment Policy)


Well documented, well executed.
The overall construction and design rivals that of many a machine seen in the arcade industry. Either that is saying a *lot* about his construction and documentation skills, or says a *little* about the arcade industry ;)
Anyway, great schematics, and I love that he drew them on the back of compiler output paper!
it was sad to hear that neat (and well documented) project was dismantled.
his blog made me think more about 3D printing, and the fab@home project which tends to deposit material (like his 3d printer) rather than take it away. i then remembered some of the alternative methods of 3d printing, like stereo-lithography — a process that uses a laser to heat up and fuse a liquid polymer into a solid. i wonder if anyone has tried to use a DVD-laser diode or something similar to do homebrew stereolithography-based 3d printing? i’m not sure where you’d get the polymer, and it’d have to be something that the laser could heat up rather easily, and /certainly/ the laser-aspect can be very dangerous to your eyesight, but if done safely it could have the potential to create some very smooth and well-formed surfaces, rather than the shaggy surfaces generated by fab@home style projects. (not that i don’t like fab@home — i think it’s a great idea and project!)
Maybe you could use some of that CA glue that hardens immediately upon contact with UV light? I think it’s pretty expensive, but it’d work, theoretically. Just use a UV laser diode.
i think by ‘glue that hardens under UV light’ you’re probably thinking of the polymer that they typically use, which is liquid until hit with a high-power burst from a UV laser.
for a homebrew unit you’d probably want to use a visible laser, both because they’re probably a lot easier to find, as well as for saftey (you can see a visible beam). (at the same time, you’d have to find a liquid polymer that quickly solidifies under visible laser light).
it’s important that the polymer (‘glue’) be liquid and flow quite well until it’s exposed to a focused beam of laser light. since you kinda build the 3d object in a tank of polymer one layer at a time, and progressively decrease a platform down into the polymer such that the top of your 3d object is just below the top of the tank, you need the polymer to flow very easily around the hardened sections, and to rinse off them pretty easily when the printing is complete.
i was working on something similar, a couple of years back..
involving attaching a DVD drive to an “upright” flatbed scanner.
using the existing mechanical mechanisms, the flatbed mechanism moving the drive up and down. and the tray, being split into two “forks” going in and out,
basically turning the DVD drive into a “forklift”
Cd’s placed on a little Arm that fit between the forks..
Simple mechanics, one stepper, and an eject button
pringo :)
/Kyndal
@2,3,4: I thought the more common version of the technology you’re talking about used a laser to melt a powdered material (usually polythene or metal) and fuse it into a solid-ish object, the UV-solidifying polymer is a new one to me. Certainly you coud recreate the former with some granulated plastic which must be available at some scientific supply place or other, and the laser only needs to be able to spot-heat the material to its melting temperature.