Let’s face it; remembering a bunch of passwords is the pits, and it’s just getting worse as time goes on. These days, you really ought to have a securely-generated key-smash password for everything. And at that point you need a password manager, but you still have to remember the password for that.
Well, Motorola is sympathetic to this problem, or at least they were in 2013 when they came up with the password pill. Motorola Mobility, who were owned by Google at the time, debuted it at the All Things Digital D11 tech conference in California. This was a future that hasn’t come to pass, for better or worse, but it was a fun thought experiment in near-futurism.
[Dave] over at Usagi Electric has a mystery on his hands in the form of a computer. He picked up a Motorola 68000 based machine at a local swap meet. A few boards, a backplane, and a power supply. The only information provided is the machines original purpose: gas station pump control.
The computer in question is an embedded system. It uses a VME backplane, and all the cards are of the 3u variety. The 68k and associated support chips are on one card. Memory is on another. A third card contains four serial ports. The software lives across three different EPROM chips. Time for a bit of reverse engineering!
While it might not seem like it today, there was a time in the not-too-distant past where Motorola was the processor manufacturer. They made chips for everything, but the most popular was arguably the 68000 or 68k. It’s still has a considerable following today, largely among retrocomputing enthusiasts or those maintaining legacy hardware. For those wanting to dip their toes into this world, this Motorola 68000 emulator created by [Ted Fried] may be the thing needed to discover the magic of these once-ubiquitous chips.
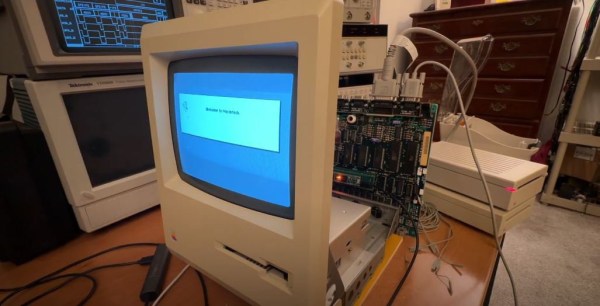
The emulator itself runs on a Teensy 4.1, a 32-bit ARM microcontroller running at 600 MHz — giving it enough computing power to act as a cycle-accurate emulator not only for the 68000 CPU but also the local bus interface, in this case for a Mac 512K. This capability also makes it a drop-in replacement for the 68000 in these older Macs and the original hardware in these computers won’t notice much of a difference. A few tricks are needed to get it fully operational though, notably using a set of latches to make up for the fact that the Teensy doesn’t have the required number of output pins to interface one-to-one with the original hardware.
While the emulator may currently be able to replace the hardware and boot the computer, there is still ongoing development to get every part of the operating system up and working. The source code is available on the project’s GitHub page though so any updates made in the future can be found there. And if you have a Mac 128k and still haven’t upgraded to the 512k yet, grab one of these memory switching modules for the upgrade too.
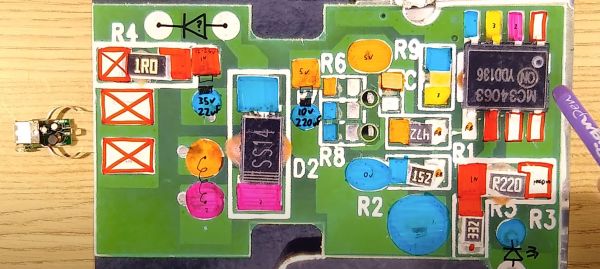
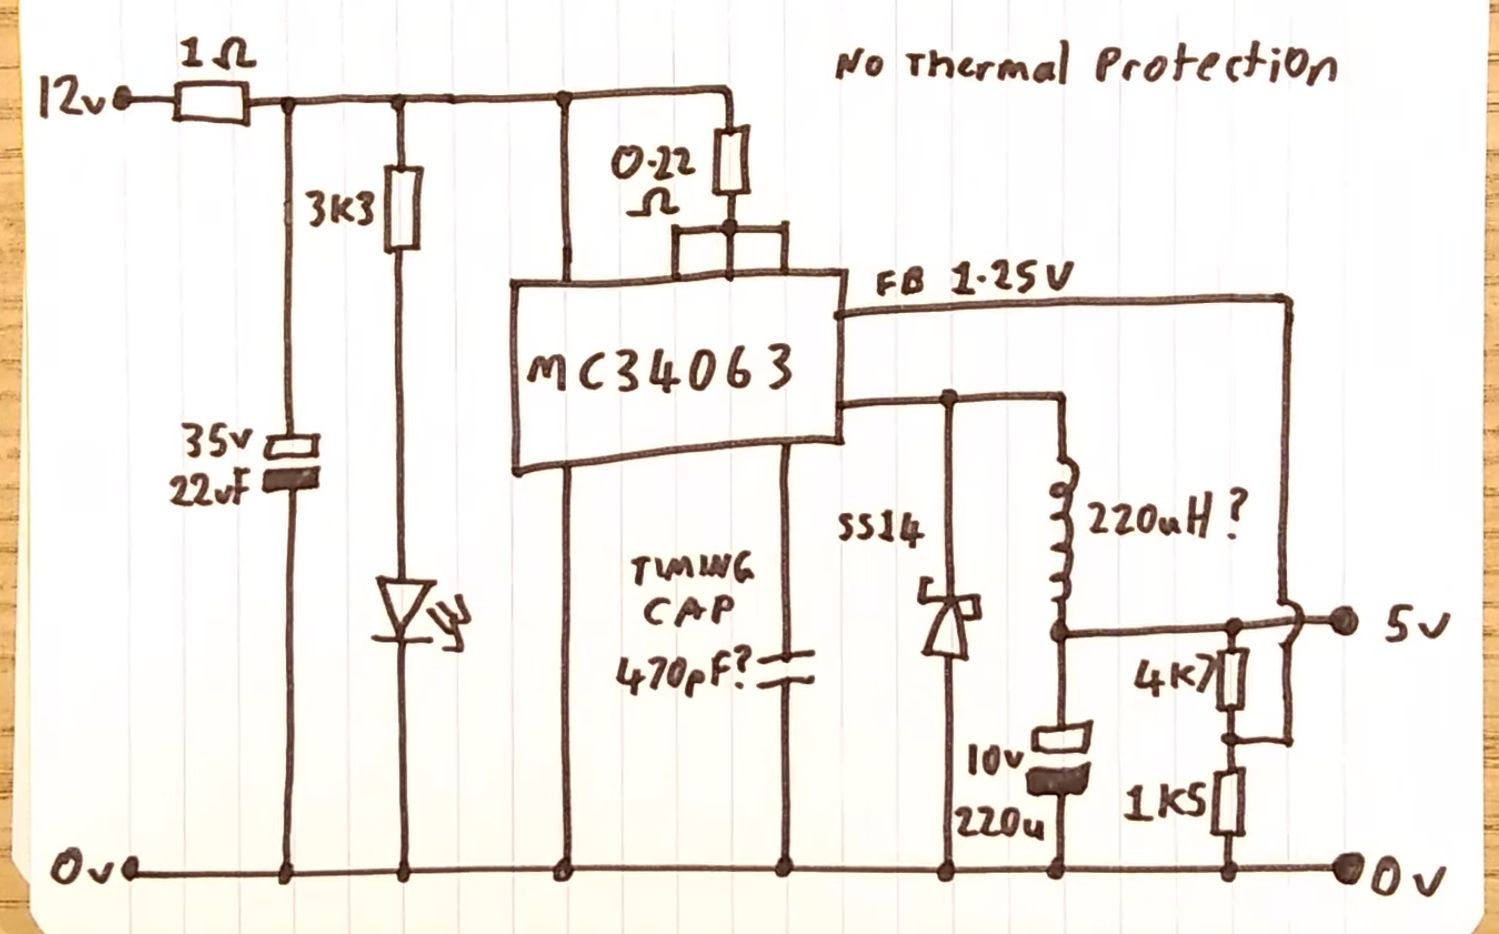
Big Clive’s reverse-engineered schematic of the USB charger containing the MC34063 IC.
Generally when you crack open a cheap car-to-USB charger unit that came with some widget, you do not expect to find anything amazing inside. That’s why it was such a surprise to [Big Clive] when said car USB charger revealed a blast from the past in the form of an MC34063. This is a switching regulator that supports buck, boost and inverting topologies, but perhaps it most notable feature is that it was first produced by Motorola in the early 1980s.
This particular IC is marked as having been produced by ON Semiconductor which means that it’s technically still manufactured by Motorola – with ON Semiconductor being the Phoenix division that was spun off in 1999 – but it’s somewhat remarkable that this particular chip isn’t only produced by ON Semi today, but also by Texas Instruments. Much like the venerable NE555 timer IC and Intel’s 8051 MCU architecture, it would seem that certain chips and designs are simply made to become commodities in the future.
This appears to be the case for the MC34063 as well, which may lack some niceties of more modern ICs, such as built-in thermal protection, and it switches at only up to 100 kHz, but it can be bought for peanuts, has a wide input voltage range of 3 to 40 V, can switch up to 1.5 A and supports multiple common topologies. Often a 100 kHz switching regulator is all you need, in which case it’s handy to have a stack of such commodity chips lying around, plus the MC34063 comes in PDIP packaging as well, which is a boon for prototyping.
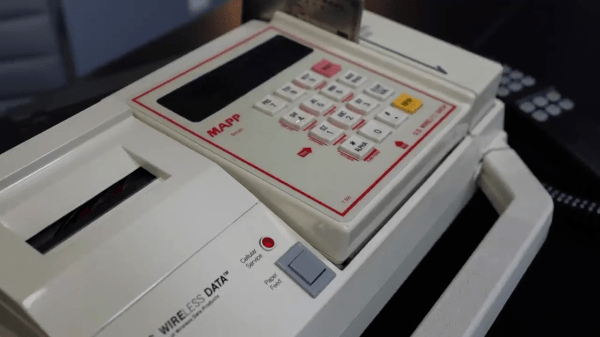
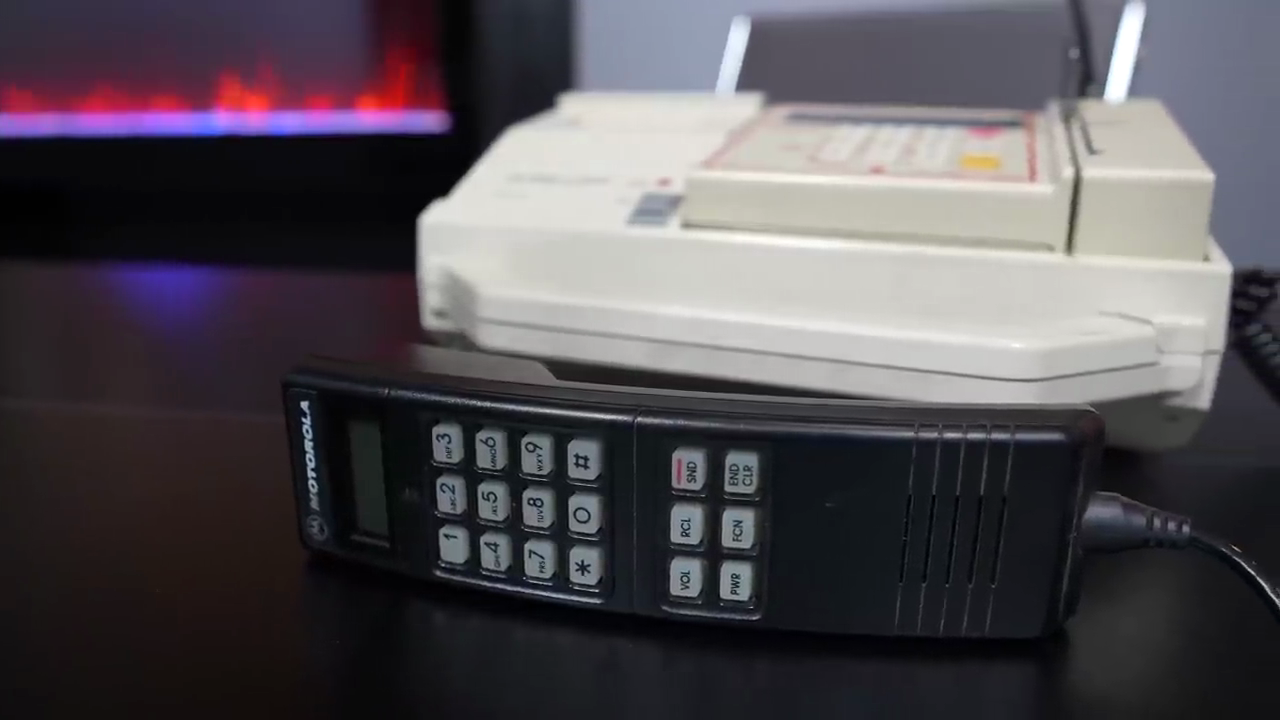
[JR] over at [Tech Throwback] got ahold of an unusual piece of gear recently — a portable Point of Sale (POS) credit card machine from the late 1990s (video, embedded below the break ). Today these machines can be just a small accessory that works in conjunction with your smart phone, but only the most dedicated merchants would lug this behemoth around. The unit is basically a Motorola bag phone, a credit card scanner, a receipt printer, a lead-acid battery, and a couple of PCBs crammed into a custom carrying case
Handset Detail
Despite having a lot of documentation, [JR] struggles to find any information on this U.S. Wireless POS-50. He finds that the credit card scanner is an Omron CAT-95 authorization terminal, and the Motorola SCN-2397B phone appears to come from the Soft-PAK series.
He is able to power it up, but can’t do much with is because he is missing the authorization password. But regardless, with the demise of the Advanced Mobile Phone System for over a decade, this 850 MHz band analog phone can’t connect to the network anymore.
If you happen to know anything about this old POS, or used a similar luggable system for accepting credit cards in the 1990s, let us know in the comments below.
If you want to program a microcontroller today, you pop open your editor of choice, bang out some code, and flash it over USB. But back in ancient times, when your editor was a piece of paper and you didn’t even have a computer of your own, things were a bit different. In that case, you might have reached for a “trainer”: a PCB that included the chip you wanted to program along with an array of switches, LEDs, and maybe even a hex keypad for good measure. Grab yourself the programming manual (printed on paper, naturally), and you’re good to go.
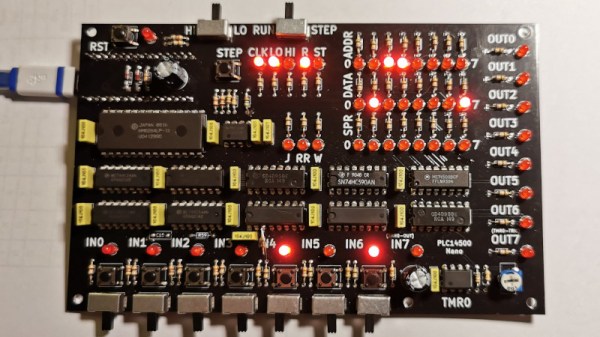
So when [Nicola Cimmino] became curious about the Motorola MC14500, a 1-bit ICU (Industrial Control Unit) from the 1970s, he could think of no more appropriate way to get up close and personal with the chip than to design an era-appropriate trainer for it. The resulting board, which he’s calling the PLC14500 Nano, is festooned with LEDs that show the status of the system buses and registers. Thanks to the chip’s single-step mode, this gives you valuable insight into what’s happening inside this piece of classic silicon.
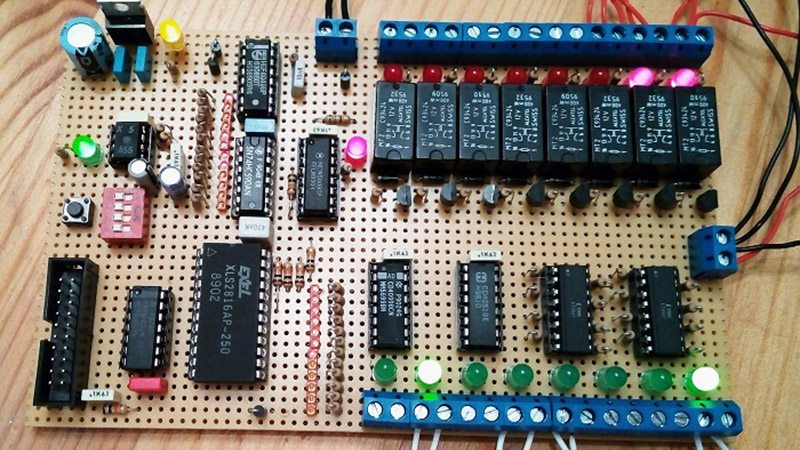
An early breadboard version of the trainer.
But just because the board looks like it could have come from the 1970s doesn’t mean you have to live in the past. There’s an Arduino Nano on the backside of the trainer that handles communicating with a modern computer. [Nicola] even provided an assembler that lets you write your code in ASM before shuttling the binary off to the board for execution.
Interested in getting your hands on one? Not a problem. The design is completely open source for anyone who wants to build one at home. In fact, [Nicola] even got his trainer OSHW Certified. He’s also selling kits on Tindie, though at the time of this writing, they’re sold out.
This project has actually been a long time coming. We covered an early breadboard prototype of the concept back in 2015. We’re glad to see that [Nicola] was finally able to bring this one across the finish line. It’s a beautiful piece of hardware, and thanks to its open-source nature, something that the whole community can enjoy and learn from.
The degree to which computed tomography has been a boon to medical science is hard to overstate. CT scans give doctors a look inside the body that gives far more information about the spatial relationship of structures than a plain X-ray can. And as it turns out, CT scans are pretty handy for reverse engineering mystery electronic modules, too.
The fact that the mystery module in question is from Apollo-era test hardware leaves little room for surprise that [Ken Shirriff] is the person behind this fascinating little project. You’ll recall that [Ken] recently radiographically reverse engineered a pluggable module of unknown nature, using plain X-ray images taken at different angles to determine that the undocumented Motorola module was stuffed full of discrete components that formed part of a square wave to sine wave converter.
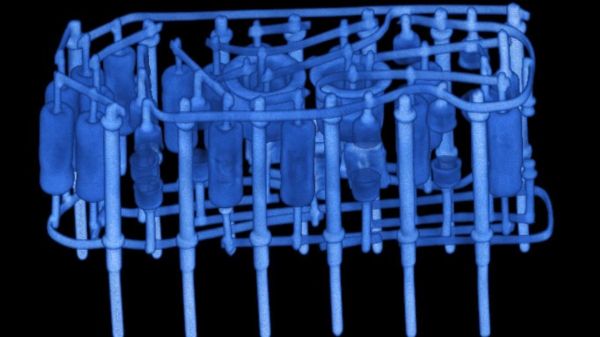
The module for this project, a flip-flop from Motorola and in the same form factor, went into an industrial CT scanner from an outfit called Lumafield, where X-rays were taken from multiple angles. The images were reassembled into a three-dimensional view by the scanner’s software, which gave a stunningly clear view of the components embedded within the module’s epoxy body. The cordwood construction method is obvious, and it’s pretty easy to tell what each component is. The transistors are obvious, as are the capacitors and diodes. The resistors were a little more subtle, though — careful examination revealed that some are carbon composition, while others are carbon film. It’s even possible to pick out which diodes are Zeners.
The CT scan data, along with some more traditional probing for component values, let [Ken] reverse engineer the whole circuit, which turned out to be a little different than a regular J-K flip-flop. Getting a non-destructive look inside feels a little like sitting alongside the engineers who originally built these things, which is pretty cool.