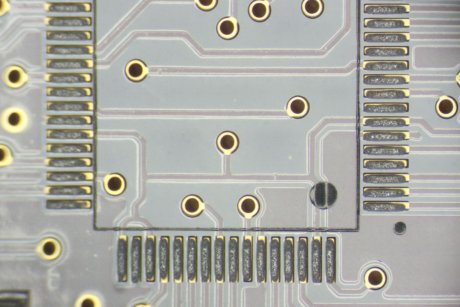
The application of Solder Paste is an essential part of short run manufacturing and prototyping. After getting back bare boards from a PCB shop, its time to get down to business and populate those boards. This new tutorial set assumes you have access to things such as stencils for your boards, but does mention a couple of resources on commercially available ways to purchase stencils. Of course, if you have a laser cutter, we can help you out. After getting your solder paste chops down, make sure you check out our guide to toaster oven reflowing.
[Thanks to P. Torrone]


I notice the paste is very carefully placed onto the pads in the picture without any paste in between. My understanding is that the paste can actually be slopped all over the pins and when it is heated, the solder paste starts to conjeal and stick to the plates and “automatically” just stick to the component and the pads?
Brad, generally it can but can often leave too much solder causing bridges. With a stencil, it provides just enough in the right places cutting down repair time afterwards.
But you don’t need to use solder paste for a lot of hobby construction.. you can solder fine pitch SMD packages just fine with a generic iron, solder and flux.
Brad, I would imagine that if using a lead solder then your method would be OK. However lead free solder does not flow as nicely.
i want to know how to make a 3+ layer pcb… and my own solder paste… not to much to ask of the new recruits i hope ;)
Does anyone know what stencil holder he’s using in the tutorial? I really like the simplicity of that one.
I have used http://www.ohararp.com/Stencils.html for mylar smd stencils and have been very happy. Very quick turnaround and nice person to deal with…
25$ does seem expensive to me however. What else is out there?
There are a lot of companies that will make very inexpensive mylar stencils for you, and stenciling is the preferred method for soldering with paste (slopping it on just doesn’t seem to have good results with SMD IC’s and other fine pitch devices).
Anyway, the board in the pictures could easily be soldered by hand, and it would be faster to do it that way than by stenciling it, unless you were doing a great number of them and got it down to a sort of assembly line process. Good info regardless.
I have been needing this for a while. I built my self an oven and so far use “the pain brush method”
What i really want is a laser cnc where is the how to ?
@Addidis
See the search function?
Unless you’re willing to drop a bunch of cash, you’re better off to just buy mylar stencils. Thing is, unless you’re making many instances of the same board, stenciling isn’t really worth it to begin with…
@Addidis
But the idea of a CNC paste applying machine…. hum…
Never mind, i see it’s been done
http://www.ciciora.com/surface_mount.html
i saw this instructable the other day, great idea, its like iron on stencil etching (the stencils are copper).
if you already have a direct ink/toner method setup then you can make stencils
http://www.instructables.com/id/Making-stencils-for-solder-paste-at-home/
So….. Who else here has re-balled BGA chips by hand???
xD
You can indeed just ‘slop’ the paste on, and the solder mask generally does a decent job of pushing the solder into the pads during reflow, but you’ll definately have bridges on an 0.5mm pitch parts that will need to be removed after the fact. If you’re making one board, it’s not really any issue … but if you’re making 50 boards, you absolutely want to minimize any manual rework since it’s a big time consumer. That’s why it’s important to get the paste layer right the first time.
If you want one-offs, though, you might find this useful:
http://www.microbuilder.eu/Tutorials/SMTSoldering/SolderPasteByHand.aspx
The stencil holder was purchase from Reflow-Kit in Europe:
http://www.reflow-kit.com/rkuk/order_product_details.html?p=64
Hope this helps!