For those times when you’d rather not get sucked down another internet rabbit hole when you really just wanted the weather, an ambient display can be great. [AlexanderK106] built a simple ambient display to know the probability the Northern Lights would visit his town.
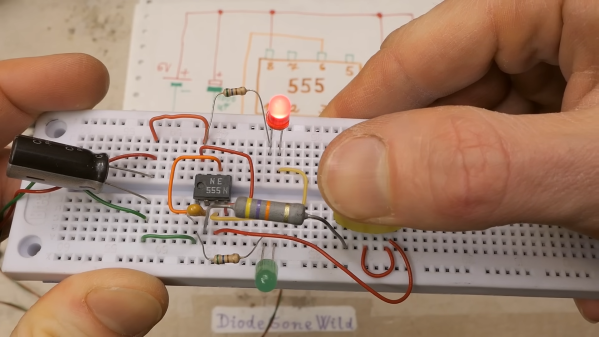
Starting with a NodeMCU featuring the ESP8266, [AlexanderK106] walks us through a beginner-friendly tutorial on how to do everything from configure the Arduino IDE, the basics of using a breadboard. finding a data source and parsing it, and finally sticking everything into an enclosure.
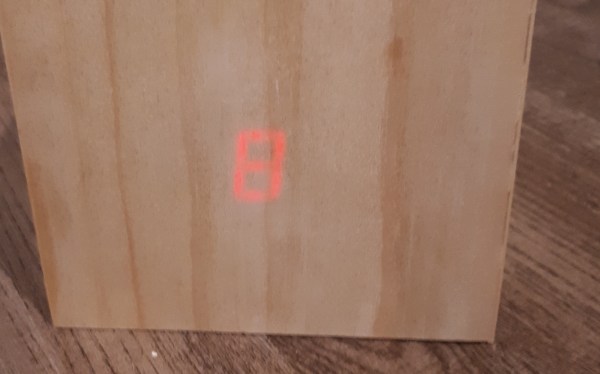
The 7-segment display is taped and set into the back of the 1/4″ pine with enough brightness to shine through the additional layer of veneer on top. The display is set to show one digit and then the next before a three second repeat. A second display would probably make this easier to use day-to-day, but we appreciate him keeping it simple for this tutorial.
When I was growing up, my dad and I restored classic cars. Combing junkyards for the pieces we needed was a mixture of interesting and frustrating since there was always something you couldn’t find no matter how long you looked. [Emily Velasco] was frustrated by the high price of parts even when she was able to find them, so she decided to print them herself. She wrote an excellent tutorial about designing and 3D printing replica parts if you find yourself in a similar situation.
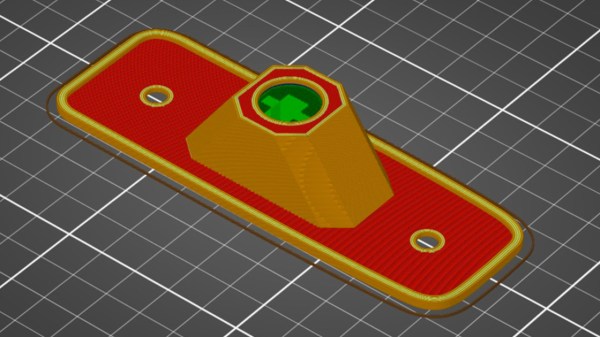
All four marker lights on [Velasco]’s 1982 Toyota pickup were on their way to plastic dust, and a full set would run her $160. Instead of shelling out a ton of cash for some tiny parts, she set out to replicate the marker lamps with her 3D printer. Using a cheap marker lamp replacement for a more popular model of pickup as a template, she was able to replace her marker lamps at a fraction of the cost of the options she found online. Continue reading “3D Printing Hard-To-Find Vintage Vehicle Parts”→
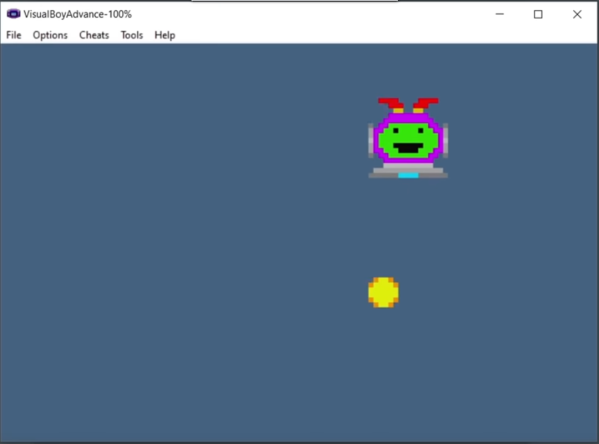
As video game systems pass into antiquity, some of them turn out to make excellent platforms for homebrew gaming. Not only does modern technology make it easier to interact with systems that are now comparatively underpowered and simpler, but the documentation available for older systems is often readily available as well, giving the community lots of options for exploration and creativity. The Game Boy Advance is becoming a popular platform for these sorts of independent game development, and this video shows exactly how you can get started too.
This tutorial starts with some explanation of how the GBA works. It offered developers several modes for the display, so this is the first choice a programmer must make when designing the game. From there it has a brief explanation of how to compile programs for the GBA and execute them, then it dives into actually writing the games themselves. There are a few examples that [3DSage] demonstrates here including examples for checking the operation of the code and hardware, some simple games, and also a detailed explanation the framebuffers and other hardware and software available when developing games for this console.
While the video is only 10 minutes long, we recommend watching it at three-quarters or half speed. It’s incredibly information-dense and anyone following along will likely need to pause several times. That being said, it’s an excellent primer for developing games for this platform and in general, especially since emulators are readily available so the original hardware isn’t needed. If you’d like to build something from an even more bygone era than the early 2000s, though, take a look at this tutorial for developing games on arcade cabinets.
“With the power of edge AI in the palm of your hand, your business will be unstoppable.”
That’s what the marketing seems to read like for artificial intelligence companies. Everyone seems to have cloud-scale AI-powered business intelligence analytics at the edge. While sounding impressive, we’re not convinced that marketing mumbo jumbo means anything. But what does AI on edge devices look like these days?
Being on the edge just means that the actual AI evaluation and maybe even fine-tuning runs locally on a user’s device rather than in some cloud environment. This is a double win, both for the business and for the user. Privacy can more easily be preserved as less information is transmitted back to a central location. Additionally, the AI can work in scenarios where a server somewhere might not be accessible or provide a response quickly enough.
Google and Apple have their own AI libraries, ML Kit and Core ML, respectively. There are tools to convert Tensorflow, PyTorch, XGBoost, and LibSVM models into formats that CoreML and ML Kit understand. But other solutions try to provide a platform-agnostic layer for training and evaluation. We’ve also previously covered Tensorflow Lite (TFL), a trimmed-down version of Tensorflow, which has matured considerably since 2017.
For this article, we’ll be looking at PyTorch Live (PTL), a slimmed-down framework for adding PyTorch models to smartphones. Unlike TFL (which can run on RPi and in a browser), PTL is focused entirely on Android and iOS and offers tight integration. It uses a react-native backed environment which means that it is heavily geared towards the node.js world.
There are many, many video tutorials about designing the functional side of PCBs, giving you tips on schematic construction, and layout tips. What is a little harder to find are tutorials on the graphical aspects, covering the process from creating artworks and how you can drive the tools to get them looking good on a PCB, leveraging the silkscreen, solder and copper layers to maximum effect. [Stuart Patterson] presents his guide for Advanced PCB Graphics in KiCAD 6.0 and Inkscape, (Video, embedded below) to help you on your way to that cool looking PCB build.
Silkscreen layers in yellow, solder mask opening in red
The first step is to get your bitmap, whether you create it yourself, or download it, and trace it into a set of vectors using the Inkscape ‘trace bitmap’ tool. If you started with an SVG or similar vector shape, then you can skip that stage.
Next simply create a PCB outline shape by deleting all the details that aren’t part of the outline. A little scaling here and there to get the dimensions correct and you’re done with the first part. [Stuart] has an earlier video showing that process.
The usability improvements in KiCAD 6.0 are many, but one greatly demanded feature is the ability to group objects, just like you do in Inkscape and any other vector graphics tool for that matter. That means you can simply import that SVG outline into the Edge.Cuts PCB layer and all the curves will be nicely tied together. Next you select the details you want for the silkscreen layer, solder mask removal layers and any non-circuit copper. In Inkscape it would be wise to use the layers feature to assign the different material types to a uniquely named layer, so they can be hidden for exporting. This allows you to handle silk, mask and copper PNG exports from a single master file, in addition to any vector details for outline, slots and holes.
Once you have PNG bitmap exports for the silk, mask etc. you need to create a footprint inside a board-specific library, using the KiCAD image converter tool. It was interesting to note that you can export a new image footprint from the tool and paste it straight into the footprint editor, and tweak all the visibility details at the same time. That will save some time and effort for sure. Anyway, we hope this little tutorial from [Stuart] helps, and we will be sure to bring you plenty more in the coming months.
You can do your own Surface Mount Technology based PCB assembly with just a handful of tools and some patience. At the heart of my SMT process is stopping to inspect the various steps all while trying to maintain a bit of cleanliness in the process.
Surface mount or Surface Mount Technology (SMT) is the modern way to assemble Printed Circuit Boards (PCB) and is what is commonly seen when opening a modern piece of tech. It’s much smaller than the older Through-Hole (TH) technology where the component leads were inserted into holes in PCB, and act we called “stuffing” since we had to stuff the components into the holes.
A few specialized tools make this a lot easier, but resourceful hackers will be able to pull together a solder paste stencil jig, vacuum tweezers, and a modified toaster oven with a controller that can follow the reflow profile of the solder paste. Where you shouldn’t skimp is on the quality, age, and storage of the solder paste itself.
Join me after the break for my video overview of the process I use in my workshop, along with details of every step of my SMT assembly process.
Ever wanted your own gesture-controlled robot arm? [EbenKouao]’s DIY Arduino Robot Arm project covers all the bases involved, but even if a robot arm isn’t your jam, his project has plenty to learn from. Every part is carefully explained, complete with source code and a list of required hardware. This approach to documenting a project is great because it not only makes it easy to replicate the results, but it makes it simple to remix, modify, and reuse separate pieces as a reference for other work.
[EbenKouao] uses a 3D-printable robotic gripper, base, and arm design as the foundation of his build. Hobby servos and a single NEMA 17 stepper take care of the moving, and the wiring and motor driving is all carefully explained. Gesture control is done by wearing an articulated glove upon which is mounted flex sensors and MPU6050 accelerometers. These sensors detect the wearer’s movements and turn them into motion commands, which in turn get sent wirelessly from the glove to the robotic arm with HC-05 Bluetooth modules. We really dig [EbenKouao]’s idea of mounting the glove sensors to this slick 3D-printed articulated gauntlet frame, but using a regular glove would work, too. The latest version of the Arduino code can be found on the project’s GitHub repository.
Most of the parts can be 3D printed, how every part works together is carefully explained, and all of the hardware is easily sourced online, making this a very accessible project. Check out the full tutorial video and demonstration, embedded below.