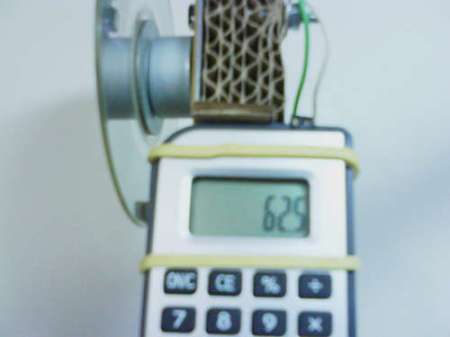
For those out there who would enjoy a quick and interesting weekend project, this odometer made by [PeckLauros] is for you. Featured on Instructables it is made from the simplest of materials including some cardboard, a calculator, wires, glue, hot glue, magnetic drive key, an old CD and a reader, and a rubber band. The magnets, when attached to the CD work in a calculation to add 0.11m to the calculator when a magnet closes the circuit. [PeckLauros] points out that since it is a homebrewed device, it does have flaws such as adding 0.11m twice when the CD is rotated too slowly. It is easily fixed by simply running faster. The video is below the break.
[youtube=http://www.youtube.com/watch?v=p3HWrBeO1cs&w=470]


Thats a really bulky cool hack – want to see more like this.
Featured on ….
*interest plummets instantly*
jk,
That’s a pretty nifty combination of all those scraps into something useful.
Cheers Daid:
http://daid.mine.nu/instructabliss/?url=http://www.instructables.com/id/Odometer/
Nice hack. Now learn about ‘focus’ on your webcam.
I once used a worn out pedometer for that. Cheap ones begin to skip steps after some time, however, they’re still good as a generic event counter if you provide reliable external contacts.
How would one further this hack to solve the “reed bounce” problem when running slowly?
One of the ideas I was toying with involves swapping the reed switch for a hall effect sensor, and feeding this to some hysteresis circuitry (an op-amp and some passives). I wonder if it’s possible to utilize a similar setup with the reed switch currently used.
@reklipz
I would go optical. IR gap photo-sensors are easily found inside old mechanical mice, floppy drives, scanners, printers, and lots of other plentiful (read: free) electronic items. You could even hack up one of those using a pair of LEDs–one emitting and one detecting. You’d probably also need a transistor to “push the button” on the calculator.
Very old trick, I’ve seen that in a science magazine more than 22 years ago! But still a good hack.
[reklipz] talks about the problems with the reed bounce when riding slowly and I remember having tried it at that time and it didn’t performed well with quick speeds too!
I did use this trick with success though when I got graduate something like 10 years ago (sic!) using a big AT90S1200 with a software day-timer and one output connected on the ‘=’ key of the calculator, the other contact of the ‘=’ sign beeing the ground. By typing the numbers of days left before graduation minus one and letting the AVR grounding for a short time the ‘=’ sign once everyday I got this “graduation countdown” down working within a few hours! And with almost nothing to buy.
Optical sounds good, a rotary encoder would be useful for tracking rotation movement accurately (mm accuracy), its what they use in computer ball mouses
i LONG time ago had did one whit a pedometer and a fishing rod
someone commented that you can do the same thign with a calculator and i said no way
my apologies to you XD
This would be a cool project for a physics class or something. I could totally see having done something like this back in one of my physics labs in college.