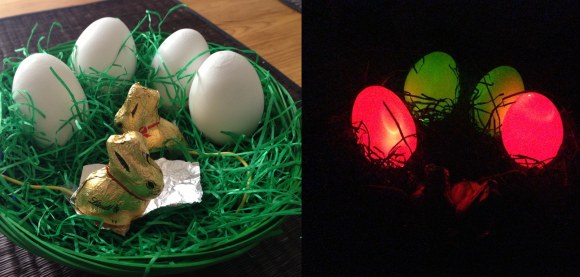
This is a project to keep in mind for the kids next Easter. It uses electronics to light up your eggs instead of dying them (translated).
The project still has one foot in the old tradition as it starts by blowing out the eggs. The larger hole on the bottom, which was used to evacuate the yoke an albumen, ends up being just the right size to insert an LED. You could simply hook these up to a battery and resistor, but [Rene] decided to add some functionality by hiding an Arduino board in the fake grass of the Easter basket. This way the way the RGB LEDs can glow, blink, and rotate through different colors. And the foil covered chocolate bunnies aren’t just for show. He wired them up to the I/O pins of the Arduino to use as a switch. When they’re both placed on the same piece of foil it completes the circuit and starts the light show. See for yourself in the clip after the jump.
Of course for the older kids you’re going to need something more complicated to keep their attention.


we did that in university too for our easter lecture .. It was great fun soldering with all those fun people :)
We used SMD LEDs and a 3mm drill to evacuate the eggs.
How can you evacuate Eggs with SMD LEDs?
Make a hole with the drill, point the SMD LED towards the hole, let it blink and scream “EVACUATE NOW”. It will happen immediately. Fear is your most powerful weapon!
You can blow out an egg and leave just one small hole. Use a syringe with a 14-16 gauge needle, push 15-30cc air into the bottom of an egg, pull out the syringe and let the contents be pushed out by the air pressure. Repeat a few times until empty, then you can inject water to rinse.
Use a fertilized egg with a chicken foetus in it and it will double-up for halloween.
Check my recent “Solar Easter Egg” Instructable, which was very popular with local pre teens this past Easter =>http://www.instructables.com/id/Solar-Easter-Egg/
don’t quit your dye job
Live fast and dye young…