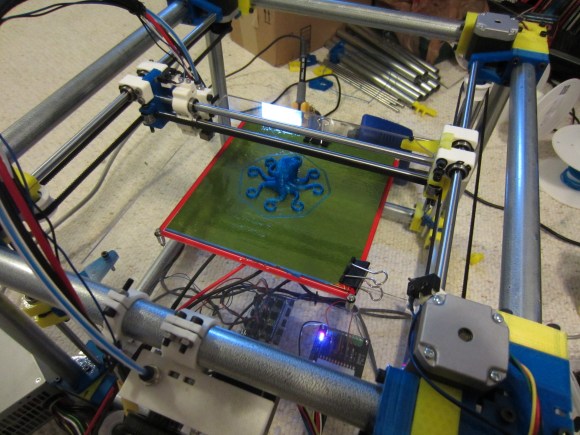
We’re always on the lookout for parts that can be source locally and that don’t cost a bundle. This hack fits both of those criteria. [Lee Miller] came up with a way to use steel electrical conduit as a 3D printer frame. He recently finished building the device seen above, and has been showing it off at Solid State Depot, a Hackerspace in Boulder, Colorado where he is a member.
Look closely at the corners of the frame in this image and you’ll see the 3D printed parts that make up the clamping mechanism. Each has three components that screw together. The two gaps in between each have a rubber ‘O’ ring. When the plastic clamps are screwed together they squeeze the rings which hold the electrical conduit firmly. This also has the side benefit of dampening vibrations.
It’s certainly easy to find this type of conduit which is sold at every home store (and most hardware stores). Just make sure that you check that a piece is straight when you pick it out. The SCAD files for the parts are available from his Github repo.


Who’s a good octopus? Who’s a good cephalopod?
NO!
BAD!
BAD CTHULHU! We don’t *eat* the octopus.
Are you high?
Well done, Lee!
That’s the problem with Cthulhu, you can’t always tell whether he’s eating an octopus or not.
I was thinking about something like this over lunch today, using steel (or aluminum if you’re feeling frisky) square tubing and something like the Tantillus XY gantry ( see Goopyplastic’s extrusion version here: http://forums.reprap.org/read.php?279,190661 ). And here it is, except with conduit and an HBot gantry.
http://deezmaker.com/bukobot/
The bukobot does use the tubing like you mention. I’ve seen one in person, looks to be fairly stable.
Bukobot uses aluminum extrusion which, while really easy to work with, is many times more expensive than hardware store steel tubing. What I was thinking about is square steel tube without any of the channels.
I love these builds that depend on a $4000 3d printer to print the parts you need to build it.
Anyone find a 3d printer build that does not require a 3d printer to build it?
I know I’m feeding the official HaD troll, but:
http://reprap.org/wiki/WolfStrap-English
or source printed parts from a local hackerspace, friends, or eBay.
4000$? More like 400$.
The entire point of the RepRap project is for the machines to replicate themselves, or use components that are easily available, to as high a degree as possible.
If you don’t have a printer, then buy the parts from someone who does.
A lot of the printed parts for the initial build can be done just as the initial build for a reprap: use maple or some other hardwood. It’s easy and cheap to find, non-toxic, and can be replaced with whatever local material you have handy. You could even carve the pieces out of foam, and use them as patterns for lost-foam casting of aluminum. Use some creativity to overcome technical limitations, like a real technician or engineer would!
$4000. no way, I’m printing the uconduit right now. 7th printer printed off my Under $400 MK1 from Makrtoolbox. Pursa-Mendel, 3DR Delta, Tantillus, Smartrap, Smartone and GMax plus a filament extruder.