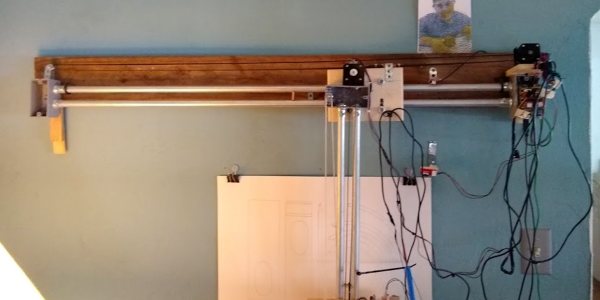
If you think you need fancy parts to build a giant robot drawing machine, think again! [Cory Collins] shows you how he built his Big-Ass Wall Plotter v.2 out of stuff around the house or the hardware store, including electrical conduit, gang boxes, scrap wood, and skateboard bearings, alongside the necessary stepper motors, drivers, and timing belt. (You should consider having this trio of parts on hand as well, in our opinion.) With a span of 48″ (1.2 m) on a side, you probably don’t have paper that’s this big.
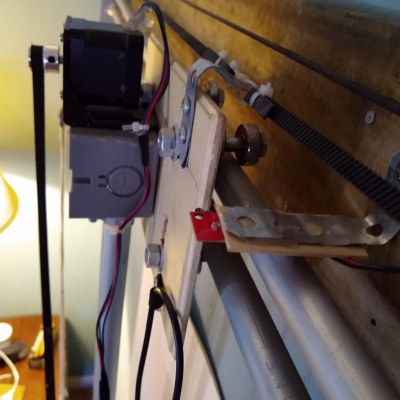
 And while the construction is definitely rough-and-ready, there are a ton of details that turn this pile of parts into a beautifully working machine in short order. For instance, making the rails out of electrical conduit has a few advantages. Of course it’s cheap and strong, but the availability of off-the-shelf flanges makes assembly and disassembly easy. It also hangs neatly on the wall courtesy of some rubber cuphooks.
Note also the use of zip-tie belt tensioners: a simple and effective solution that we heartily endorse. [Corey] makes good use of custom 3D printed parts where they matter, like the compliant pen holder and linear mechanism for the z-axis, but most of the mechanical accuracy is courtesy of wooden shims and metal strapping.
[Corey] uses the machine to make patterns for his paper sculptures that are worth a look in their own right, and you can see the machine in action, sped up significantly, in the video below. This is the perfect project if you have a DIY eggbot that’s out of commission post-Easter: it reuses all the same parts, just on a vastly different scale. Heck, [Corey] even uses the same Inkscape Gcodetools extension as we did in that project. Now you know what we’re up to this weekend.
Can’t get enough pen plotters? Check out this one that lets you write whatever you want!
Continue reading “Conduit, Birdhouse, And Skateboard Become Giant Pen Plotter”


