Need a high definition projector? Don’t have a thousand bucks sitting around? Then this hack is for you! [TheJinxster] threw together this awesome HD projector, and it cost him absolutely nothing to build!
He started by picking up an old overhead projector off of Freecycle. Freecycle is a great grassroots network, kind of like Kijiji or Craigslist — but everything is free. It’s all about reuse and keeping useful things out of the landfills. Anyway, he also had an old LCD monitor sitting around gathering dust…
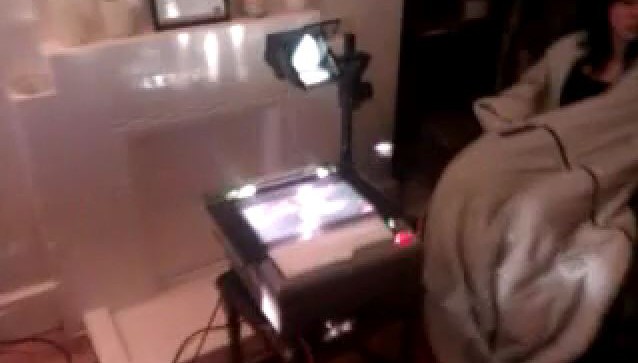
Putting two and two together he took apart the LCD, laid the bare screen on top of the glass and, well, that’s it! It’s seriously that simple. The hardest part was taking apart the monitor — the overhead projector and mounted lens took care of the rest. The beauty with a system like this is you can get high definition out of a relatively small and cheap LCD panel! The only thing is it won’t last forever — LCDs (especially monitor LCDs) aren’t designed to pass through that much light.
Don’t believe us? Check out the following video.
http://www.youtube.com/watch?v=BDA6Kfy_lKo
Now all he has to do is replace the expensive(?) halogen light bulb with a high powered LED instead!
Oh and if you’re looking for a 3D HD projector… we’ve also got you covered.
[Thanks Jono!]


hasnt that approach been around like forever?
It has. Still good to see that people are willing to recycle, and today’s panels are more affordable and have better resolutions compared to those back in the day.
You could try and use that OSCAR-module with a Retina-panel combined with a fairly compact OHP. Some fans for cooling and Bob’s your uncle.
I remember a commercial version of this from one of my CAD classes in the early ’90’s. I think at that time it was only a monochrome monitor that sat on top of a projector. It allowed the professor to show what was on the screen before projectors on classrooms were common.
Blowing air between the panel and the top glass of the projector should increase the life of the LCD. Another tactic would be replacing the hot bulb with one or more of those 100W LED modules. Cover everywhere inside that the light could strike then reflect up and out with aluminum flue tape, if the surface isn’t already shiny.
I agree about blowing the air – the first one of these we made, many years ago, died from the lack of ventilation! Good support of the fragile ribbon cables too.
But I would be cautious about the reflective tape. Perhaps we didn’t do a great job of it but we ended up with lots of irregular patterns of light and bright spots etc I think the internals are intentionally mostly matted to prevent these spurious reflections and light spots.
You need a diffuser. Maybe a piece of frosted glass just before the LCD.
I used to work at a photo shop, a “real one”, not the one hour places in department stores.
And the machines used to use diffusers to well, diffuse the light from the bulbs and the reflectors. Some actually used multiple reflectors to get the job done. The idea being, if you bounce the light around enough, it’s automatically diffused.
One way was, bulb, then a “reflector box”, that bounced the light around, off the sides, lots of angles etc…. then the exit hole, and that would point at what ever you needed (in this case, the LCD).
Frosted glass in this case, would probably dim the light too much.
Just because an LED is more efficient doesn’t mean it’s not emiting more heat than light :(
Projector bulbs emit somewhere around 85-90% of the incoming energy as heat. LEDs are still only somewhere around 80%.
I think you are confused. Heat is generally measurable in Watts, which is the power of the bulb. Leds give off more light per watt, which means you can get away with using a lower watt bulb and therefore less heat.
plus in leds about 90 percent of the heat is sunk into the base, it does not come out as IR
Let’s do some math!
LED luminous efficiency: about 80 lumens/W, after all factors are taken into account
Halogen bulb luminous efficiency: about 30 lumens/W
LED thermal inefficiency: about 80% of the energy that goes into an LED is converted into heat
Halogen bulb thermal inefficiency: about 90% of the energy that goes into a halogen bulb is converted into heat.
Desired brightness: Equivalent to a 1kW halogen bulb.
1kW halogen = 30kilolumen
30kilolumen = 375 W LED
Wasted heat in the case of the halogen: 900 W are emitted as heat and near UV, 100W as visible radiation
Wasted heat in the case of the LED: 300 W are emitted as heat and near UV, 75W as visible radiation.
Dissipating 300 W is still REALLY DIFFICULT. Harder, actually, because incandescent bulbs are supposed to run at 2000-3000K at the filament, while LEDs are “ok” at 50C and only get unhappier the hotter they get. 300W, even though it is “only” 1/3 the waste heat of the halogen, will still cook your LCD right quick.
The difference in watts of visible radiation is due to differences of color rendering index.
FWIW, there is such a thing as heat-absorbing glass. Here is an example:
http://www.edmundoptics.com/optics/optical-filters/shortpass-edge-filters/heat-absorbing-glass/2403
I don’t know much a large piece would cost or where you could get it. It has the advantage of actually absorbing the IR radiation — radiant heat does not pass through it (much). However, you still need a means for dissipating the heat.
I did just that with mine. Was on Hackaday not long ago.
http://hackaday.com/2012/02/04/converting-transparency-sheets-to-an-lcd-monitor/
HD projector, 240p video.
im sure this has been on HaD many times :/ ohwell….
i DID this in high school. Cords everywhere was awesome until one of my drunk friends tripped over a cord and pulled the whole thing tumbling down. LCD overheats like mad, needs a little spacer to lift the screen up a small amount and a fan to blow through. Other than that this is completely retarded, and I still feel like a goofball for doing it. Look here’s when I was 15 and thought this was cool.
https://myspace.com/risingrate/mixes/classic-my-photos-173607/photo/23110284
That’s Teagan Presley like the first porn I ever downloaded… Fuck she is old now and so is this idea.
And so is Myspace :) The link don’t even work.
I been using a setup like that for about 4 years…before that it was a XGA panel, just like the build in Tom’s Hardware ( http://www.tomshardware.com/reviews/supersize-tv,918.html ).
I’m normally running it in low-light mode, and with a series of CPU-fans mounted between the panel and the OHP.
Both the old and the new panel is still fully functional, but the WAF is pretty low…
I been using a setup like that for about 4 years…before that it was a XGA panel, just like the build in Tom’s Hardware ( http://www.tomshardware.com/reviews/supersize-tv,918.html ).
I’m normally running it in low-light mode, and with a series of CPU-fans mounted between the panel and the OHP.
Both the old and the new panel is still fully functional, but the WAF is low…
That’s the one! Toms Hardware was where I first saw it too. The bitch part is when you open the panel and find out the cable is one of those foldover ribbon cables that obscures the top half of the screen.
I was going to mention that as thats the problem I ran into trying to do this.
I really love the idea of recycling like this, though I suspect even replacing the halogen unit with a 100W LED will still push an unacceptable amount of light & heat through the LCD panel. That said, it might run for several years like that, which is far better than binning any of the components.
When I refurbed the Projector I was gifted (write up here : http://projects.hackaday.com/project/357-100w-LED-projector-conversion) I spent about a week running about with the 100W LED attached to just a heatsink. No joke, from a foot away you can feel the heat of the light on your skin. Under six inches and it’s uncomfortable (I even tried setting fire to things, like the workbench, it will make it smoke through a magnifying glass).
I think there is a reason why these type of projectors still use bulbs. the LED’s would need to cover a wide spectrum. any how, good built!
What’s going on here? I didn’t post that!
Are you sure?
(Ren isn’t exactly an uncommon name. Changing it back after this.)
Nobody in here but us Rens.
*Remembers vault 108*
Thinking… since the LCD screen’s colour filters absorb 2/3 of the light that hits them, perhaps a mono panel with separate R G and B LEDs would be much more suited. The only problem would be getting the LCD to react quick enough. Overall the flashing lights would average to white on the human eye, the only possible problem would be colour trails where the LCD pixel doesn’t darken quickly enough to cut off the other colours.
I guess an ipad display might do pretty well for this now
Yes, especially with the hdmi adapter board for the ipad displays you can purchase.
http://hackaday.com/2013/07/05/macbook-pro-retina-display-with-a-normal-computer/
Doesn’t freecycle have a camera for him so he doesn’t have to put up youtubes of 240p resolution?
that’s a neat hack, screen does look very washed out though, maybe its the resolution of the vid.
well wait… I think this is a terrible hack!
why? because the illumination of the vast majority of projectors is far from being uniform!!
At least that’s whats happens ALWAYS in my faculty ¬¬
We had a similar device back in high-school to connect the TI 83 calculator to the overhead projector, It had two pieces of glass and a fan blowing air around the display to keep it cooler, the only problem would be dust when the filter got clogged.
The “Teacher’s Edition” of the TI-83 has a connector on the back to hook it up to the LCD.
The old IBM Thinkpad 755CDV had this feature built in.
http://thinkwiki.de/images/0/07/755cdv-overhead.jpg
It’s so HD it sucked the HD out of the camera!
Note: this is make a low quality HD projector for nearly nothing. the focus on those overheads are horrible, the lenses are ooky as well. plus with all the light spillage the contrast on screen is horrible.
I’ve been down this road, while it’s great for playing around, you can not get anywhere near what even a $40 cheapie 800X600 used projector can do for image quality.
These were what first allowed “computer projection” at meetings/in classes etc. Resolution was about what you’d expect for the early 90s and color was a waste of time. Saw one in campus salvage the other day and just kept walking.
A few thoughts:
– Good that the builder is indulging the geek side!
– You can’t get HD through the cheap optics.
– Should being a “maker/hacker etc.” include knowing a bit about prior art? It saves one from reinventing the wheel.
I think the pedagogical value of re-inventing the wheel is quite high. You have to start somewhere, and this is _way_ above putting a blinking LED on something.
I agree that *doing* prior art is a useful start to inventing something new – it’s where nearly all of us start. Knowing that it’s been done and is out there is the first step.
I saw one of these lying around the other day for dirt cheap at a second hand store.. too bad i did not have the cash on me then.. blinked and it was gone.
Got this idea two years ago. Couldn’t find a free retroprojector so… abandoned.
We made one just like this in high school about a decade ago. Thou we only used a 640×480 TFT.
I’ve done this in school…. a way to make the build last longer is to have a series of small fans UNDER the LCD, pushing air sideways. Use old CPU fans or the like.
What I always found fun about this kind of “hack” was it’s origins, and how it was a part of (or led to?) the whole “100 inch TV” craze on Ebay (and the Greenspun forums). The goal of getting those plans (and other online “open-source” plans) to work eventually led to a crazy amount of hacking and making, with some homemade projectors (using Playstation and other LCD panels) outputting near-professional results (heck, some even had cabinets that were professional quality).
Various vendors of parts and such sprung up – eventually, my favorite (who had great forums) became LumenLabs – they sold complete kits and plans. This was all, of course, before kickstarter and such – but it was a true garage-based business.
Eventually, the whole homemade projector craze died off (I guess projectors finally became cheap enough) – and LumenLab switched to selling a CNC system, then dropped that and started (or tried?) to sell some kind of “smart TV” system (basically a large LCD TV with a built-in mini-ITX or smaller PC motherboard, with wifi, etc) – and then they “imploded” with a ton of drama (from what I gathered – I didn’t follow them much once they switched away from selling projector parts).
I remember it all well. Probably how I first came across hacking. The psone screens were amazing when I was 15.
RE: cooling; I once saw this done but with strips of glass bonded around the perimeter of the LCD front, and then another sheet of glass on top of that, with openings for connecting tubing. they ran distilled water through the resultant space, cooling the screen. they did it in such a way as to provide for a laminar flow across the screen, and of course they made sure no air bubbles.
Is there any particular monitor
that’s recent enough to have a low response time
yet reasonably easy to open up?
The monitor would have to still connect a desktop pc
for it’s input.
All of the local places to find good deals on used monitors
have fallen to gentrification.
Low Quality HD: isn’t that an oxymoron?
Not really.
What about an IR filter under the panel? Wouldn’t that help with the heat?
I’ve always wanted to do this but the halogen lamp part is a bit too much. Also the side mounted monitor’s electronics hanging off the projector is too insane to have to deal with. There is a better way and you can use Freecycle, Salvation Army, Goodwill, or Savers for parts.
First get the smallest VGA LCD monitor you can find from these thrift stores. Now get an old fashion movie projector screen at same stores – or find a friend at your old school AV department throwing one out. They are very old now. Hardly anyone uses them any more. Make sure the white space is in good condition.
Now you need to get a projector lens from an old slide projector, projector tv, or any projector from a thrift store. You may have to cannibalize them to get just the lens and it’s mounting hardware.
The hard part is the big black box. You will have to have your carpenter friend build one for you. The box needs to encompass your small monitor and a hole needs to be drilled for the lens and mounting bracket. You have to allow enough room in your black box to move the monitor back and forth to find the focal point position for the projector screen. The box only needs to be totally black INSIDE the box not the exterior.
The small monitor will need to be mounted inverted (upside down) to compensate for the image inversion the lens causes. Your carpenter friend can help you do this in a very creative way with nuts and bolts, hinges, etc. He’ll (she’ll) know what to do – it’s like a lid for the box. The hard part is finding the perfect focal point position in the box FIRST before you mount it. You will need to drill holes for the two cables the VGA cable and the power cord.
You will need to turn off all lights in the room and set the monitor’s brightness to the highest. The projector screen has a special coating to make it reflect all available light. So you may get away with not darkening the room too much but don’t count on it. You don’t have to worry about expensive and VERY hot halogen bulbs and fooling with the projector and the LCD guts hanging out. You don’t have to do any surgery on the monitor at all.
You can also order projector LENS from Edmund Scientific in New Jersey (USA). I hope this works for you. I’ve seen this somewhere else maybe on HAD I dunno… Would like to hear about success stories (or fails too) – send to 1(remove-this-first)@cj22.com.
Was also thinking that if you could find an old but very small CRT type monitor you could generate achieve higher brightness to project than an LCD. However, You will have to allow more horizontal clearance in the box. It will be harder to invert the screen too. REMEMBER any holes you drill for cables or whatever need to be plugged up to stop any light-leakage into the black box.
Given the size of HD screens on smartphones, could you hack it such that the screen was still attached to the guts (enabling playback of stored video) and rig it to a slide projector?