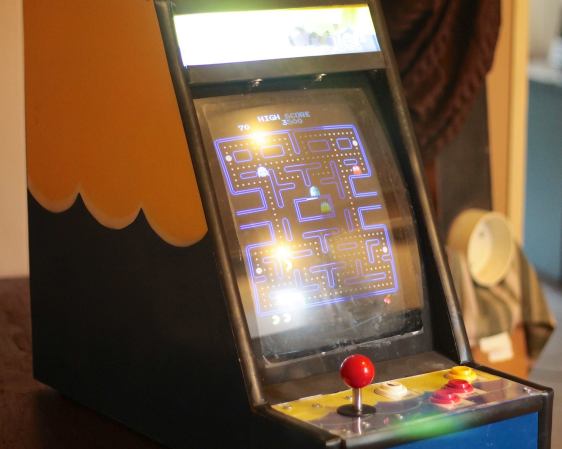
[Greg] wanted to build a MAME cabinet. Not one of those monsters that take up a bunch of floor space, mind you: this one would be table-top size. He admits he could have made his game system out of new, currently available, off the shelf parts, but part of the design goal was to reuse old hardware that was kicking around. It was important to [Greg] to keep unnecessary waste out of the landfill.
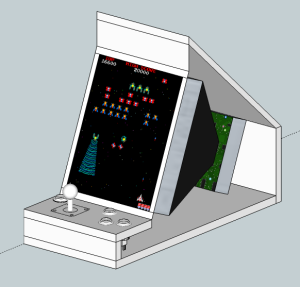
An old PC motherboard was pulled out of an old desktop. It’s not fast enough for use as an everyday computer but it will be totally sufficient for a MAME machine. The project’s screen is an old 13 inch Gateway CRT computer monitor. Notice that it is turned 90 degrees so that it is taller than it is wide. This screen orientation lends itself better to certain types of games. The monitor’s plastic casing was removed before some measurements were taken. SketchUp was used to plan a basic idea of the cabinet.

The controls consist of a joystick and 4 buttons. During past projects, [Greg] has had experience with the least-expensive arcade controls available on eBay. Well, you get what you pay for. This time around he ponied up the extra cash for some high quality controls and is satisfied with the purchase. These buttons were wired straight into a PS/2 keyboard so the computer does not know the difference between the keyboard keys or recently added controls… another great re-use of old obsolete hardware.
The cabinet is made from MDF, glued and screwed together. The limited wood working tools available wasn’t a show stopper for this dedicated builder. For example, the square hole for the joystick was made by removing most of the material with a spade drill bit before using a chisel to clean up the edges. Doing it this way was a little tedious, but you have to do what you have to do sometimes. Once the entire cabinet was finished, several coats of paint were added in a yellow and blue water-theme. Black rubber molding finishes off the edges of the cabinet nicely.


Very nice project! :-)
Recently, I was asked to add a degauss button to the CRT in an arcade cabinet… The screen can rotate for both screen formats, so degaussing is necessary every time you change the orientation of the screen.
You can see more about the mod here: http://www.estechnical.co.uk/blog/entry/an-interesting-challenge-fitting-a-degauss-button-to-an-arcade-console-crt-display
Then again the CRT in that arcade was most likely a special case. Color CRT TV have been automatically degaussed every time they where turned on for years, I had assumed color CRT monitors did the same, but I have yet to be inside a CRT monitor to not if it had the coil. My degaussing soil is one salvaged from a smaller TV wrapped in good electrical tape with a switch added to the salvage power cord. The last TV I know that someone had to use a hand held degaussing coil is one who grandson was discovering the magic of magnets, discovering magnets applied to the TV screen made all sorts of fascinating colors/patterns.
I’m currently working on a bartop arcade cabinet as well, though with a laptop and its LCD as the base. I’ve found the $7 eBay controller boards to be excellent. No lag, solid, and function just like a controller in your OS of choice.
Absolutely, no reason to buy the expensive controller boards. the ebay china stuff is fantastic.
Of course YMMV is always a factor, clearly Greg’s experience hasn’t been as good as yours.
The article is written almost apologetically for re-purposing available materials.
I see NOTHING to apologize for here.
It’s beautiful!
Yea, I know what you mean, he took useless junk and made something great! Reduce, reuse, recycle, reboot, rock!
Always impressed at people that can use SketchUp. All it does is frustrate me, but that might be because I am used to full blown CAD.
Using sketchup for CAD is like sodomizing oneself with a file.
Sketchup make “difficult” things easy for the layman, but more often make otherwise easy things difficult.
Awesome build, Greg! I’m concerned about one thing, however…
There is a lot of heat producing equipment in there, and all I see is the PSU fan trying to pull a vacuum! Did you provide some unseen venting in the case? I’d monitor the inner case temps closely, for safety and longevity reasons.
Again, sweet build!
Thank you. I’d sort of painted myself into a corner with my design’s control panel, since I don’t want to do odd angled cuts, but you just gave me an idea on how to fix that by building in some ventilation slots at the front.