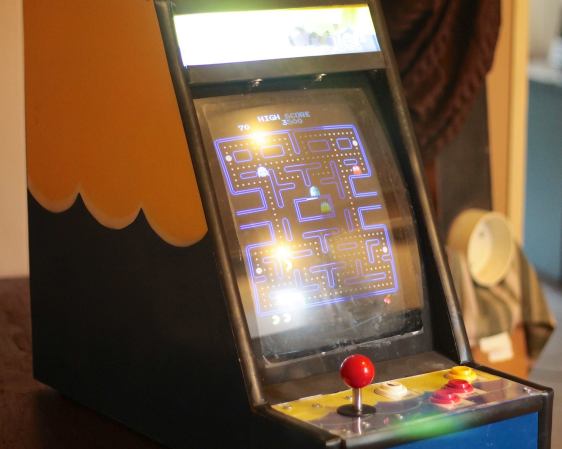
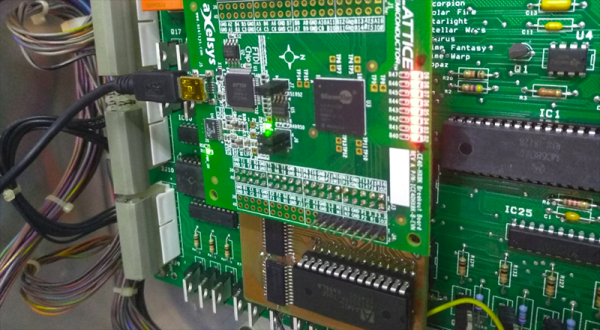
Streetfighter 2 placed on table top display with separate arcade control box

Game Like It’s 2021 On A McDonald’s Touchscreen Table

Some of you around the world may have come across these Android-based gaming tables installed in your local fast-food outlet, and may even have been lucky enough to paw at one that was actually working at the time.

Originally based on an ancient mini PC, with a 1080p flat panel LCD and a touch overlay, they would have been mind-blowing for small children back in the day, but nowadays we expect somewhat more. YouTuber [BigRig Creates] got his hands on one, in a less than pleasant condition, but after a lot of soap and water, it was stripped down and the original controller junked in favour of a modern mini PC. To be clear, there isn’t much left beyond the casing and display from the original hardware, but we don’t care, as a lot of attention was paid to the software side of things to get it to triple-booting into Windows 10, Android x86 and Linux running emulation station, covering all those table-gaming urges you may have.

Internally, there is a fair amount of room for improvement on the wiring side of things, and [BigRig] is quick to admit that, but that’s what this learning game is all about. Now, many of you will choke on the very idea of playing games on a table system like this, after all, it’s pretty obvious this will be really hard on the back and neck. But, it does offer the easy option to switch from landscape to portrait orientation, simply by walking around the side, so it does have an upside. Also you’ve got a handy place to dump your beer and the takeaway when it arrives, so maybe not such a bad thing to have in your apartment? And, yes, it does run Doom.

We were particularly amused by the custom boot logo as well as the slick custom art in emulation station. It’s attention to detail like this that makes a build a great one and a conversation piece at parties. Now if only he could sort out that wiring job.

Continue reading “Game Like It’s 2021 On A McDonald’s Touchscreen Table”

FPGA Jacked Into Pinball Machine Masters High Scores

How do you preserve high scores in an old arcade cabinet when disconnecting the power? Is it possible to inject new high scores into a pinball machine? It was the b-plot of an episode of Seinfield, so it has to be worth doing, leading [matthew venn] down the rabbit hole of FPGAs and memory maps to create new high scores in a pinball machine.

The machine in question for this experiment is Doctor Who from Williams, which, despite being a Doctor Who pinball machine isn’t that great of a machine. Still, daleks. This machine is powered by a Motorola 68B09E running at 2MHz, with 8kB of RAM at address 0x0000. This RAM backed up with a few AA batteries, and luckily is in a DIP socket, allowing [matthew] to fab a board loaded up with an FPGA development board that goes between the CPU and RAM.

The basic technique for intercepting and writing a new high score for this pinball machine comes from the incredible [sprite_tm] who is tweeting high scores from a 1943 cabinet. The idea is simple: just have an FPGA look at one specific memory address, and send some data to a computer when the data at that address is updated. For the Doctor Who pinball machine, this is slightly harder than it sounds: the data isn’t stored in hex, but packed BCD. After a little bit of work, though, [matthew] was able to write new high scores from a Python script running on a laptop. All the code (and a few more details) are over on a Github

Extending arcade games by tapping into address and data lines isn’t something we see a lot of, but it has been done, most famously with the Church of Robotron. Here, a few MAME hacks turn a game of Robotron into a Church for the faithful to fully commit themselves to the savior of the world, due to arrive in 66 years and save the remaining humans from the robot apocalypse. This hack of a Doctor Who pinball machine goes beyond a modded version of MAME, and if we’re ever going to make a real chapel with a real game of Robotron, these are the techniques we’re going to use.

Coin-Op Weather

When you have access to your own CNC machine, you tend to make stuff first and ask questions later. That sounds like how [Rui Cabral] came up with a weather station stuffed into a miniature arcade game cabinet.

arcade28
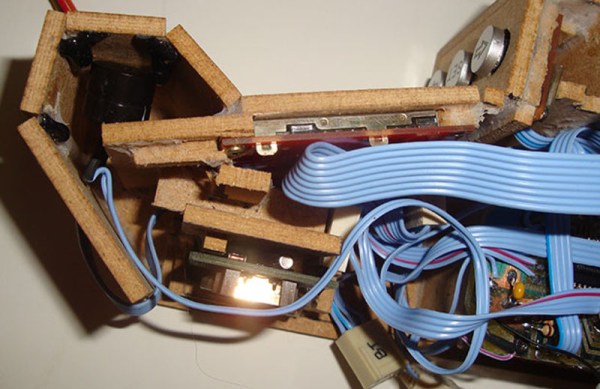
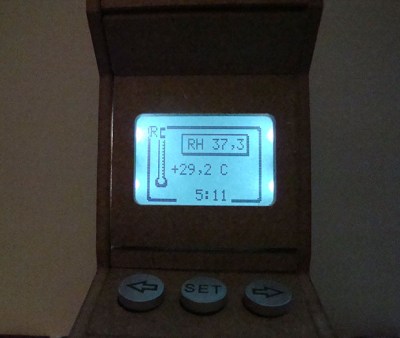
Standing only about 16 cm tall, the cabinet is quite detailed and resembles the familiar arcade form factor that has consumed countless quarters. It even appears to be made of particle board like the big boys. The screen cutout is filled by a 84×48 monochrome Nokia display, and the rest of the cabinet’s interior is stuffed with a CNC-milled PCB, temperature and humidity sensors, an RTC, and a Bluetooth module for uploading data to a phone. [Rui] even manages to work in an homage to the grand-daddy of all arcade games with a Pong splash screen.

Another good-looking display for this project might have been this ePaper badge made into a weather station. And we’ve featured even tinier arcade cabinets too, though perhaps not as functional.

[Rui] takes us on a video tour of his build after the break.

Continue reading “Coin-Op Weather”

Table-Top MAME Cabinet Dubbed “The Water Cooler”

Table-Top MAME Cabinet Dubbed "The Water Cooler"

[Greg] wanted to build a MAME cabinet. Not one of those monsters that take up a bunch of floor space, mind you: this one would be table-top size. He admits he could have made his game system out of new, currently available, off the shelf parts, but part of the design goal was to reuse old hardware that was kicking around. It was important to [Greg] to keep unnecessary waste out of the landfill.

An old PC motherboard was pulled out of an old desktop. It’s not fast enough for use as an everyday computer but it will be totally sufficient for a MAME machine. The project’s screen is an old 13 inch Gateway CRT computer monitor. Notice that it is turned 90 degrees so that it is taller than it is wide. This screen orientation lends itself better to certain types of games. The monitor’s plastic casing was removed before some measurements were taken. SketchUp was used to plan a basic idea of the cabinet.

Table-Top MAME Cabinet Dubbed "The Water Cooler"

The controls consist of a joystick and 4 buttons. During past projects, [Greg] has had experience with the least-expensive arcade controls available on eBay. Well, you get what you pay for. This time around he ponied up the extra cash for some high quality controls and is satisfied with the purchase. These buttons were wired straight into a PS/2 keyboard so the computer does not know the difference between the keyboard keys or recently added controls… another great re-use of old obsolete hardware.

The cabinet is made from MDF, glued and screwed together. The limited wood working tools available wasn’t a show stopper for this dedicated builder. For example, the square hole for the joystick was made by removing most of the material with a spade drill bit before using a chisel to clean up the edges. Doing it this way was a little tedious, but you have to do what you have to do sometimes. Once the entire cabinet was finished, several coats of paint were added in a yellow and blue water-theme. Black rubber molding finishes off the edges of the cabinet nicely.

PirateCade Is An Impressive Feat Of Woodworking And Design

Retro Arcade Machine Keeps the Classics

A six month journey of blood sweat and tears is finally over for [David Carver] and what he is left with is nothing short of beautiful. He calls it the PirateCade. We call it the perfect arcade cabinet.

This project is actually [David’s] very first Raspberry Pi project – at least it was, until his Pi crapped out on him. After running into too many problems with it and SD card corruptions, [David] decided against the RetroPie project platform and decided to upgrade to a full-blown PC, using an AtomicFE front-end and the Ultimark Ipac.

The entire cabinet is hand made out of solid wood; he didn’t have access to any fancy CNC routers or laser cutters. We gotta hand it to him, he’s quite the cabinet maker for an electronics guy. Continue reading “PirateCade Is An Impressive Feat Of Woodworking And Design”

Arcade Briefcase (the Briefcade)

20131109_134118

[Travis Reynolds] is part of an arcade club at work — the only problem? He’s the only one with an arcade machine, so they always end up at his place. So he decided to make his own portable, arcade briefcase to take to the office.

It all started with a quick trip to Goodwill where he found a beautiful maroon briefcase from the 80’s, for only $5! He then took apart a spare LCD monitor he had sitting around, and it worked incredibly well in his favor. He was able to reuse the LCD’s internal mounting brackets to secure it to the briefcase, and the video cables were just long enough to reach the Raspberry Pi.

The next problem he faced was the joystick height. He picked a Sanwa style joystick which is fairly small, but even that was too tall for the briefcase. So unfortunately, he needs to remove the ball of the joystick before closing the case. After testing out the proposed button layout, he cut a plywood mounting plate to hold everything in place. A bit of black spray paint later plus a power connector through the side of the case, and it’s complete!

He’s running Shea Silverman’s PiMame, which has an easy to use menu, quick setup, and great support. It’s an awesome project, and very well documented in case you’re itching to do something similar — I know we are!

Of course, if you have the space, a coffee table arcade machine is pretty sweet too…

[Thanks Brendan!]

Mini Supergun PCB

A few decades ago, Japanese manufacturers of arcade games realized they should make a connector for all their boards that provides the power, controller, video, and audio I/O. This became the JAMMA standard and it make arcade owner’s lives awesome. Because you can buy arcade boards off the Internet, arcade enthusiasts figured out they could build their own console with an ATX power supply, AV connectors, and a few controllers. These ‘superguns’ as they’re called are big devices with wires all over the place. [Charlie] wanted to condense the size of his supergun and ended up creating a single PCB solution (link dead, try the Internet Archive version).

The JAMMA compatable boards require a few power connections; +5 V, +12 V, and -5 V. Of all the boards [Charlie] has collected so far, he realized only one used the negative supply. This, along with a big 12V laptop power supply, means the only power connection for this mini supergun is a single barrel connector.

For the controls and A/V, DSub and SCART connectors are commonplace. Laying these parts out in Eagle resulted in a single-sided board that is easily fabbed by etching with a toner transfer at home.

There are a few problems with the build, as [Charlie] admits. Some of the pins on the JAMMA connector aren’t on the board. These are only ground pins on the pinout, and so far everything works okay. It’s still a great project, though, that turns old arcade boards into a playable device with a minimal amount of hardware.