Like many of us, [C] enjoys an ice-cold, refreshing soda while coding. Driven by a strong desire to keep a soda ice-cold indefinitely without using ice, [C] started Project Frosty Mug.
[C]’s stated goal is to keep a 20oz plastic bottle of soda at ~35F indefinitely while it sits in a room temperature environment. He started with a thermoelectric unit to cool an aluminium disc, like a cold coaster. Builds one and two made him realize that dealing with the generated heat was a big issue: it got so hot that it deformed the PLA frame. [C] also realized that bottom-only cooling wasn’t going to get the job done.
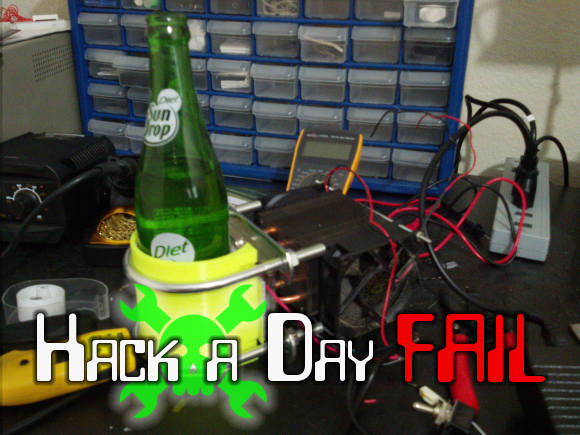
This project is now in its third build, which is pictured above. As you can see, it’s more koozie than coaster. That 3-D printed holster is lined with aluminium sheeting. Another flat piece covers the opening and attaches to the cooling element. A beefy CPU heat sink does its best, and a couple of U-brackets hold it all together.
[C]’s tested it with a glass bottle of Diet Sun Drop chilled to 38F. After 30 minutes in an ambient temperature of ~70F, the soda measured 45F. [C] lamented having not used a control bottle for comparison and reports that the power supply became quite warm. [C] isn’t going to give up that easily. Do you have any ideas for the fourth build?
Editor’s Note: This is one of the last Fail of the Week tips we have stored up. If you want to see the series continue on a weekly basis, we need help finding more documented fails! Please look back through your projects and document the ones that didn’t go quite right. We also encourage you to send in links to other fails you’ve found. Just drop the links in our tips line. Thanks!
 Fail of the Week is a Hackaday column which runs every Thursday. Help keep the fun rolling by writing about your past failures and sending us a link to the story — or sending in links to fail write ups you find in your Internet travels.


Where is heat isolation box?
Another way of asking that question is “what makes him think the ambient temperature right by the bottle is 70 F?”
The heat that the TEC is generating is being dissipated by forced airflow, which promptly spreads that heat… all around where the soda is. That heat needs to be directed elsewhere, somehow.
Could go crazy and try something like a heat pipe solution, which can move heat much more effectively.
I agree, shaping the direction of heat flow is important. I once tested the output of small solar cells across varying temperatures using a peltier to cool it. If the air blowing from the fan was allowed to circulate in the direction of the cold side, it would both slow the rate of cooling and reduce it’s maximum cooling potential. In my case this warm airflow would prevent me from reaching temperatures below freezing.
I also had problems with an overheating power supply, but this was fixed by using an old desktop power supply which could easily supply the needed amps.
From my experience with peltiers, if you need more cooling from your unit you can often do three things. Get a bigger heat sink, increase the airflow over the heat sink, and use more insulation on the cold side.
1) Glass is terrible for this job. It holds a tremendous amount of heat. You’ll need to fully enclose it in order to really pull the heat out through a substance like glass.
2) Glass is terrible for this job. It holds a tremendous amount of heat. You’ll need to slowly move the fluid around inside the glass bottle to ensure that the colder liquid is circulated toward the middle and the warmer liquid is mixed over toward the glass bottle.
3) Glass is terrible for this job. If you just stuck a plastic or aluminum container you’d get better results even without doing (1) and (2).
4) Glass is terrible for this job. If you really insist on using a glass bottle, which I would because the sodas with real sugar taste better, then also consider using a working fluid other than air to conduct the heat more effectively between your substance container and your heat exchanger.
Good luck,
~ dan ~
Wait… So glass is terrible for this job, right?
Yes. Glass is terrible for sucking heat through :( haven’t you ever noticed your glass bottles take 3+ times as long as cans to cool, given the same volume?
Well, in his case looks like he is not trying to cool down the glass bottle, but to keep it cool. The bottle is already cold, so I’m assuming the fact that glass requires more energy to get warmer is better than if it was aluminum for example.
I think what he needs to do is get a plate/pump from an All-In-One CPU liquid cooling system (you can find a system with broken radiator on eBay for cheap) . Then attach his CPU cooler to the hot side of thermoelectric unit and the liquid cooling plate to the cold side. Then print a hollow holder for the bottle and route some hoses from the pump to the holder. Fill it all up with water and start it up. Some isolating wrapping on the holder could help too. This should address some of the issues like high ambient temperature around the bottle, small area of transfer between the thermo unit and large area for heat to get to the bottle from outside.
This is true. And now i can say glass is terrible for this job because it’s hard to get a cood temperature sample too
Why would you need a glass bottle for soda with real sugar??? In Australia all our drinks are made with cane sugar and almost all come in PET plastic bottles…
You don’t. That’s just how they’re sold in the US.
Oh ok cool, so more of a way of marketing as ‘premium’ then hey? :)
Except for Pepsi Throwback and Mointain Dew Throwback. They come in plastic bottles and cans. My first taste of Dew Throwback was like going back to the 1970’s for a short visit. :-)
Yeah, I just like the glass, I don’t really notice a taste difference, though, but the smoother texture of the opening is nice. Also, it is diet soda. I drink lots of soda, and too much sugar (more than one regular soda at a time) gives me a headache nowadays.
Real sugar or not has nothing to do with it since both are sold in both types of containers. However, many people prefer the glass to plastic because they claim they can taste the plastic and glass has a “cleaner” taste.
Glass is the job.
The best would be if he would have cooled a liquit instead of the air that’s around the bottle, which is harder to do than liquids. Also thermoelectric units really don’t work for that, at leats not like a coaster.
Heat moves (and therefore in this case, temperatures change) via radiation, conduction, convection, Any design needs to account for all of these.
Promote conduction with lots of contact between hot (soda bottle) and cold (thermoelectric device) surfaces. Use the most thermally conductive materials you can find and the biggest surface area you can create.
Limit the conductive heat transfer in the other direction (cold soda to hot environment) with the most and best insulation you have at hand. Any inward heat flow you can stop reduces the need for a countervailing outward heat flow.
Radiative heat losses can be reduced by a reflective surface on your insulating jacket but they are probably minor.
Convection will bring the warmest soda to the exposed top of the bottle where conduction and work its mischief. This is probably also a minor source of heat transfer but hey, it’s always a good idea to keep a lid on it. No matter what it is.
Hope these ideas help make build four a success.
If I were going to try something like this, I would go with liquid cooling. I’d probably build a bladder in the shape of a koozie, that had an inlet and outlet on opposite ends, that would flow the chilled coolant through. It would also allow for mounting the heat exchanger further away from the bottle, to control bottle temps better. I don’t know about -35F as a target, I’d imagine you’d be freezing your beverage faster than you could drink it, but you should be able to get it very comfortable cold.
Yeah – I saw that and immediately thought about just making a water tight coozie, and filling it with some sort of antifreeze to promote complete surface contact – just make sure it circulates enough that it won’t freeze to the walls and that you don’t end up drinking any. In short, scrap that idea and make a bladder instead!
That’s a tilde, not a minus. They’re saying “about 35f”.
All I can say is mod a small freezer with a custom evaporater coil in an insulated flask, vacume it to 0 psi, and charge it with about 10 psi of R134a from the auto parts store. (Or better yet, 20 psi of R404 but the EPA will fine you $$$$ if it catches you without a licence)
only $4?
You could also use propane or propane/butane mix – the amount is quite low (some 10g) so it is no extra fire hazard. Especially if the old fridge was using R12. The oil is not compatible with R134a or R404a.
Or the refrigerant from a cold-spray – which is one of the above: R134a for “non-flammable” versions or a hydrocarbon mix for the others. Best is to use the same refrigerant as the unit used originally. This ensures compatibility of the oil.
It does normally not work to fill up to a specific pressure. You have liquid and gas in the system so the pressure depends only on the temperature. You have to fill by weight or volume. Propane or butane has about half the density than R134a.
Don’t reinvent the wheel, take a look at the wine chilling devices on the market. The 2 main designs appear to be an automated ice bucket and the wine well. Since we are doing this without ice the wine well is going to be the best bet. Those work by circulating chilled water around a basin with the drink in it. My advice grab a large metal tumbler for your chilled basin and an aquarium pump for circulation ad some insulation and you’ll be good.
First off, run the thermoelectric at 1/2 it’s rated current. It’ll cut the waste heat output down to nearly 1/4 of rated current, and you’ll get 1/2 the cooling capacity.
Second I’d add a LOT more insulation around the beverage holder. Something like an inch of styrofoam around most of the bottle will help dramatically.
^^^ This. I tried doing the exact same thing, except I quit after my first iteration, which was basically a cold plate. The trick is definitely to balance the current going through the peltier. At max power, I could feel the surface of my plate actually getting warmer almost immediately. As it is now, it actually delays the time it takes for the drink to get warm significantly. If C just reduced the current of the peltier with that massive koozie set up, I’m sure it’d work.
Interesting, I hadn’t considered the efficiencies of running at lower current. Figured it would have been linear, and more power was the answer. The cooling effect is based on current, correct? So just using a lower voltage supply would work. It’s there any benefit to using an active control system, varying current based on the measured temp difference?
The transfer of heat responds more or less linearily to the current, whereas the power loss in the device follows Joule’s law, which is in the cube of current plus the junction loss which is slightly above linear.
If you can measure the characteristic curve, you can optimize the element. Usually the highest coefficient of power is somewhere between 1/4 and 1/2 of the rated voltage or current, and over small temperature differences you can even achieve greater than unity heat transfer.
That is, if you use many parallel peltiers and run each of them at low voltage, you may be able to pump 3-4 times the input power in heat and still reach 0 degrees C.
The main problem with these can chillers is that there is a huge thermal resistance between the heat mass and the TEC coldplate. The coldplate gets very cold, the temperature difference across the TEC shoots up and the efficiency of the device drops to ~0%. You’re trying to cool the bottle but the poor contact between the bottle and the TEC is resisting the heat flow.
To keep the efficiency up, one has to make sure that heat is being transmitted from the bottle to the coldplate. This is difficult without immersing it in some sort of liquid, so the next best thing is to use a heavy block of copper that surrounds the bottle and is insulated on the outside. The large thermal mass of the copper keeps the TEC from freezing over and helps it to sink heat from the bottle.
For clarification, peltiers are most efficient when the temperature difference across is zero, and least when it’s at the maximum dT. The closer together in temperature you manage to bring the two sides, the more heat it pumps through.
That’s one of the reasons why the peltier powered cooler boxes suck so much. They have a tiny-ass heatsink and a feeble fan in the lid that isn’t enough to warm up the cold side of the TEC to the interior temperature of the box. That means the element becomes colder than necessary and it pumps out less heat.
It also causes a different problem because the heatsink is colder than the dew point so instead of cooling the box, it starts to condense water out of the air which takes up nearly all of its cooling capacity.
What he says. In fact to put some numbers, some pliers will be incapable of moving any heat from the cold side when the temperature difference is as low as 30-50deg C.
If you plug the numbers in you would realize why this is such a bad idea. Here is how to make it work:
1. put a super good cooling system on the hot side, so that your hot side sits as closely as possible to ambient.
2. enclose the thing you want to cool in the cold area. If your thing is halfway outside it may be able to cancel most of the cooling effect.
3. make good contact with between cold surface and liquid you want to cool. A round glass bottle tangent to a flat cool surface is about as bad as you can get.
4. do a little math: 0.5kg of liquid cooled from 30C to 5C(optimal beer temp) will require about half an hour to cool with a 100W peltier element in optimal conditions****(0 deg difference between cold and hot side). With real conditions and a properly sized system it is easy to take 3-5X more time. Do you want to wait so long?
5. make a good isolation between the hot stuff and the cold stuff.
If you fail at 2. your thing can be totally useless. There is a reason why we prefer the thing that cools something to be a closed box.
If you partially fail at 1. you might get something, but not enough.
It is worth noting that if you want to cool something fast a good way is to have a high thermal mass available at the proper cold temperature and put the new thing in good contact.
So adding some cooler packs there might help.
*** I am aware that the task is maintaining, but I wanted to put the numbers in as an example of the scale of things.
“0.5kg of liquid cooled from 30C to 5C(optimal beer temp) will require about half an hour to cool with a 100W peltier element in optimal conditions”
Actually, it would take about 9 minutes under plausible optimal conditions. Peltier elements are capable of transferring as much heat as their power over a 25 degrees difference if you don’t run them at full power.
Run a length of tubing thru a hole in the top your mini fridge straight into the bottle of pop that you keep in the fridge. Some kind of pinch clamp would prevent you from having to suck so much to get the pop to your mouth each time you want a drink.
I’d like to build TEC based flow-thru beer cooler. So i can tap 50l beer kegs without long pre-cooling (which means you can swap kegs instantly). I guess it has to cool 0.5l of beer in 1 to 4 minutes on average… Point is that you are cooling water or copper mass and then use heat exchanger to cool the beer, so it cools faster (but with pauses).
Point is to be able to tap the beer using DC from solar system, car batteries, etc… It’s not good to use 230V AC compressor based cooler with DC to AC inverter… So looking for purely DC alternative…
Any experiences?
Well if the back of the napkin math is right to pull a room temp beer down to chilled in 2.5 minutes, you would need a system removing ~170 watts of thermal energy at 100% efficiency to meet your demand. . However if your interested, you could use a “cold plate” system or a coil based system with a salt/ice bath that uses the TEK to try to keep the working fluid cool.
Use the TEC to make the ice before you need it.
There are 12VDC compressors from Danfoss. I have the BD35 in my camping cool-box. They are also used very often on boats, motor-homes and such. There are also stronger variants. But the compressor has about 3 times the cooling capacity than a peltier of same power. I use it with a 80W solar panel connected to the car battery. It keeps the meat for the barbecue (and – very important: milk for the coffee) fresh and cools the beer nicely. Even if I put beer-cans with 30°C in after I take out a cold one. Never – ever again a peltier device.
“cold indefinitely without using ice”…
Try making something with a mini-fridge compressor and a condensor/evaporator with actual refrigerant in the lines?
…but if it were me, I’d get a bucket, fill it with ice and water (and maybe some salt), and put it my drink in there to keep it cold.
My idea (whitout woring about calculations at all): Make the bottle holder thermal insulated and with something that exchanges heat better than air inside it… them build a small bank of peltier coolers somewhere not close to your bottle and use some heat transfer fluid and insulated pipes to take heat away from the fluid around your bootle and into the peltier cooler. Some stuff… and profit!
Keep the soda bottle in the refrigerator, and then pour it in a thermos bottle ?
Or drink faster, while it’s still cold :)
Take something that resembles a child’s arm floatation device. That is what you set the bottle in to be chilled. You insulate the outside. You pump the chilled liquid into and out of it. That is what goes to the peltier device which is no no longer co-located.
Moving heat around is hard to do.
How about you use your 3D printer to make an ice mold. Think “ice cozzy” for your bottle. Let the Frigidaire do all the hard work. When you get a new bottle, get a new ice chunk. Have a nicely formed mold that contains the melting water.
Years ago I had to create a Peltier based system. It was crazy inefficient and required an insulated wall that was a total drag to make. Removing the waste heat is a problem.
I made something extremely similar to this about a year ago.
http://i184.photobucket.com/albums/x128/krazeecain/IMG_20141023_1142181.jpg
http://i184.photobucket.com/albums/x128/krazeecain/IMG_20141023_1143431.jpg
I guess I should’ve submitted this to HaD fail >.>
Mine actually almost worked for aluminum cans, but I didn’t measure the temperature. I ran the peltier on 5 volts instead of 12 volts, which worked much much better. The peltier just generates WAY too much heat at full throttle. This wasn’t a successful project, but it’s probably the most sexy looking I’ve ever made. :)
Definitely looks pretty!
Was the plate cold when it was running? Can you instead of a flat plate use some kind of vertical can with thick walls (may be a piece of aluminum or copper pipe)? Otherwise, when you put your can/bottle on top of it the transfer surface is too small.
Oh yeah it definitely got cold at 5v. Condensation was a mild concern at one point actually. But you’re absolutely right about there not being enough heat transfer, the can still got warm after a couple hours. My idea if I were to put real money into this (this only cost me a $5 peltier chip, the rest is junk I had laying around) was to have some kind of heatpipe surrounding the can around the middle. My theory was that if only the middle got cold, it would encourage fluid convection in the can and promote heat transfer. That’s probably excessive though. I think with a beefier heatsink and a sealed sleeve around the can, it might work. I think the problem with C’s design is that the peltier is getting too much power, if that’s the case then there’s still potential in this concept.
…dammit, now I have to try making this work again.
Use the idea behind http://www.spinchill.com/, ie spin the bottle in a liquid heat transfer meida, use propylene glycol (used as antifreeze in RV water lines for weatherization) is food safe, that way you wont poison someone with the chilling fluid and can get the working fluid below zero without issue. If that idea doesn’t work for this application then you could go a different route and use the idea of a drinking vessel with an integrated heat sink rather then glass mug, IE
http://www.rei.com/product/831504/jetboil-sumo-titanium-companion-cup-18-liter
Not saying get this stuff just saying the principles needed to rapidly heat a cup might apply in reverse so you could use the same concept for rapid chilling.
if you just want to rapidly chill something you can use the “cold plate” out of a drinking fountain. but your likely not to have any carbonation left. (its a metal heat sink in the bottom of most ice bins that use the ice from the icemaker to chill the soda at the dispensing point. in this case you would simply circulate your drink of choice in a cold plate system and rather then ice you would use the peltier coolers.
Just tossing out some ideas I might try.
From what I can see, the Peltier is only touching the bottle on an edge as the flat surface of the Peltier meets the round surface of the bottle in tangent. You should make an aluminum block that has one side flat (thermal pasted to Peltier) and the other side with a radius to match the OD of the bottle. More surface area = better thermal conductivity. Especially going into glass (an insulator) you need a large area of the bottle to be in contact.
This is what I was going to suggest, except going a bit further:
1) Use 3 or 4 TEC modules spaced 120 or 90 degrees apart.
2) Attach to each TEC a section of copper pipe (or better, a milled copper block) with a radius of the bottle.
3) Get a larger PVC or ABS pipe – just big enough to cover the TEC modules, while leaving the heatsinks and fans exposed.
4) Cut openings in the plastic pipe for the heatsink/fans to slip through.
5) Fill the space in between the copper plates and the plastic pipe with expanding foam for insulation.
6) Attach the fans so they suck air through the sides of the heatsinks and expel it away from the unit.
Yeah, you’ll need a larger power supply for the system, but by insulating the unit from the heat off the TEC modules, expelling the air away from the whole system, and using more TEC modules – it should work much better (if bulkier); in fact, it might actually freeze the soda…
why not K.I.S.S? Make an insulated container to put the bottle in? It should do a much better job than this….
Its all about surface area. There is a reason people who do extreme overclocking of CPUs lap the surfaces of their CPU heat spreaders and the mating surface of their heatsinks to mirror like finshes and use heatsink paste sparingly. Its to get the best contact between the the two as they can, the more surface area you have actually in contact, the more heat transfer you have. The fins on the heatsinks other side are there to help increase the surface area that is coupling that hot aluminum or copper to the air.
The fact that he has either an oddly shaped plastic or glass bottle, where contact with the bits that are transfering heat is next to none, is whats killing this idea.
Now if he had some sort of metal cup that is part of the “cold side” that is strongly coupled to the peltier cooler and filled with some sort of liquid to help couple it to his oddly shaped bottle… But it would probably be a little more messy than what he’s after.
What about replacing the fan for cooling the hot side of the peltier pump with liquid cooling via peristatic pump and a fairly long tube / large resivoir?
Thermal travel mug and those plastic “ice balls” (you freeze them in the freezer and then put them in the drink – they don’t melt). With that setup, you’ll either need to get up and go pee, or just get up to stretch and walk around before the drink gets warm (2-3 hours at least).
Sun Drop.. [C] must be in my neck of the woods. I don’t know where else outside of the south that you can buy it.
Wisconsin actually. There’s a bottler in Shawano (west of Geen Bay) that still does glass bottles. I think that’s why its somewhat popular here. Still have an empty case I have to take back to the grocery store for the deposit (or a new case).
Ha! Small world – born and raised in Wi but have been here in the south for the past 24 years. Interesting that Sun Drop has made its way up there.
Good luck, would love to see the results if you go for another attempt.
important: if you are going to use a heat-pipe heatsink like he is doing, it must be upright or it will not work! also, the liquid inside the heat-pipe is chosen for its evaporation/condensation temperature and might not work right outside of its designed temperature range. The liquid needs to be boiled by the “hot” part of the system so it can be condensed by the part blown by the fan. It’s probably acetone in there and won’t boil at low temperatures. Also obviously the cup should be aluminum.
Aluminium has a better heat transmission in/out of the surface and lower thermal mass, but copper is better at actually conducting heat over distance.
The heatpipe orientation doesn’t matter because they use a metal mesh as a wick to return the condensed liquid back to the other end of the tube. It works by capillary action – not gravity.
So wasteful… just get a thermoelectric cooler, they are better engineered and have insulation and you can put more than a single soda.
For the bottle holder, get a heavy (at least 1/4″) wall aluminum pipe with an inside diameter the bottle will just fit into. If needed, bore to size on a metal lathe. You’ll want as much of the bottle inside it as possible.
Weld an aluminum plate to the bottom of the pipe.
Now you have the problem of the exterior of the pipe being curved and the TEC being flat. Have a block of aluminum machined to match the exterior radius of the pipe. You could try lapping it to the pipe and using Arctic Silver. Another option would be to have the block welded to the pipe. Or you could face the bottom plate flat in a lathe and mount the TEC there.
Apply at least an inch (2.54cm) of foam insulation all over the outside of the pipe.
Make a flexible seal around the top. Either obtain some ready made silicone rubber sheet or use two part RTV silicone to cast a piece. How to attach it to the top of the pipe? Not my problem… You want a hole in the seal through which the bottle will easily fit yet will seal to the bottle to hold chilled air.
You must thermally isolate the cold sink from the heat sink. TEC mini fridges and coolers use plastic bushings to isolate the bolts holding the sandwich together from at least one of the sinks.
The edges of the TEC must be insulated from ambient air or condensation may form, corrode and damage the TEC. This insulation also helps block radiant heat from the hot side getting to the cold side.
Airflow on the hot side. You can’t have too much! As noted by others, this warmed air must be directed away from what you’re trying to keep chilled.
Interesting… this is almost exactly what I have in mind for my plan to “unfail” this project.
I’ve “hot rodded” several TEC mini fridges and coolers. Most of them are built rather poorly. The TEC contact surfaces of the sinks tend to be rather rough and often there’s far too much thermal compound applied.
Smoothing the sinks with a flat file and applying just enough compound to fill the little gaps is a large improvement.
The mini fridges and coolers usually use a thin aluminum tub on the cold side. Nothing wrong with that, given sufficient insulation and a closed cooling compartment. The problem is the bolts holding the TEC and heatsink distort the area of the tub the TEC is against. Some careful work with a body hammer and steel dolly (auto body repair tools) flattens that out. To keep it from warping again I install a thicker piece of aluminum (1/16″ or a little heavier) on the inside with holes for the bolts. I also apply thermal compound between the stiffener and the tub.
Airflow on the hot side is easily upgraded by replacing the crappy half squirrel cage fan and its noisy 12V DC brush motor with a 4″ brushless DC computer fan. If needed I do some work with a Dremel to make the air opening conform to the non-round shape of the fan’s duct/frame.
Another thing I do is glass bead blast the aluminum sinks (also the inside stiffener on the tub type ones) to somewhat increase their surface area. More surface = more area for heat transfer to the air. Rounding off all sharp edges on the fins improves airflow by reducing turbulence that can ‘choke off’ air going between the fins.
The first 9 can cooler I did all those mods to went from barely being able to keep soda cool to being able to maintain a half gallon box of ice cream in a frozen state for at least two hours while I drove to a party.
I wish I could hire you just to mod those little coolers. I know of several I’d like to buy for their looks, but hate their performance.