This isn’t a Hackaday Prize entry that will change the world, but that doesn’t mean there’s not a place for it. [vdirienzo] is building an ultra low-cost 3D printer controller for 3D printers and other CNC machine. It’s not going to change the world, but it is a rather interesting little device.
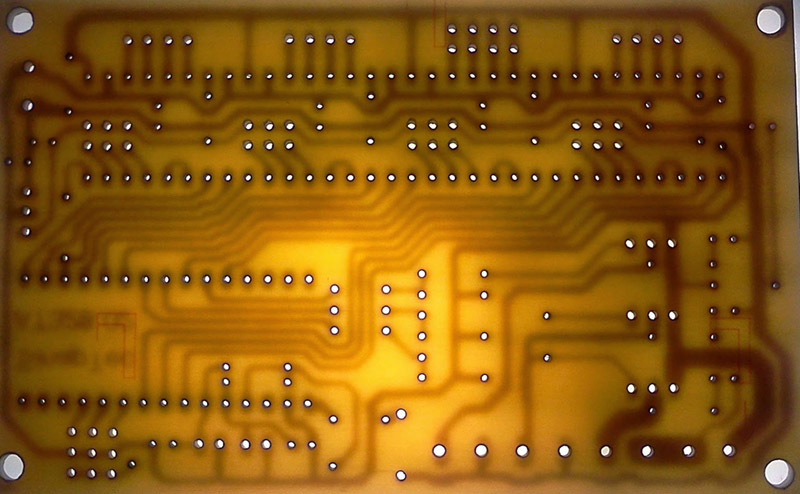
This printer controller is very minimal, with a single-sided circuit board with just enough parts and components to make this board useful. The stepper motor drivers are from Pololu, and most of the other components are stuff you could pull out of a reasonably stocked junk drawer. The microcontroller is rather interesting; it’s an Arduino Nano. Instead of the ATMega644 and ‘Mega1280 microcontrollers found on other 8-bit printer controller boards, [vdirienzo] slimmed down the Teacup firmware to fit on the ATMega328 in the Arduino Nano.
The SinapTec is not by any means the first effort to create an ultra low-cost controller board for a 3D printer that can be assembled at home. The RepRap Gen 7 electronics can be manufactured on a RepRap or small CNC mill. There’s not much to these boards – just a small, single-sided board. If you want a small, simple, and cheap controller board for a 3D printer, this is all you need.
While a cheap 3D printer controller board doesn’t really fit with the ‘change the world’ theme of The Hackaday Prize, that doesn’t mean there’s still not a place in the contest for [vdirienzo]’s entry; we have a Best Product category, with a $100k prize and a six month residency in the Hackaday Design Lab. If that’s not enough reason to build something cool – even if it won’t change the world – we don’t know what is.


YES, this is the same i suggest on my site to use pololu instead ULN2803, it will cheaper than TB6560; of course is needed to configure pin outs to drive endstops and spindle… Using arduino seems to be that it will be the standard for 3D print, laser engraving and CNC. This week I will post for mach3 usage.
Good recommendation, i will let know SinapTec, the possibility of this change.
The problem here is, standard RAMPS shields (and complete kits) are sold by Chinese dealers at a price that even an absolutely low level DIY board can’t beat, if you calculate the costs realistically.
You may have some of the parts and tools already at home, but you paid money for them at some time.
Instead of going through the hassle of etching or milling the PCB and soldering it, I’d rather just buy a $6 RAMPS shield, or a $4 CNC shield.
Nevertheless a cool project, and one step further to self replicating 3D printers.
Brian is just using this project as a way to plug the HaD prize. Clearly the inventor doesn’t need to spend 6 months in their Lab.
Which is a terrible excuse, as he mentioned several times in the story. Not that excuses help change the world and win the hackaday prize. <–see I just did it.
Shameless.
Gyk, keep in mind in 3rd world countries you dont have money or credit card to buy in china.
Other thing to have in mind if you are bored you can build your own board during the weekend in a couple of hours. Also you can help to built others.
Thank you very much for the comments.
And yet they have money to buy electronic components and etch circuit boards.
1. You can find components in any dead item with a circuit board.
2. If you have the time, you can etch and drill a circuit board with a sharp piece of metal. You can also depopulate an already made circuit board and place new components into holes that line up with the schematic. It will look ugly/hard to figure out/etc., but it will work.
(Try Googling ‘African ingenuity’; your mind will be blown away with what those who have little can come up with.)
Its the little things that truly change the world and making technology accesible for people of low income, might just be the change we need.
Thank you very much.. That was the basic idea of the project.
Sintron sells kits on eBay for $219. You get a MK3 heated bed (a MK2B is pictured but I got a MK3), “discount” LCD and adapter, Arduino Mega, RAMPS, 5 Pololus with heat sinks, 5 motors, hot end with cooling fan and mount, Wade extruder and bowden tube, thermistors, 6 mechanical end stops, USB cable, lots of wires and cables to connect things to other things. All the electronic parts required for a 3D printer except the power supply.
Since I already had 4 motors more powerful than what Sintron supplies (but still within the capability of the Pololu) I had Sintron delete 4 of the motors which dropped the cost to $159.
You can get the Ramps kits for less from Aliexpress.
I have very little experience with 3D printers, so this following comment may make that very obvious… B^)
Does any manufacturer use the bed as a heat sink for the driving transistors?
No. With ABS, the heat bed is run at about 100 degrees C. That means speccing the drivers and everything else to 100 degrees C. It’s going to fail.
By the looks of it, most of the money spared comes from replacing the mega2560 arduino with the nano.
I highly doubt you can get the parts and make the pcb for less than the $5-6 you pay for a ramps board.
A complete ramps 1.4 is about $32 on ebay, but you can get it for less if you buy separately: $6 ramps, $7 drivers, $12 arduino = 25.
Beyond the scope and building cost, we need to think globally. I’ts not true you can get a chinese RAMPS at 6$ in every country. A Ramps kit with Arduino and 4 pololu cost in my country $140. I’m sure this kind of development can help somebody in the world.
No, those are the prices with free shipping from China and assuming they are low enough value no to pay customs. Locally i can buy them for 2-3 times the prices or even more. I supposed the stores pay customs and shipping due to importing large quantity and then need to make a profit.
“It’s not going to change the world” i dont know about that! in a day in age when ready made 3d printers are coming onto the market and big companies are writing software and the firmware and roms with drm to recognize the object and detect if it a gun in whole or parts or some copyrighted works like a car body or a statue from a museum.
this will revolutionize the world because it is open source or open technology or at least open enough to not have drm.
that does not mean that the design you want is not going to be drm protected by some proprietary format that can only be read by their printer.
Agreed true alchemy at a peasant’s price starts with transforming ideas into physical objects with a cheap 3d printer.
We will not be changing the world, but we are making low income people (most of the world) being able to build their own Controller and be inserted into the global economy. Its like a democratization of the 3d printing world even more. Keep in mind a 3d printer is only the first step of the ladder. In the future we will see the big things done.
HOGWASH. If you want to help the 3rd world, make a 3d printer controller from parts THEY have, not parts YOU have. Make a 3D printer controller from a Nokia candy stick phone and then you’ll be talking.
im still waiting for parallel port add in cards to fall back into fashion
Here its the first version of the board it has Terminal Blocks for all the cables. but it was decided to be removed them to make it cheaper. there in the wiki you can find all the files to do it your self if you want.
Wiki Reprap: http://reprap.org/wiki/SinapTec_AT328.01
Video1: https://www.youtube.com/watch?v=ce9a7WTrSbA
Video2: https://www.youtube.com/watch?v=Eok0S3jyTSo
If this is meant for manufacturing, go for 2 layer boards. They are pretty much standard these days. You can have ground plane to eliminate ground bounce and can run thicker power tracks.
Putting those caps in between 2 rows of connectors is not a good idea.
– trapped heat from the motor driver module from above cooking electrolytic caps.
– from manufacturing/mechanical point of view, use “Axial” style cap if you want them to lay down parallel to the PCB. A pain to bend the caps 90 degrees by pick & place, so you are going to be paying extra for manual insertion.
You could put those “Radial” electrolytic caps standing up in between the output connectors. Heck, they can be lined up with the power pins too and you’ll lower the inductance too!
Also he could use some “big” SMD resistors (cheaper) with a 2 layer board.
That’s where they sit on many of the home-fab mostly through hole boards. Other stuff (like too thin power traces, underrated connectors or FETs) tend to kill the boards first. The assembled boards do tend to use smt caps. (At the risk of a flame war) the more professional boards integrate the drivers into the board rather than having them on breakouts anyway.
If you could make an integrated board the same way those dirt cheap arduino nanos get made, it would be cheaper than these slot-ins and all their components. This is just a way of using whats already being made cheaply (e.g. nano clones, stepstick compatible drivers).
I didn’t even picked on the SMT parts since the board have so darn many through hole connectors, you might as well keep to through hole parts and use wave solder. The only time a through hole part is cheaper are those crap electrolytic caps.
Going to a 2 layer board means all of the component holes are plate through holes, so they are a bit more rugged and suffer less from peeling off pads etc when you push a connector/part in too hard. You can also get rid of those wire jumpers. If you are cheap, you can even use the copper board as a heatsink.
I am sure that most of my comments are in one ear and out the other…
I prefer single sided smd boards … Lots more room and lots less time mucking up pads on the bench press! … Granted with the risk of lifting pads …
But bio what about jumpers?! … Okay some times you have to drill some holes … Or use large smd pads for wire jumpers and make it look like crap like I always do xP
Thank you very much all the comments and suggestions. ;)