You Wouldn’t Download A Combustion Engine

Although 3D printing it a great tool for making all sorts of things, the nature of the plastics used in most desktop FDM printers means it isn’t the first tool most would think of to build an internal combustion engine. [Alexander] is evidently not most people, as he’s on his third generation 3D printed engine.

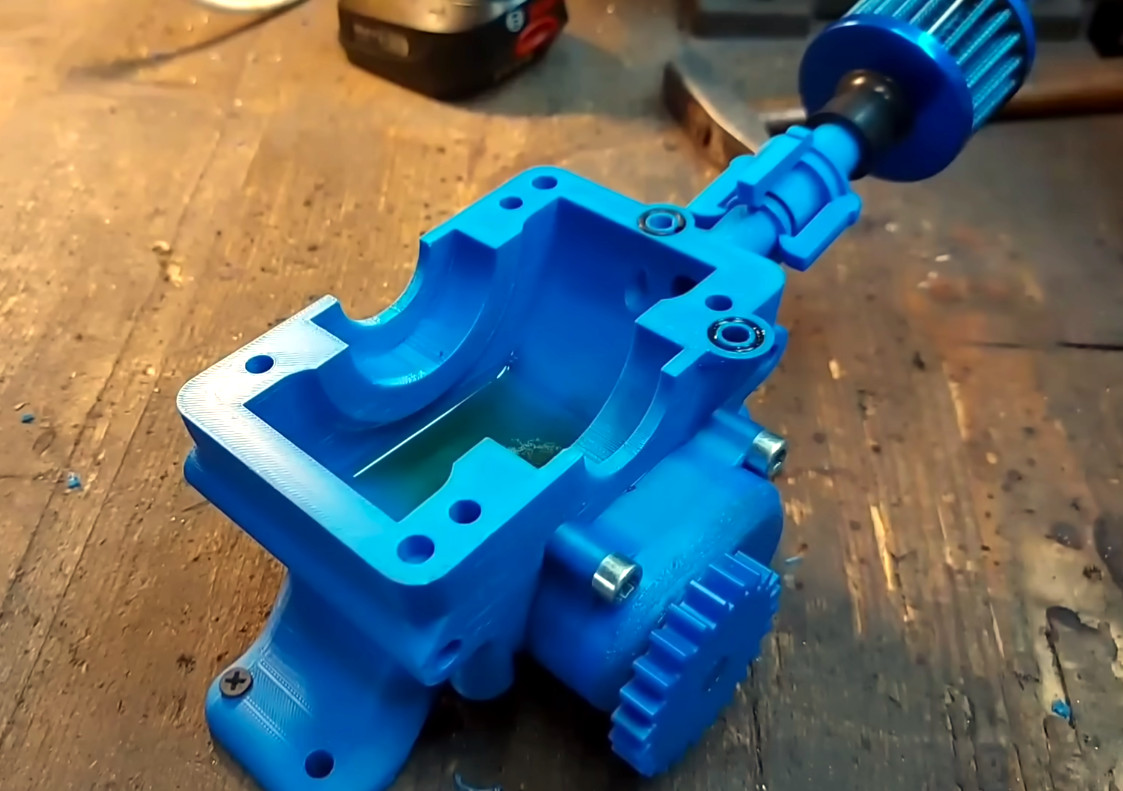
There are 3D printed pumps to distribute coolant water and oil, plus some clever engineering in the head to make sure they don’t mix — a problem with a previous iteration. As you probably guessed, the engine isn’t fully printed. Assembling it requires add-on hardware for things like bearings, belts, and filters.

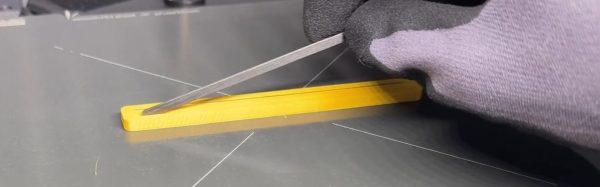
But it’s still impressive just how much of this beast is actually made of plastic. Not even fancy engineering plastic, either — there are a few CF-Nylon parts, but most of it is apparently good old ASA and ABS.

If you’re looking for “cheats”, the plastic engine block does get a stainless steel sleeve, and the head is CNC’d aluminum, but we hesitate to call anything that gets a homemade engine running a “cheat”. It’s hard enough using all the ‘right’ materials. Just like another 3D printed engine we featured, the carb is also an off-the-shelf component.

Still, it’s the dancing bear all over again: it’s not how well it runs that impresses, but the fact that it runs at all. We’ve also seen hackers use 3D printing to make steam engines, hot-air Stirling engines, and electric motors— all with varying amounts of non-printed parts.

Continue reading “You Wouldn’t Download A Combustion Engine”

One Sailing Pulley To Rule Them All

When thinking of humanity’s ability to harness wind energy, many people will conjure images of windmills from places like The Netherlands or Persia. But people have been using wind energy for far longer than that in the form of sailing ships. Using the wind for transportation goes back another four thousand years or so, but despite our vast experience navigating the seas with wind alone there is still some room for improvement. Many modern sailboats use a number of different pulleys to manage all of the rigging, but this new, open-source pulley can replace many of them.

The pulley, or “block” as they are sometimes called, is built with a polymer roller made out of a type of nylon, which has the benefit of being extremely durable and self-lubricating but is a bit expensive. Durability and lack of squeakiness is important in sailing applications, though. The body is made from CNC-machined aluminum and is composed of two parts, which pivot around the pulley’s axis to allow various ropes (or “lines”) to be inserted without freeing one end of the rope. In testing, this design outperformed some proprietary stainless steel pulleys of similar size.

Another perk of this design is that it can be set up to work in many different applications on a sailboat, whether that’s for hoisting a mainsail or pulling in a jib or any other task a pulley could be used for. It can also be stacked with others in many different configurations to build custom pulleys of almost any type, and can support up to 14 mm lines. For a sailor this could be extremely valuable, because as it stands each pulley on a ship tends to be used in only certain applications, and might also be proprietary from a specific company. This pulley is being released into the open-source world, allowing anyone to create them who wants one.

Thanks to [Keith] for the tip!

Continue reading “One Sailing Pulley To Rule Them All”

A giant pokeball is the best place to hide this holiday season.

Our New Years Wish Is To Hide In A Giant Pokéball

Between the news, the world situation, and the inevitable family stresses that come this time of year, well — one could be excused for feeling a certain amount of envy for those adorable pocket monsters who spend their time hidden away in red-and-white orbs. [carlos3dprint] evidently did, but he didn’t just dream of cozy concave solitude: he made it happen, with 3D printing and way too much post-processing.

Arguably 3D printing is not the ideal technique for such a large build, and even [carlos], despite the 3dprint in his handle, recognized this: the base frame of the sphere is CNC-routed plywood. He tried to use Styrofoam to make a skin, but evidently he’d lost access to the large CNC cutter he’d borrowed for the plywood frame at that point, as he was trying to do the cuts by hand. It still seems like it wouldn’t have be any worse than the little printed blocks from four different printers he eventually hot-stapled into a shell.

We only say that because based on his description of how much resin and filler went into creating a smooth outer surface on his Pokéball, the raw surface of the prints must have been pretty bad before fiberglass was applied. Still, it’s hard to argue with results, and the results are smooth, shiny and beautiful after all the sanding and painting. Could another technique have been easier? Maybe, but we hack with what we have, and [carlos] had 3D printers and knows how to make the best of them.

The interior of the ball is just large enough for a cozy little gaming nook, and no guesses what [carlos] is playing inside. The Instructable linked above doesn’t have many interior photos, though, so you’ll have to check the video (embedded below) for the interior fitting out, or jump to the tour at about the 15 minute mark.

Given ongoing concerns about VOCs from 3D printers, we kind of hope the Bulbsaur-themed printer he’s got in there is decorative, but it’s sure a nice homage to the construction method. Other pokeballs featured on Hackaday have been much smaller, but we’ve always had a soft spot for scaled-up projects.

Continue reading “Our New Years Wish Is To Hide In A Giant Pokéball”

Pause Print, Add Hardware, And Enjoy Strength

3D Printing is great, but it is pretty much the worst way to make any given part– except that every other technique you could use to make that part is too slow and/or expensive, making the 3D print the best option. If only the prints were stiffer, stronger, more durable! [JanTech Engineering] feels your plight and has been hacking away with the M601 command to try embedding different sorts of hardware into his prints for up to 10x greater strength, as seen in the video embedded below.

It’s kind of a no-brainer, isn’t it? If the plastic is the weak point, maybe we could reinforce the plastic. Most concrete you see these days has rebar in it, and fiber-reinforced plastic is the only way most people will use resin for structural applications. So, how about FDM? Our printers have that handy M601 “pause print” command built in. By creatively building voids into your parts that you can add stronger materials, you get the best of all possible worlds: the exact 3D printed shape you wanted, plus the stiffness of, say, a pulltruded carbon-fiber rod.

[JanTech] examines several possible inserts, including the aforementioned carbon rods. He takes a second look at urethane foam, which we recently examined, and compares it with less-crushable sand, which might be a good choice when strength-to-weight isn’t an issue. He doesn’t try concrete mix, but we’ve seen that before, too. Various metal shapes are suggested — there are all sorts of brackets and bolts and baubles that can fit into your prints depending on their size — but the carbon rods do come out ahead on strength-to-weight, to nobody’s surprise.

You could do a forged carbon part with a printed mold to get that carbon stiffness, sure, but that’s more work, and you’ve got to handle epoxy resins that some of us have become sensitized to. Carbon rods and tubes are cheap and safer to work with, though be careful cutting them.

Finally, he tries machining custom metal insets with his CNC machine. It’s an interesting technique that’s hugely customizable, but it does require you to have a decent CNC available, and, at that point, you might want to just machine the part. Still, it’s an interesting hybrid technique we haven’t seen before.

Shoving stuff into 3D-printed plastic to make it a better composite object is a great idea and a time-honored tradition. What do you put into your prints? We’d love to know, and so would [Jan]. Leave a comment and let us know.

Continue reading “Pause Print, Add Hardware, And Enjoy Strength”

Cheap 3D Printer Becomes CNC Wood Engraver

3D printers are built for additive manufacturing. However, at heart, they are really just simple CNC motion platforms, and can be readily repurposed to other tasks. As [Arseniy] demonstrates, it’s not that hard to take a cheap 3D printer and turn it into a viable wood engraver.

The first attempt involved a simple experiment—heating the 3D printer nozzle, and moving it into contact with a piece of wood to see if it could successfully leave a mark. This worked well, producing results very similar to a cheap laser engraving machine. From there, [Arseniy] set about fixing the wood with some simple 3D-printed clamps so it wouldn’t move during more complex burning/engraving tasks. He also figured out a neat trick to simply calibrate the right Z height for wood burning by using the built in calibration routines. Further experiments involved developing a tool for creating quality G-Code for these engraving tasks, and even using the same techniques on leather with great success.

If you need to mark some patterns on wood and you already have a 3D printer, this could be a great way to go. [Arseniy] used it to great effect in the production of a plywood dance pad. We’ve featured some other great engraver builds over the years, too, including this innovative laser-based project. Video after the break.

Continue reading “Cheap 3D Printer Becomes CNC Wood Engraver”

Two four-cylinder engines mechanically linked and exhausting into a trombone.

Franken-engine Plays Its Own Swan Song At 15k RPM

Back during WWII, Chrysler bodged five inline-6 engines together to create the powerful A57 multibank tank engine. [Maisteer] has some high-revving inline-4 motorcycle engines he’s trying to put together too, but unlike 1940s Chrysler, he also has a trombone… and a lot more RPMs to deal with.

The Chrysler flatheads were revving at a few thousand RPM– their redline was almost certainly in the three-thousand range. [Maisteer] is working at 15,000 RPM, which is where the real challenge of this build lies: the trombone in the image is just for fun. He wanted to use a heavy chain to link the crankshafts, but at that rotational speed, a heavy chain becomes really heavy— or at least, it feels a force many times its weight due to centrifugal force. The lietmotief of this video is a quote by an automotive engineer to the effect that chains don’t work over 10,000 RPM.

That leads to a few problems for the intrepid “not an engineer” that take most of the video to deal with and ultimately doom the engine linkage– for now. Not before he gets an iconic 8-cylinder sound out (plus some fire) out of a trombone, though. Of particular note is the maker-type workflow Hackaday readers will appreciate: he 3D scans the engines, CADs up parts he needs and sends away to have them CNC’d and SLS printed.

Hacking motorcycle engines into cars is nothing new. Hacking them together into franken-engines is something we see less often.

Thanks to [Keith Olson] for the tip! Remember, if you want to toot your own horn– or toot about someone else’s project, for that matter–the tips line is always open.

Continue reading “Franken-engine Plays Its Own Swan Song At 15k RPM”

How To Make Big Cabinets On A Small CNC Router

It’s easy to build big wooden furniture if you have a massive industrial CNC router, but few of us are so lucky. However, you can still build sizable stuff with a smaller router if you know what you’re doing. [Aribabox] shares some useful tricks and techniques for building large workshop cabinets on smaller machines.

The key to doing this well is modularity. [Aribabox] shows off how to build excellent workshop drawers in pieces using a stackable design. Rather than having to cut out one huge side panel to cover the whole stack of drawers, each drawer can have its own side panel that easily fits on a smaller router. They can then be stacked into a stout assembly that still does its job perfectly well. Assuming your CNC router is trued up properly, you can whip up a lot of furniture quickly, just assembling everything with screws.  You’ll still be able to work faster and make bigger things easier on a big machine, but a small machine can do a lot more than you think.

[Aribabox] supplies design files for a cost if you’re eager to replicate their work. If that doesn’t suit you, you can always just use the video as inspiration to work on your own modular furniture designs instead. We’ve featured other modular furniture designs before, too, that rely on 3D printed and lasercut components.

Continue reading “How To Make Big Cabinets On A Small CNC Router”