In vehicle racing, a properly tuned suspension is essential for making good time around the track. Weekend Race Warrior [Julian], thought that his right rear suspension might be bottoming out when making hard left turns. After thinking about it for a while, he came up with a super simple way to measure how many times his suspension bottoms out during a lap: a digital counter made from a calculator.
There are two types of calculators out there, one is good for this project and the other won’t work. To figure out which one you have, type in 1+1=. All calculators should display 2. Then, press the = button again. Some calculators will continue to show 2, but some will change to 3, then 4 and so on as many times as the = button is pressed. This is the type of calculator this project requires.
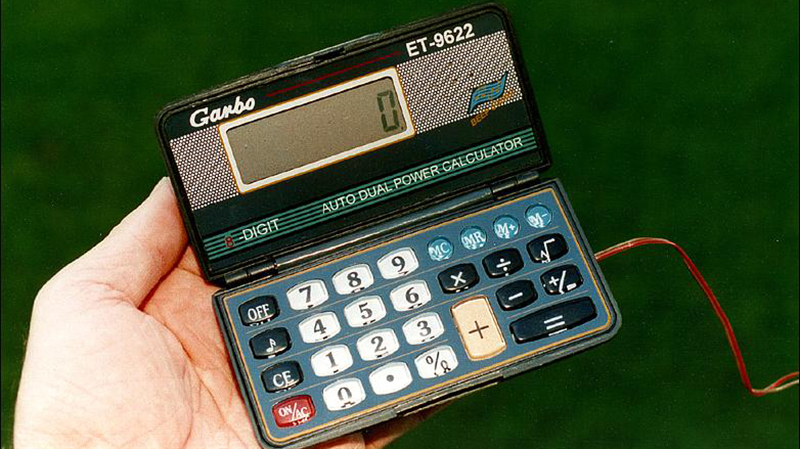
[Julian] opened up his calculator and soldered a pair of wires across the = button terminals. After a hole was drilled in the case for the wires to exit, the calculator was put back together. To count how often his suspension bottomed out, a normally open limit switch was installed on the car at a point where it would be triggered when the suspension bottomed out. The 2 added wires coming out of the modified calculator connect to that switch. Switch presses now emulate a = button press. Before starting a lap, 1+1= is pressed to display 2. At the end of the lap, if the suspension bottomed out, the switch would be triggered and the displayed value would increase. Remember to subtract 2 from that value to get the total number of events that occurred.
A mechanical switch makes this a great application for counting when things move a certain way but there are some more options. Connecting the switch-side of a relay to the calculator allows [Julian] to count brake presses (via the break light signals) or count how often his boost pressure goes over a certain amount (using a pressure switch).


Had to come back and read this again to figure out how the de-bounce logic worked. I addition to the de-bounce for the vehicle.
Now THAT is a hack! I’m going to pay my junk drawer a revisit before I just throw an Arduino at the next project.
http://i0.kym-cdn.com/entries/icons/original/000/013/974/clap.gif
+1, Yup an actual. Hack shows up on HaD. Amazing it could squeeze in among all the Contest posts.
I’m almost certain I recall learning of this this one 20 years ago in Popular Electronics
A cheap pedometer with a weight actuated mechanical switch will also work. McDonalds handed out a few million of them a while back, along with exercise videos on DVDs.
“Remember to subtract 2 from that value to get the total number of events”
Or, you know just start at -1 instead of 1
[1] [+/-] [+] [1] [=] …
Actually, the trick is that pressing = actually adds the first number in repeatedly, not the second. So if you enter “1++0” then the subsequent count of = presses will be accurate.
This also lets you enter a start offset – just replace the 0 with the initial value.
(source: I just did this for a coil winder)
I don’t doubt that you have a calculator that works that way, but every basic calculator I’ve used (including $1 novelties, overpriced scientific units, and the Windows calculator) works the way I describe, and if you think about how you would design a calculator architecture to be as cheap and simple as possible, it makes sense. You would want to have as few numeric registers as possible; probably just an accumulator and an input register, and possibly a memory register if you want to support that feature. Then pressing [=] just needs to apply the most recently activated operator to the accumulator and the input, and store the result back in the accumulator. This also explains why [1][+][=] works on most calculators, and why you can typically use the previous result of a calculation as the left-hand operand of a new expression, even if you pressed [=] at the end.
Edit: Every basic calculator I’ve used except for one. I found an old Casio fx-55 that works like you describe. Pressing one of the basic operators twice causes a little “K” to appear in the corner of the display and any subsequent [=] presses apply that operator and the input register to the accumulator. If a number is entered after the double operator it appears to be loaded directly into the accumulator, rather than the input register. All in all it seems rather illogical to me.
If hitting the [=] on your calculator doesn’t increment the total after the first time you press it, try entering [C] [1][+][+][1][=], [=], [=].
In other words, hit the plus key twice.
I have had a few calculators that worked this way.
As far as I know, essentially every calculator made today does this (the calculators that work with just 1+1= are the weird ones.)
Yup, just entering 1++ should increment every time you press =. On every calculator I can remember.
Also, for those of us worried about the lifespan of the Sun, you can switch off a solar powered calculator with no “off” button by holding 4,5,6 and pressing “on”. Dunno why it works, but it always does.
That power off trick was so odd I had to try it. It worked! Cheap calculator chips and key matrices must be highly standardized at this point, enough that the “off” functionality is always there regardless of whether the calculator actually needs it, and always with the same matrix connections. With your combo being interpreted as the right connections, since a calc keypad isn’t designed to distinguish between simultaneous keypresses. I wonder what other functionality might be hidden away, due to it being cheaper to include it than produce multiple chip versions.
It wasn’t always that way. I remember some odd quirks. My first calculator (a Novus with LED display) would do this: 0-1+1=-0
Glad it’s working, I discovered that myself as a kid, after I’d finished taking all my toys apart with a screwdriver. Yep it probably is a matrix thing, now I think of it. Now spread the news! If that’s my immortality, I’ll take it.
Nice !
Worked on my good-old-old-old TI-1606
But not on my ibico 212x
“There are two types of calculators out there, one is good for this project and the other won’t work… Some calculators will continue to show 2, but some will change to 3… This is the type of calculator this project requires.”
Many calculators have an auto power-off feature. These also wouldn’t work, unless you can guarantee events frequently enough to keep them on.
I dig it. Props.
Next is to solder wires on each number and “C” buttons. Program the uC to clear then type in the numbers at an interval.
A uC? To do something that overkill needs… Arduino!
… driving a servo to press the equals button!
Something similar from 2010 https://www.youtube.com/watch?v=L1FP2NIWj6k
I remember doing this in middle school, tying it to the teeth of the gear on a hobby motor. I thought it was so cool watching it count so fast
Come on guys, I built a complete frequency counter for ten bucks a year ago: http://pakahuszar.blogspot.hu/2014/03/frequency-counter-v2-13-breath-to-live.html
The code in it can be easily modified for just counting, and definitely more reliable than this calculator thing.
That’s $9 too expensive.
This is so cool! I wish my calculator had an air-conditioning button!
I have seen this a long time ago at some guy’s workshop used for winding coils and motors, to count turns.
There is no need to debounce the sensor switch. I made a frequeny counter based on this principle some 25 years ago, but the project was a partial failure as the maximum acceptable frequency of pressing the = button on my calculator was about 10 Hz – probably beacause of the internal on-chip debouncing circuitry. It is but a great and simple way to count things that happen not too frequently (because of the internal debouncing) and not too infrequently (beacuse of the auto power-off)
In those as a schoolboy I also used those free merchandise “credit card sized” calculators as some poor mans human/machine interfaces for my MCU projects. Cut some PCB traces and you will get a reasonable membrane numeric keyboard. Connect some GPIO pins to the other ends of those cut traces and your 8051 can write numbers to the LCD – A kind of magic for free!
I was never as creative as when I had no money to spend on my hobby. Even today, when I have all I need, I like to dumpster divie for various curious ad wondefull stuff – especially the medical one, as I work for some prominent health care facility here in the Czech Republic.
Ah! Clever way of using / avoiding entirely the LCD, just use the keys to input instead! I’ve tried driving an LCD through an Arduino, 5V with various resistors, from 2 GPIO pins alternating 0 and 1, since you have to drive LCDs on AC. Didn’t really work though. The LCD was in a bag of displays from Maplin, they have two types of bag, each type containing the same selection of mostly LCDs with no driver, the odd microwave oven VFD and a few 7-segment LEDs. A couple are surface-mount which is a bit of a bugger when you’re not much of a solderer.
Any ideas on driving LCDs raw would be appreciated. I just randomly chose pairs of pins, which should be fine for a row/column multiplexed display. Since it’s AC polarity ought not to matter, or exist.
I bought some of those bags a few years ago! I dont think anyone has ever driven any of the bare LCDs, they seemed to be for VCRs or HiFis. My research said even if I could make a robust electrical connection, the effort to reverse engineer and drive the LCD is not worth it when those NOKIA LCD modules are a few dollars shipped…
I did poke around with 5v at various frequencies.
The Cypress PSoC 4 has built-in drivers, so it can drive the LCD raw. Not bad for a $4 breakout board.
Also microchip has good app notes on how to do it.
Ta! I’m only experimenting, but for $4 why not? I’ll have a look at the notes you mention.
When I was 11 years old (back in 2001) I fiddled around with a calculator and had the same idea. I then submitted it to a german electronics website, here’s the translation: https://goo.gl/CVOPdp
You can find hundred of videos with this hack when you search for “coil winding diy”. A lot of people use it to count the number of turns. (https://www.youtube.com/watch?v=_z4OVsFWYyw)
Personally I used a cheap chinese tally counter and I soldered reed switch to the add button and a magnet to the crank in order at every crank turn the magnet come close to the reed swich (but a lot of people do this also….)
Can I use that thing as a microwave frequency counter?
I thought there were 10 types of calculators?