Friday afternoon I had the pleasure of sitting in on a surface mount soldering workshop. I’ve done some surface mount soldering before and am quite adept with a soldering iron, but this focused on solder paste and a hot air pencil. [Bob Cogeshall] ran the workshop and went beyond the most basic information. His experience founding Small Batch Assembly, a contract manufacturer whose offices are in the Nova Labs hackerspace, has led him to learn a lot of tricks of the trade.
The Tools
 Each work station was outfitted with tools that make SMD population a breeze. Solder solder stations had both hot air pencils as well as traditional irons. We were populating boards sourced from eBay sold specifically for practicing SMD techniques. Solder paste was dispensed from syringes, with modified aquarium pumps used as vacuum tweezers.
Of course mistakes happen, and tools for that are more familiar to me. After lifting off the part with hot air and regular tweezers the pads need to be cleaned up. A syringe of flux combined with solder wick and a traditional iron make cleaning up excess solder a breeze.
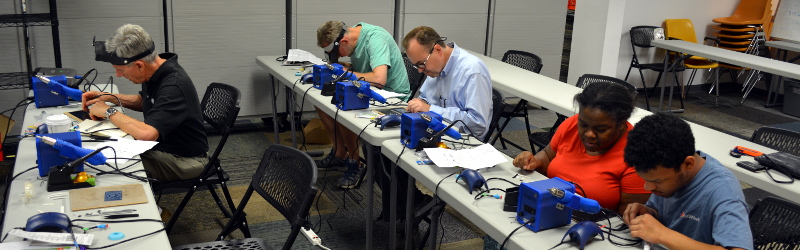
![[Bob] demonstrating the scotch-tape trick under USB microscope](https://hackaday.com/wp-content/uploads/2015/09/dsc_0549.jpg?w=267)
The Tricks
For me the best part was hearing [Bob] talk about what he had encountered and learned while building his business as a contract manufacturer who populates circuit boards of all types. Yes, he has a pick and place machine and that was a lot of fun to see, but it’s far from automatic and rework is part of the process.
One of the tips I found most interesting is to make the choice between HASL and ENIG finishes on your boards based on your population needs. [Bob] finds that HASL finishes tend to vary quite at bit in how flat they are, while ENIG finish is usually very flat. It costs more for the gold finish, but if you are working with very-fine pitched parts it can make your reflow much easier because stencil-applied paste will be much more even.
 His demonstration of a hot-air rework station (which heats from the bottom with an element and the top with air) was also enlightening. Simple know-how is a huge time-saver with these types of tools. For instance, using a mounting fixture that slightly separates the board from the bottom heater gives you a larger margin of error before you begin to burn up your board. Once it is up to temperature [Bob] doesn’t like to hold it there for more than 90 seconds lest the board or the components be damaged.
But mostly you don’t need secrets. The right tools make the job easy: solder paste, vacuum tweezer, hot air pencil. Thanks [Bob] for putting on this workshop!
Washington DC Hackers: Meetup Tonight
Of course the reason that I’m in town and able to take this workshop is because we are hosting a Hackaday Meetup at Nova Labs near Washington DC this evening. This gets going at 6pm and admission is free to all. Check out the details here!


I have been trying to get started with some SMD components, and having a very limited budget has meant only using very basic tools. I now use an electric skillet (frying pan) set at 200C, solder paste, and tweezers. The paste is applied with a toothpick, and it does take longer, but seems good!
One day, when I’m independently wealthy though, I would like one of the hot air stations that Sparkfun sells!
My hot air tool is around $60 US ($60-$80) on ebay. The one with a soldering station is actually cheaper than the stand alone. They throw in a full set of tips for the hot air tool and the soldering iron. So if you are starting out, this is actually a sweeter deal than just getting a temperature controlled soldering iron which would run you similar amount.
Yeah, I have a generic eBay “852D+”, and am more then happy with it, it was around $60 free shipping.
The hot air and the iron work great, and I opened it to remove the handle to make it stackable and the build quality is OK.
The absolute best thing you can do for hand SMD soldering is use lots of flux and follow videos from YouTube. I thought it was doing it wrong – until I started using copious amounts of this stuff and then like magic the solder gets wicked to the pins, solder bridging goes way down and the finished joint even looks shiny. The solder is supposed to have some mixed in, but it never is enough for SMD hand soldering.
No Clean Flux Paste
http://amzn.to/1FEgRej
Flux = Liquid Magic
Too much flux = sticky mess and a crutch you really don’t need if you use proper technique. Then you need to use electrowash or some other crazy solvent. Even “no-clean isn’t so clean the way people dump it on. Like seriously stop it with all the flux people… A little bit will help with bridging or if you need to solder a ground to a chassis or something heavy. But outside of that, I rarely use it.
I can’t see any links that will let us know what equipment was used and what the “scotch-tape trick” is.
Without that information your piece is reduced to “I learned some secret tricks of the trade, but I’m not telling you what they are. So yah boo sucks to you”
A piece of scotch tape taped upside down on the table where you can temporarily stick tiny SMT parts on.
Get off of ebay a set of hot tweezers. I have soldered many a board filled with SMT components with them $21.95 for a good set.
$21.95 for a set of hot tweezers?! My Hakko FM-2023 hot tweezers literally cost me 10x that amount!
by “good set” timgray1 meant not a total fraud :)
“…SHARES SECRETS OF CM”
So, the CM is “circuit manufacturing”? Should it be SMD CM?
CM = Contract Manufacturing i.e. you pay a factory to make stuff for you
Or configuration management is another use of the CM acronym
I’ve never bothered with solder paste or hot air pencils for individual hand soldering. I use regular solder wire (0.7mm) and iron (0.8 mm tip). Put some solder on one pad, attach part, and then solder second pad.
I only use paste in combination with stencils and reflow oven.
Probably the worst thing you can do is hit a surface mount component with a hot iron. It will stress most parts and destroy some. I have spent 40 plus in soldering and conductive epoxy seminars and still don’t know half of surface mounting technology and the problems that go with it. Expensive paste can be very bad and cheap paste can be very good. It all depends on the ball size and consistency of the product. Additionally the ends on surface mount parts are not all the same, it depends on how you want to mount them when you specify the end material.
On small projects I once used a fry pan and peanut oil, works good smells bad.
I’m not impressed until I see some 16-pin 6mmx6mm QFPs
I think it’s important for newcomers to the smd soldering to make shure you have some spare boards and components. While learning, failures do happen. If you are prepared to fail, it makes the process of learning a lot less frustrating. Another tool i think is really important is some kind of magnification device to help you see whats actually going. At least at the component sizes i regularly hand solder (0402 / 01005) and <0.5mm pitch, having a binocular that allows you to rest your wrists on something while soldering, have a comfortable working position, and of course the right tools (small tweezers, extra small solder iron tips,…) help a lot. And as stated above, flux is your friend, and if you even have some board cleaning solution to remove the excess flux after soldering, you should be golden.
In other words, if you work in the field and can get away with “home projects” during lunch or down time. You can get some cheap bino’s on the ‘bay, but you always get what you pay for. But trying to do 0402 or smaller by hand beyond a simple one part repair or a few parts would get tedious really fast. And even hand placing parts on a stenciled board sucks without all the stuff you mentioned. Laying off the coffee or caffeine before a big job helps too, which for some is like giving up breathing. but as you get older and essential tremor increases, it’s helpful to avoid the java.