Photogrammetry is a real word, and [shapespeare] built himself a nice setup to take high-res 3d scans using it. A good set of images for photogrammetry are: in sharp focus, well lit, precisely indexed, and have a uniform background. The background was handled by a 3d printed stand and some copier paper. To get even lighting he used four adjustable LED lamps from Ikea.
In order to precisely index the object, he built an indexing set-up with an Arduino and a stepper motor (housed in the, self proclaimed, most elegant of 3d printed enclosures). The Arduino rotates the platform a measured increment, and then using [Sebastian Setz]’s very neat IR camera control library, snaps a photo. This process repeats until multiple photos of the object have been taken.
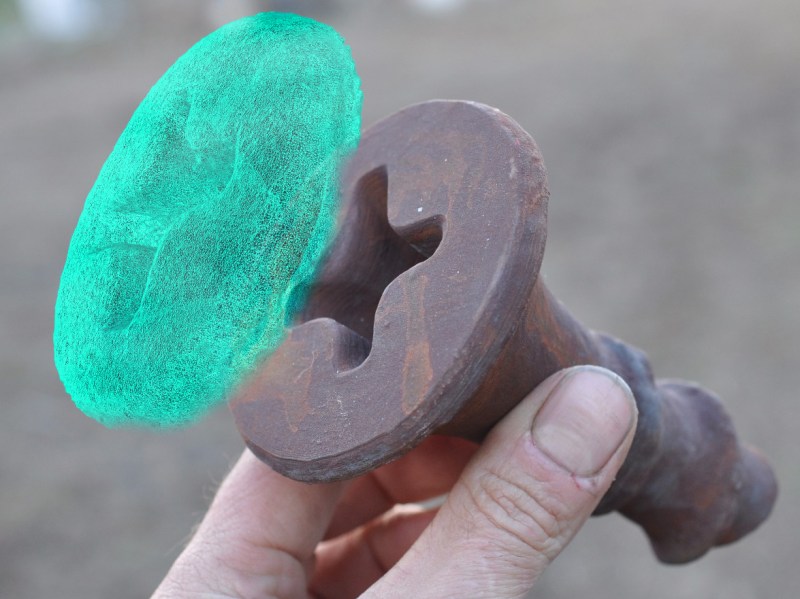
Once the photos have been taken, they need to be run through a photogrammetry processor. [shapespeare] uses Agisoft Photoscan, but says Autodesk Memento and 123d Catch do pretty well too. After all this work it appears that [shapespeare] used his new powers to 3d print a giant decking screw. Cool.


>>This process repeats until multiple photos of the object have been taken.<<
Soo… two images?
Ok seriously, photogrammetry is really cool. The problem as of now is the software side. It's either commercial and quite expensive, or cloud-based, or has a bad UI. Or a combination of the above.
Is there any free software out there that uses my local cpu/gpu and is easy to use?
Ben
Give Virtual SFM a try.
The GUI is okay, but might have some difficulties to get it started.
There are quite a few SFM (Structure from Motion) softwares that are OpenSource such as the BigSFM and MVE (http://www.gcc.tu-darmstadt.de/home/proj/mve/) requires Linux and compile by yourself.
I’ve tried it. It works pretty well.
If you’d like to avoid the fuss and want performance, Pix4D is a go. (has free trial with unrestricted functionality.)
Contact me, if you’re interested. I’ll roughly get you started.
email: hi (at) nickson.me
Would you be willing to create a VirtualBox image with everything installed and running? Most of us aren’t up to compiling (…and figuring out what the inevitable errors even *mean*.)
It looks like Pix4D is aimed at making maps from drone based photos, not creating 3D models of objects like giant screws as in the article. On the other hand, making maps from drone photography is exactly my interest at the moment, so thanks for pointing out a couple of potential solutions.
The objects shown are all quite easy to scan. Textured surfaces without reflections aren’t a real problem. Shiny surfaces or surfaces with little to no texture are quite hard to capture with a camera alone. Here you might want to use an active Scanner like the David Scanner.
Did a clay vase years ago with “photomodeler”, one of the first softwares with this capability and I had to put dots all over it with a marker so it could correlate reference points. Texture shots are taken first without dots naturally.
Interesting
The reason there aren’t ideal solutions is because the 3D math. Typical programmers these days don’t understand most algebra let alone topology.
Yeah, those damn programmers “these days”. C’mon, Grandpa, enough Hackaday for today, it’s time to drink your prune juice and change your diaper.
Not to mention uncorrected lens aberrations…
You can compensate for them with OpenCV but most people who complain of poor results want a magic turn key solution that uses fairy dust to transform a cheap plastic lens in to a precision measuring tool. To the extent chessboard calibration should be a required step of using the software: maybe they aren’t wrong. OTOH, if you forced people to print a .pdf before they could use the software: they may be that much less likely to bother at all.
I own a license for Agisoft Photoscan and I’ve been extremely impressed with it’s performance. Garbage in, garbage out.
tl;dr version: “I’m a prat”
The math is quite simple, as long as you have identified corrosponding reference points, exactly enough,
industrial photogrammetry does that by simply using optical markers, that are quite easy to identify, even to identify further information like shape and brightness distribution you also solve for the problem of “uneven” reflection, when you use the retroflector type.
OpenSource Software(I tried but it didn’t work):
http://insight3d.sourceforge.net/
http://sourceforge.net/projects/insight3dng/
Optical Targets used in professional application:
http://hubbsmachine.com/5-retro-reflective-tape-target
http://hubbsmachine.com/4-retro-reflective-contrast-photogrammetry-targets
“All that object orientated programming is just cut n paste. If you can’t memorize a complete instruction set in HEX and code without more than a text editor, go cleanup a beach somewhere and make yourself useful.
Pressed the wrong reply link two posts down. Pressed “comment” in “report comment”! Apparently I’m reporting myself for my own stupid coments!
So…. basically a DIY Nextengine scanner? Only no lasers? Neat.
Oh so it’s like the old Hollywood Boujou Match Moving, on a broader scale. Fun !
That’s the biggest freakin’ drywall screw I’ve ever seen.
You should see the drywall.
That’s why it was so easy to scan ;)
That wasn’t the original size that’s what the 3D printer created after leaving out the scaling factor :)
woosh!
Bassically the same sort of process I use : https://hackaday.io/project/6752-yet-another-turntable-for-photography
But no matter how much you control the conditions, surface attributes will generally not give “super high res mega detail”.
Pix4D has a new monthly pay option for Drone captures that’s pretty affordable. I’ve used it with terrestrial images and the results have been pretty cool and pretty detailed. I used the full version to do an interstate higway interchange and an industrial accident scene. Both measured about 600 feet x 800 feet. I shot about 1200 images for each one and I surveyed a few points to use to set the scale. The only problem I had was both were shot on overcast days, and the software has trouble with gray sky. It puts a lot of noise in the scenes that you can filter out and remove manually with Cloud Compare. I used the same photos sets with VisualSFM and got the same sort of noise, so the takeway there is to avoid overcast days when you’re capturing an outdoor scene. It took several days to process the scenes with VisualSFM, and 15-18 hours to process them with Pix4D.
I’ve done batch HDRs on the overcast photo sets and then re-run them and it improves the detail and reduces the noise. I’ve even started HDRing all of the photos I use for generating point clouds, regardless of whether or not it was overcast when I captured the images and I’ve found it helps.
Catch123’s been phased out, but it actualy did a great job for shiny objects like cars, for instance. the 70 photo limit meant you had to really plan your capture and it made it hard to use for large scenes. They’ve replaced it with ReMake, which has a montly pricing structure similar to Pix4D’s drone package There’s a 250 photo limit now, so you can capture reallly good detail. One of the ways around the detail issue is to use some targets as ground control points for the areas you want to focus on..and then do two captures…one of the larger area, and another one only on the specific area you’re interested in. More photos on the specific area of interest mean greater detail in the point cloud in that area….Use the targets to set your scale and then you can align the points in, say Cloud Compare or Meshlab.
If you’re fooling with point clouds, take the time and get to know CloudCompare well. You’ll save yourslef lots of vexation if you do that…
When insight 3D works well, it makes a nice point cloud. Most of the time, it gives me intermittent crashes.
I’ve tried Regard3D, and it works very well for some things….I’m still playing with it, but I don’t think it does as well as either Pix4D, or ReMake. I’ve run the same image sets through it that I’ve run through the other two and it’s given me nice partial point clouds but not a capture of the entire area I was interested in like Pix4D and ReMake do. I think it’s ignored significant portions of the image sets I’ve used with it.
Visual SFM does a wonderful job on large scenes….but – unfortunately – I can’t use it commerically…..I’ve tried them all with terrestrial images and with aerial images…
I’ve also tried o install the Bundler CMVS packages out there, but I have a high frustration level with all things Python. I seem to encounter a never ending list of things it requires to run specifical applications…