[Norwegian Creations] makes things as a business model. Tired of the mundane lamp above their heads, they decided to put their skills to use. The basic idea was simple, plot out a cool 3D function, put some RGB LEDs behind it, make it an awesome mathematical rainbow light display, hang it right above their desks, and then ignore it for their monitors while they worked.
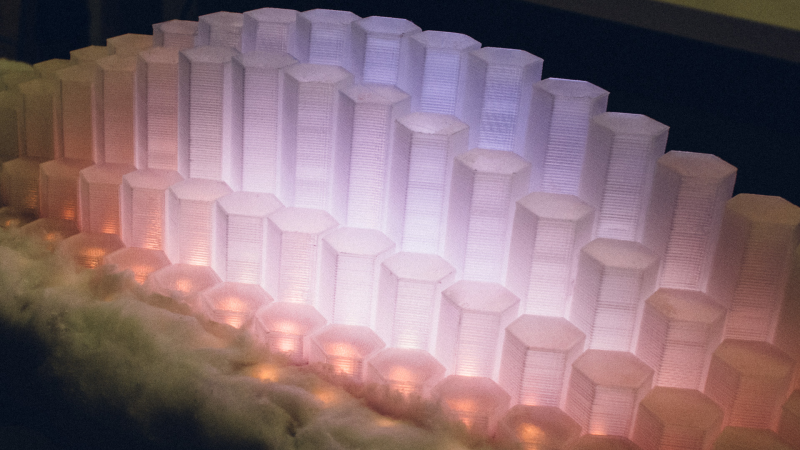
The brains of the project is a Raspberry Pi B+, WS2812 LED strips, and a Fadecandy controller from Adafruit. They 3D printed hexagonal towers out of clear plastic and labeled each carefully. Then they attached the strips to the board, glued on the hexagons, and covered the remaining surface in cotton balls to give it a cloud-like appearance.
The lamp normally plays patterns or maintains a steady light. As the day turns to night it reflects the world outside. However, if someone likes their Facebook page the light has a little one robot strobe party, which we imagine can get annoying over time. Video after the break.


Connect to rss feed and watch for severe storm warnings. Have a few hexagon modules flash like lightning if there’s one in your area.
That’s the sort of thing Ambient Orbs do and they never really got too popular.
Ambient’s Orbs also cost $100 and only displayed a relatively small amount of default options (unless you paid for the pager bandwidth to display something of interest to you, or tethered them and used the SDK)
But they were pretty. And so very Media Lab.
What I meant was that this way of displaying coarse data never caught on for some reason. I thought at the time it was a great idea and figured they would be everywhere. Good thing I didn’t have any spare money to invest at the time or I might have taken a flyer on them.
Those hexagons must’ve been one hell of an expensive (and tedious) 3D printing job. Surely they could have found something cheap & off the shelf that would have worked well enough. Or, a different way of producing them–some plastic cylinders and a bandsaw, for example.
Maybe pencil holder at office supply source comes in clear or semi-clear hexagon shape?
You need hexagonal plastic prisms. But perhaps you can make round tubing hexagonal. Bind a bunch of equal length pieces side by side with rubber bandsand put it in an oven at the right (softening, not melting) temperature.
I doubt they cost more than $20 in filament to print the whole display, and considering that a print like that should be able only take ~10 minutes (depending on the wall thickness) I have my doubts that it would be possible to fabricate similar structures by hand in less time without finding an object that already had all of the requisite properties and can be cut to the correct length. By going the 3d printed route there is so much more freedom to control the properties of the system (changing the amount of diffusion, the overall size/shape, the color, surface texture, etc) it seems like a no brainer for a one-off art project like this. I just wish they would do more to post their generation scripts so that others can benefit from their efforts.
Tap Plastics (U.S. Plastic parts/materials supply) sells various sized translucent plastic rectangular boxes <2"x2". No idea of the cost, likely more than materials cost for 3D printing but less than the cost of your time setting up the 3d printer.
I assume they printed them single layer vase mode. Doesn’t take much plastic at all and prints quick.
The light is a good idea. I’ve been tossing around similar ideas for my kids rooms.
But the cotton balls are a dumb idea. In a years time, that’s going to look more like a storm cloud with all the dust that it’s going to catch. Vacuum it up every month or so and your cotton balls are going to look a little naked.
Not sure about the 3D printed parts though. If the AC fails on a hot day….?
It would have to get pretty darned hot to melt any 3d-printed piece I’ve come across.