How To Get Started With Fadecandy And LEDs

The internet is awash with millions of stunning LED projects, and for that, we are all very thankful. For those outside the hacker/maker matrix, it can be difficult to know how to approach such a build. Never fear, for [Amy Goodchild] has put together a beginner’s guide to building pretty glowables, using Fadecandy and Processing.

Fadecandy is a platform specifically designed to drive WS2812B LEDs for artistic purposes. This allows users to focus on the visual side of things without getting bogged down with the hassle of selecting the right microcontroller and choosing the applicable libraries. It works great in combination with Processing, a piece of software designed for coders experimenting with visual arts. Through a USB link, any graphics drawn by processing can be mapped to the LEDs attached to the Fadecandy controller.

[Amy] does a great job of explaining how to do everything required, from purchasing the right equipment, through wiring everything up, and then getting it all humming along with the correct software. If you’ve ever wanted to build a big flashy project with a ton of LEDs, this would be a great place to start.

We’ve seen Fadecandy put to good use before, too. Video after the break.

Continue reading “How To Get Started With Fadecandy And LEDs”

Interactive LED Dome Glows With The Best Of Them

With the price and availability of components these days, it’s easier than ever to throw a whole pile of LEDs at a build and get them flashing away. The hard part is doing it well. [Amy Goodchild] is an artist, and has a knack for producing rather beautiful LED projects. The When in Dome installation is no exception.

The build is based around a large geodesic dome, fitted with LED panels that glow and react to the occupants inside. Using the Microsoft Kinect as a sensor enables the dome to map out what’s happening in 3D space, and use this data to guide its animations. WS2812B LED strips were used, in combination with a Fadecandy controller along with Processing. This is a powerful combination which makes designing attractive LED effects easier, without forcing users to go to the effort of writing their own libraries or optimizing their microcontroller code.

For those more interested in the dome itself, you’ll be happy to know that [Amy] doesn’t skimp on the details there either. The build actually started as a commercially available kit, though there’s still plenty of manual cutting, screwing, and painting required. She does an excellent job documenting the dome build through a series of videos, and walks the reader through some of the design decisions she made (and would remake, if given the chance).

People love geodesic domes at the best of times; adding an interactive LED installation just takes things to the next level. We’ve seen them used as greenhouses too, and they make a great hackerspace project as well. Video after the break.

Continue reading “Interactive LED Dome Glows With The Best Of Them”

Fueled By Jealousy, This Smart Lamp Really Shines

As a lover of lava lamps, [Julian Butler] knew when he saw a coworker’s modern LED incarnation of the classic piece of illuminated decor that he had to have one for himself. The only problem was that the Kickstarter for it had long since ended, and they were no longer available. So he did what any good hacker would do: he studied it closely, took a bunch of notes, and built his own version that ended up being even better than the original.

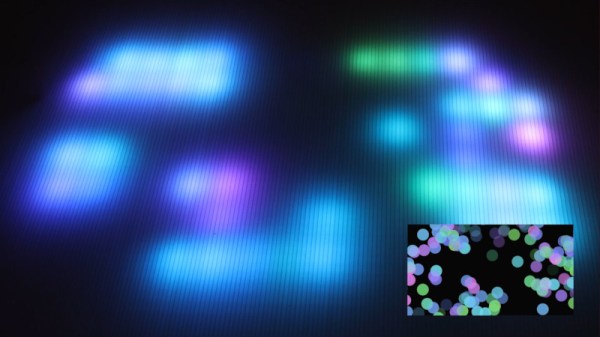
In the three part series on his blog, [Julian] takes us through the design and construction of his take on the Ion Mood Light, which raised over $72,000 back in 2014. The details in the Kickstarter campaign plus his own first-hand observations of the device were enough to give him the high-level summary: the device has a core of RGB LEDs behind a diffuser, and uses some software trickery to pulse out some pleasing effects and patterns. He wasn’t concerned about the Bluetooth or the smartphone application, so all he really needed to do was put some NeoPixel LEDs inside a glass cylinder and he’d be done. Of course, it always sounds easy…

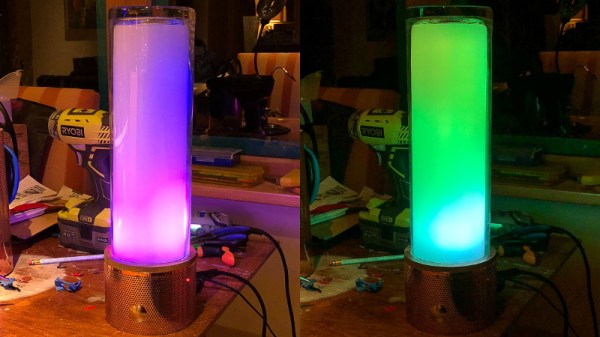
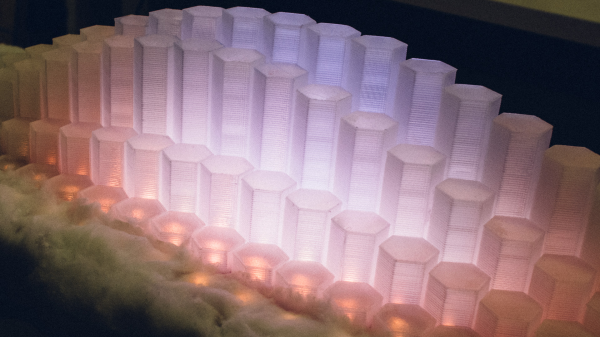
The actual journey to get there, as you might have guessed from the three part series, took awhile. Sourcing the LEDs was easy enough, and using a Fadecandy controller made getting the LEDs to blink out some cool patterns fairly straightforward. But it took [Julian] a bit of experimentation and a few trips to the crafts store before he found a material which would diffuse the LEDs enough for his tastes. Though in the end, he thinks the multiple layers of acrylic he ended up going with actually do a better job of blending the light from the individual LEDs than in the original Ion.

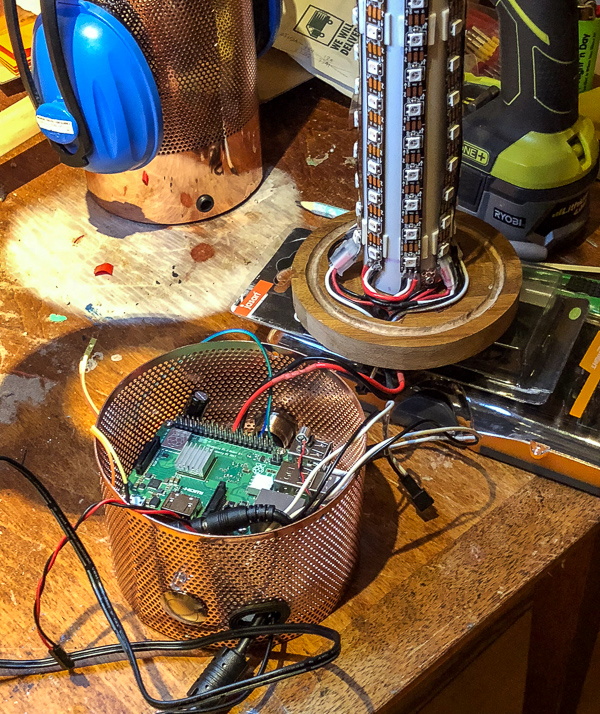
Using the Fadecandy made it easy to drive the LEDs, but he still needed something to provide it with the commands. To that end, he added a decorative base to his LED column that hides a Raspberry Pi and all the lamp’s associated electronics. This includes a microphone which gives his lamp the same sort of sound reactive features that made the Ion so popular. The base does make his lamp a bit bulkier than the original version, but the metallic mesh construction is attractive enough the overall look works.

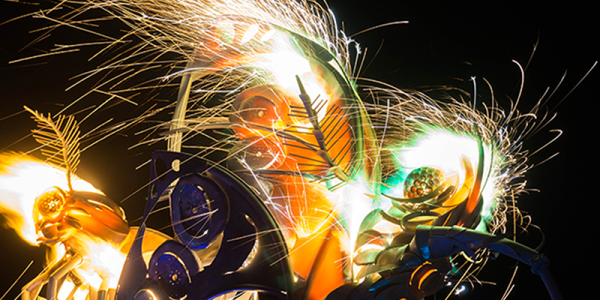
Of course, you might be wondering how [Julian] got the LEDs to react to sound, or do any of the other gorgeous effects shown off in the video after the break. The software which makes this possible makes up the third and final post in the series, and is really a whole project in itself. The short version of the story is that he used Python and Processing to do real-time computational fluid dynamics, but not before making the necessary adjustments to speed up the simulation on ARM hardware. You know, normal lamp stuff.

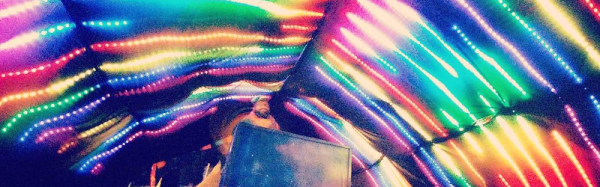
This isn’t the first time we’ve seen projects using the Fadecandy board. From creating a Tron inspired desk to building the 5,760 LED “Space Tunnel”, it looks like a great choice if you’ve got a problem that can be solved by the application of a ridiculous number of LEDS.

Continue reading “Fueled By Jealousy, This Smart Lamp Really Shines”

Tron Inspired LED Desk Lighting

Reddit user [barbarisch] thought his computer desk was a bit boring, so he came up with a cool project to spice it up: A Tron-inspired computer desk with embedded LED strips!

[Barbarisch] took a basic desk and replaced the tops with ¾” oak plywood. The LED routes were planned out on the computer first and then marked out on the plywood. Using straightedges, [barbarisch] carefully used a router to create the straight grooves and then he created a jig for doing the circles. A bit of trimming and sanding and the three pieces of the desk match up.

After painting the desk, it was time to take a crack at the LEDs. Originally, [barbarisch] thought about 3D printing some diffusers to cover the individual WS2812B lights, but it wasn’t coming out to his liking, so diffusers have been put on the back-burner for now. Holes were drilled in the desk so that connections could be made between the different parts of the grooves and soldering was done between bits of the strips when turning corners. The whole thing’s being controlled by a Raspberry Pi and a Fadecandy USB controller for RGB strips. [Barbarisch] modified a Pi case so that the Fadecandy board would fit as well as printing out a bracket to mount the hardware under the desk.

A fun project to update that boring computer desk and to help you out, the python code which communicates with the Fadecandy server has been put up on GitHub. From the Reddit discussion, it looks like [barbarisch] might have found a solution for diffusing the LEDs! If it’s an LED desk you’re interested in, though, we’ve seen interactive LED tables and Mega LED desks before!

Continue reading “Tron Inspired LED Desk Lighting”

Enter The Space Tunnel

What’s better than 1 string of LED lights? 96. That’s how many. Each string of the 96 has 60 ws2812b LEDs, for a total of 5760 individually addressable RGB LEDs.  That’s not the cool part of [jaymeekae]’s Space Tunnel installation, the cool part is that they’re interactive.

Starting out with some PVC piping, dark cloth was used as a backdrop and the LED strips were attached to it. Several power supplies are used to supply the voltage necessary and each strip controlled by FadeCandy chips which connect to, in this case, a Windows PC via USB. Initially, computer power supplies were used, but they couldn’t supply the current necessary. [jaymeekae] used them for the first installation, but switched to better power supplies for further installations.

Once the lights were up and powered, [jaymeekae] started work on the interface to control them. Starting with a used bureau, [jaymeekae] cut out a section for the touchscreen, and installed the controlling computer in the bottom half. Processing is used to interface with the FadeCandy controllers and HTML is used for a user interface. Each mode runs a different Processing program for different effects, including audio visualization, a space tunnel mode (hence the name) and a cool drawing app where the user draws on the touchscreen and sees the results in the lights overhead.

Over several iterations, the Space Tunnel has evolved, with better power supplies and a better interface. It’s a great art installation and [jaymeekae] takes it to festivals, including one in Spain and one in the UK. There are some other LED string projects at Hack-a-Day, including this one with ping-pong balls, and this one that involves drinking a lot of beer first.

[via Reddit]

Continue reading “Enter The Space Tunnel”

2,000 LEDs On Fire

What’s 18 feet tall, 12 feet wide, has 2,000 LEDs and turbine-driven blast furnaces? Believe it or not, it is a piece of kinetic sculpture created by [Therm] (a collective, not a person) for Burning Man 2016. The project is about 60% salvage, has a Raspberry Pi 3 helping its three human operators, and took a team of 30 about 9 months to complete.

The Raspberry Pi drives LED using fadecandy. You can see a video of the sculpture (three giant moths, to be exact) and a video about fadecandy, below. (We’ve covered a subtler fadecandy project before if you want to see a different take on it.)

Continue reading “2,000 LEDs On Fire”

Building An Interactive LED Lamp To Annoy Yourself

[Norwegian Creations] makes things as a business model. Tired of the mundane lamp above their heads, they decided to put their skills to use. The basic idea was simple, plot out a cool 3D function, put some RGB LEDs behind it, make it an awesome mathematical rainbow light display, hang it right above their desks, and then ignore it for their monitors while they worked.

The brains of the project is a Raspberry Pi B+, WS2812 LED strips, and a Fadecandy controller from Adafruit. They 3D printed hexagonal towers out of clear plastic and labeled each carefully. Then they attached the strips to the board, glued on the hexagons, and covered the remaining surface in cotton balls to give it a cloud-like appearance.

The lamp normally plays patterns or maintains a steady light. As the day turns to night it reflects the world outside. However, if someone likes their Facebook page the light has a little one robot strobe party, which we imagine can get annoying over time. Video after the break.

Continue reading “Building An Interactive LED Lamp To Annoy Yourself”