The only thing that matters in this world is the likes you get on social media platforms. To that end, YouTube has been sending out silver and gold play buttons to their most valuable creators. [Sean] hasn’t screamed into a microphone while playing Minecraft long enough to earn one of these play buttons, so he decided to build his own.
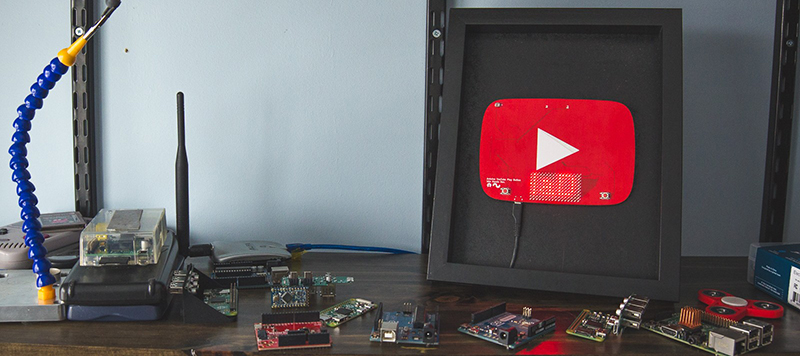
This play button isn’t just a bit of pot metal ensconced in a frame brought to you by Audible dot com; this YouTube play button actually does something useful. It’s a PCB with 144 LEDs working together as a display. There’s an Atmel SAMD21 microcontroller on board to drive the LEDs, and an ESP8266 to pull data down from the Internet. What data is worthy enough to go on an Arduinofied YouTube play button? The subscriber count for [Sean]’s channel, of course. Go subscribe, it might crash his Play button.
Admittedly, there were a few problems with this Play button PCB. Firstly, the ESP8266 can’t directly communicate with the YouTube API to pull down the subscriber count. That problem was fixed with a Raspberry Pi that could connect to the API, and programming the ESP to pull the data from the Pi. Second, this was [Sean]’s first experiment with double-sided SMD boards reflowed in a toaster oven. The first side to be assembled was easy, but to get the second side on, [Sean] turned to low-temp bismuth solder paste. Except for a small error in assembling the board, everything worked as planned.
It’s a great project, and if you want to check out what the better parts of YouTube look like, check out [Sean]’s video below. Don’t forget to rate, comment, like, unlike, or subscribe.


I just punched my self in the face for clicking this
It has enough keywords to qualify as click bait: Arduino, YouTube, social media, Raspberry Pi, ESP8266, LED
he could have connected the thingy directly to the pi via usb cdc. Would have been much easier.
“It’s a great project.” Your standards are really low.
I liked it. One more sub