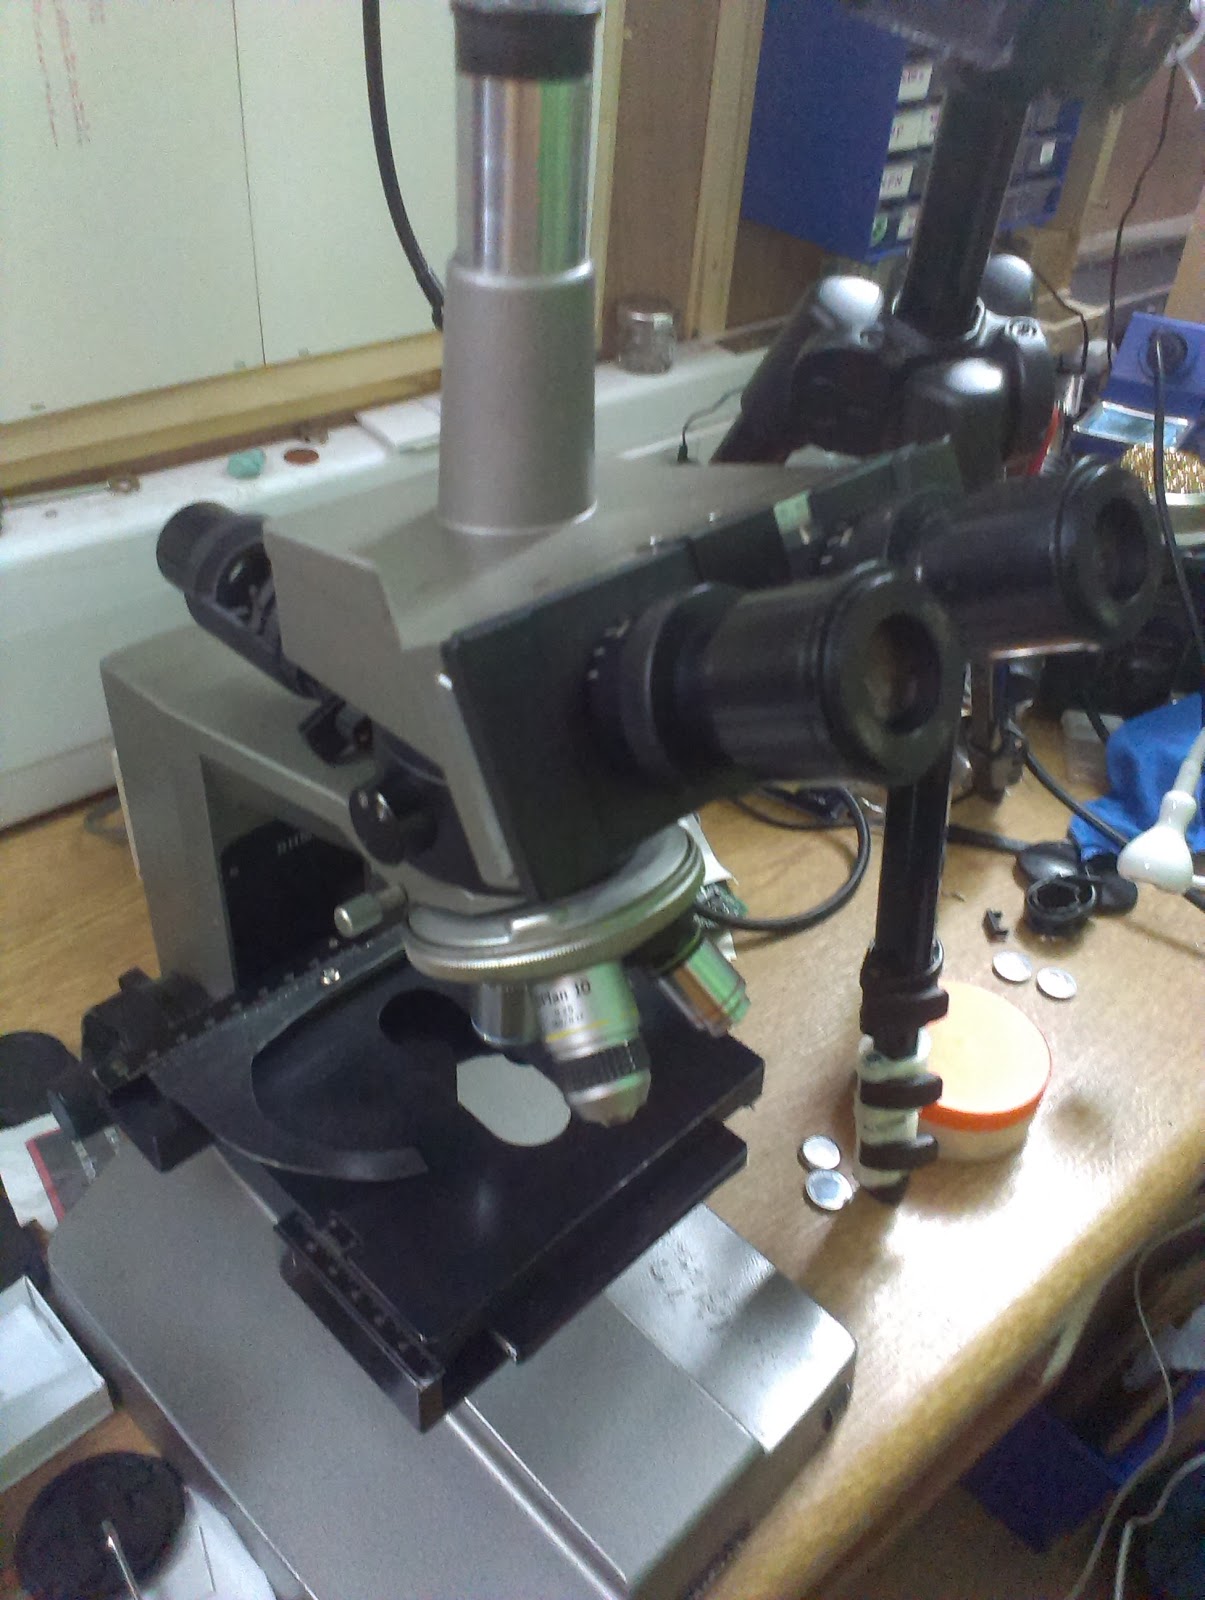
 [Amen] wanted to inspect ICs on the PCBs for suitability for reuse, so he bought a metallurgical microscope that illuminates from above rather than below, since it normally looks at opaque things. It has a working distance of 0.5 mm and 10 mm, which isn’t a lot of room to solder.
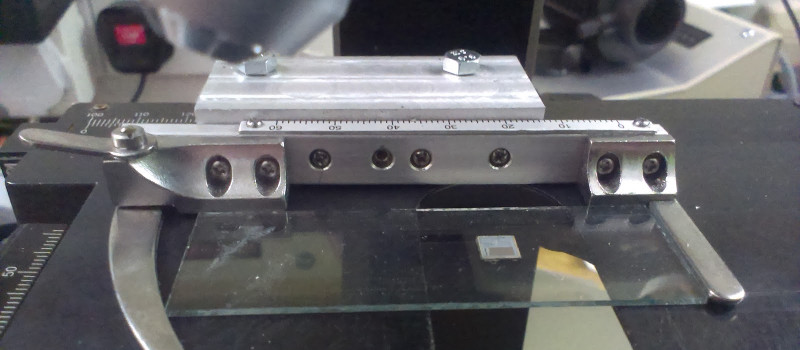
The microscope didn’t come with a slide tray, so [amen] found a cheap one on eBay. Needing a connector block, he melted down some food trays into an ingot, which he then milled down into a block shape, drilled, and used to attach the slide tray to the microscope.
The thing came with a manual XY table, which the operator adjusts by turning knobs. It’s fine for most basic applications but it’s also a pain for more complicated projects, like tiling together a huge photo of a die. [amen]’s currently working on a powered XY based on a DVD drive’s stepper assemblies.
If you’re looking for more microscope projects, read up on the hacked inspection microscope and a Pi Zero ‘scope we previously published.


Given that the microscope seems set up to allow for bottom lighting I would not describe it as a metallurgical scope (though it can certainly be used for that) but more generally as a trinocular stereo microscope. (trinocular means it has the third tube in the center for a camera or fixed single oculair lens. It seems to be set up for through lens lighting, also not a feature I’ve seen much for metallurgy. They tend to use external (ring) lights in my experience as through lens lighting can cause glare on metal parts.
I should add, I’m slightly jealous. I’m on the lookout for a somewhat affordable stereo microscope but I’ve so far never found anything decent for a good price (after accounting for shipping.)
Me too!
How much magnification?
i think your wrong because if you look closely you clearly see an (old style) lamp housing on the tube and i don’t see a condenser or light underneath. i definitely like the new holder.
as far as the article goes stitching together a 5mm*5mm (?) die is not a big deal but obviously it depends on magnification and imaging system ( as in camera and adapter if it has a lens) i see a projection tube/c-mount??? that’s going to be a pretty narrow FoV which means lots of pictures… outch….. next upgrade should be a trinocular head with a large mount (if they exist can seem to make out the brand) should improve FoV drastically. combine that with a DSLR and you have to take about 4 times less pictures. by the way PTgui works very nicely with microscope pictures if you haven’t picked a stitching software yet and its fast (GPU acceleration)
probably a LED upgrade is in order for light strength and evenness. depending on the material properties lighting from the side might work as well.
I have replaced the lamp with an LED version:
https://trochilidae.blogspot.com/2018/01/olympus-bhm-microscope-led-light-bhm.html
I use a GF1 camera on a 3D printed tube and hugin for stitching. A large die will be 200 or so exposures, which is manageable. I really do need an automated Xy table.
This is an Olympus BHM metallurgical microscope. It has no bottom lighting, all illumination is through the lens. I’m not sure how ring lighting would work as the distance between the subject and objective is very small on most objectives I have.
Definitely NOT a Stereo microscope… It is a Trinocular microscope, but not Stereo, as it only uses ONE objective lens at a time. A Stereo(whether binocular or trinocular, has two complete optical paths, one for each of your eyes, and gives you stereo views. This uses a prism to split the light from one objective lens to two eyepieces.
this is a CHC Olympus 1981 style, camera tube, ” lucky sod ” basic xy stage, and stuff here :> http://www.alanwood.net/downloads/olympus-ch-cha-chb-chc-prices-specifications.pdf if you can get one for 400 , buy it, intoday’s tech it is considered a trainer. still useful, easily does plus / minus 15 mm.
It’s actually an old Olympus BHM, but they are similar. I got it for a reasonable price, and everything was working, but I then had to find objectives. The Olympus ones seem to be best, but they can be very expensive. I’ve a collection of old Olympus objectives, and a set of new Indian ones. I tend to use the 10x MPlan objective for dies, then stitch it all together.