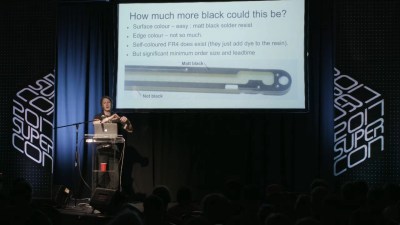
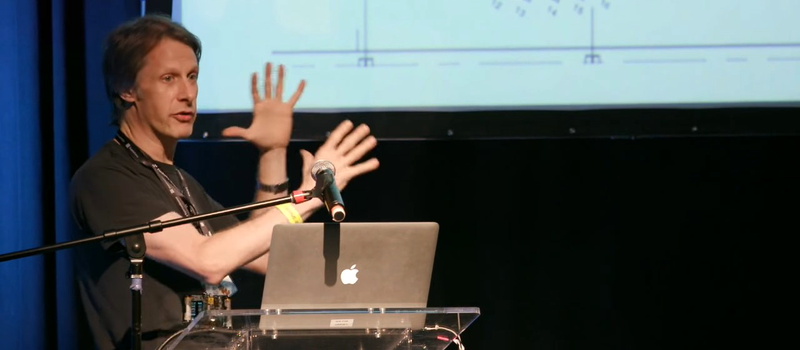
Mike Harrison, perhaps better known to us as the titular Mike of YouTube channel mikeselectricstuff, is a hardware hacking genius. He’s the man behind this year’s Superconference badge, and his hacks and teardowns have graced our pages many times. The best thing about Mike is that his day job is designing implausibly cool one-off hardware for large-scale art installations. His customers are largely artists, which means that they just don’t care about the tech as long as it works. So when he gets together with a bunch of like-minded hacker types, he’s got a lot of pent-up technical details that he just has to get out. Our gain.
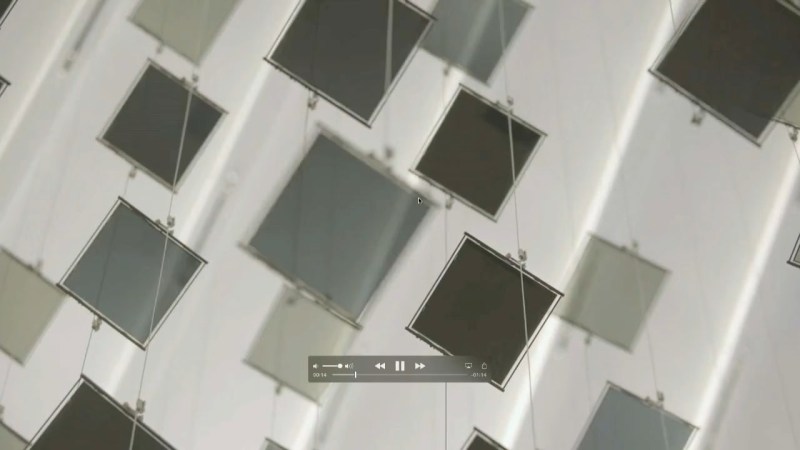
He’s been doing a number of LCD installations lately. And he’s not using the standard LCD calculator displays that we all know and love, although the tech is exactly the same, but is instead using roughly 4″ square single pixels. His Superconference talk dives deep into the behind-the-scenes cleverness that made possible a work of art that required hundreds of these, suspended by thin wires in mid-air, working together to simulate a flock of birds. You really want to watch this talk.
 Did you watch the talk? My favorite mechanical trick that Mike shared was the way he held the LCDs between two PCBs — milling a winding path through them with a 1.6 mm milling to tightly clamp down on the 1 mm thick LCD glass. Getting a black PCB is easy enough, but how do you get black FR4? Well, you could custom order it at great expense, or you could use (wait for it) a black Sharpie marker.
If you’ve never played around with LCDs before, scroll back up and watch the talk, because he also presented tons of details about the electrical requirements of doing so. LCD panels need AC drive, which for ICs that run on a single-sided supply means reversing the drive direction somehow. Mike was able to use a simple microcontroller with a PWM and inverted PWM signal to generate the “AC” and allow for beautiful greyscale on the LCD pixels. Bet your calculator doesn’t do that. (But it could!)
A lot of the details of the design were driven by the fact that these pixels needed to “float” in mid-air. To achieve this effect, they were suspended on two stainless steel wires, and the data and power were sent down the same lines. With up to five meter long wires, Mike was afraid of the data being sent down them radiating out from these unintentional antennas, as well as interference coming in. A 20 kHz Manchester encoding delivered the data. This is a win because it guarantees the maximum possible length of time between positive pulses, which is important because these pulses keep the devices powered. The resulting circuit is so well thought-out that every part is crucial to its success, and is a beauty to behold.
Installation of a large-scale piece like this could be a logistical nightmare. This is not Mike’s first rodeo. He designed in features like power and data OK LEDs that are visible from the vantage point of an installer, making it possible to individually troubleshoot each row of LCDs at a glance.
 One of the deepest tips is how Mike maps the device ID of each panel into the controller that needs to know about their physical location. The hard way to do this is program device number one, hang it, program device number two, hang it, and repeat. It’s a bookkeeping nightmare. Instead, the installer presses a “button” on a single device, the controller sends the address down the bus, and the device accepts that address as its own. This means that the addresses can be assigned after everything is set up, which also makes replacement a piece of cake. But the real beauty of this system is the “button” — a tactile switch, magnetic sensor, light sensor — you can use whatever input you’ve got on the node. Mike built an installation that already had accelerometers built in, and tapped each node to lock in the IDs.
Here, none of these were a good match for the minimal hardware on each panel and the high-in-the-air nature of the setup. Mike wanted a system that could be deployed on the end of a pole, but that wouldn’t require electrical contact, which meant something like capacitive sensing. Rather than rely on the tiny capacitive changes of a finger, he mounted a CCFL inverter on a stick, and the LCD panels detected the resulting field. The final touch was that the controller could sense the current each node used, so the LCD pixel could signal that it had received the new ID and the whole procedure could proceed at the speed that someone could wave the wand over the panels. Very slick.
It’s always a pleasure to hear Mike speak on what he’s truly passionate about — clever solutions to hardware problems. I learn something new, and useful, every time.


Aww man, I’m pretty sure he said he was going to talk about software! Would have loved to have seen how he handled these 3d objects!
Really cool stuff though, that talk was worth a watch.
Content was my customer’s problem. They have ways of extracting data from the 3D model to do the pixel mapping. Not sure what tools they use.
your works remind me of the electric efforts done 80 years ago..
38 x 27 array driving 4,104 six-watt bulbs for 720 sq.ft. (67 m²) display.
projecting film onto photoelectric cells for massive/dynamic public consumption
[Douglas Leigh + EPOK signs]
https://imgur.com/a/ehsAP
looped film projection as well as live persons’ (dancing) shadows were employed.
That was how it was originally done. This same layout (38 x 27 photocells for a 76 x 54 display) was also in use for an advert for Old Gold cigarettes outside the Hotel Cadillac (next door to the Claridge) prior to its 1940 demolition – and a smaller one (50 x 40 display, 25 x 20 photocells) for Wilson whiskey at Broadway between 46th and 47th Streets, next door to the Palace Theatre. In late 1940 the 76 x 54 display was settled at the corner of 46th and Broadway (with Wilson as the first to advertise there) for the next 36 years in terms of operational span – and the photocells actually now matched the array (76 x 54). The last product to advertise on the Leigh-EPOK display was Carlton cigarettes, from 1976 to January 1977; it was rendered obsolete the month before (December 1976) by the newer four-color (red, blue, green and white) Spectacolor display mounted above the ‘zipper’ at One Times Square that would be in operation through 1990.
Beautiful data-over-power (w/response) design. Minimal components. Absolute genius.
In fact, I have been there in summer holiday.
It is an impressive installation, funny to see it mentioned at HaD.
Two things: where do I get 100 cm² LCD panels.. Conductive epoxy, are there any thing one should be aware of when using that, I guess the LCDs are so low power it doesn’t really matter.
Now that I’ve watched it all I think I have more questions than answers.
One small thing that I often see in other projects as well; as a network guy, I think I would rather just think of each display as an node with an IPv6 address, and the do the physical mapping in software (i.e. hostnames) stateless configuration is a big time saver during setup. If something with the current setup breaks in the feature they could probably save time by implementing that in software reflash all the chips, instead of using that manual hardware toold to assign ID. I’ve often wondered why this obsession with setting static IDs manually by touching physical objects is so strong, may be it’s a human thing.
Sorry for all spelling mistakes. :-/
Assigning unique IDs to all nodes would be another way to do it (Though I don’t think Microchip’s pre-programming service doesn’t support serialisation at lower volumes) , and possibly a better way for a larger setup, but less general-purpose as you still need some way to map the physical position to an address, and you also need to take into account how you deal with replacement of nodes for maintainance,
The address size /bandwidth issue can be handled by doing some logical-physical address translation at some point.
As MobiusHorizon says auto assigning random ids, the good thing is not having to use a special tool for programming the chips.
If you had an auto-assigned id, you would still have to manually map those id’s to physical location, which is arguably just as hard as manually assigning id’s the way mike did. It would be less preparation however.
ooh! this is beautiful!
Oh maaaan, Mike you always amaze me, but this time you have really outdone yourself. One can learn so much from you, especially all the little details! In particular, I really liked the addressing procedure, genius! Although, the mechanical stuff is excellent too. Thank you very much for all of this!
You have an impressive way of doing the hard work up front to make the correct things easy. I love hearing about your solutions, they are inspiring.
Anyone got a link to where I can see more of a final product?
Tried searching “wildlife information centre denmark bird flying LCD” and it didn’t work :D
Search for “Digital Ornithology”
That worked, thanks ;)