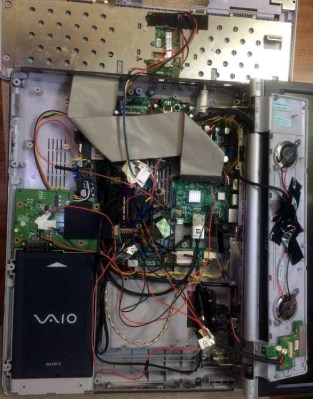
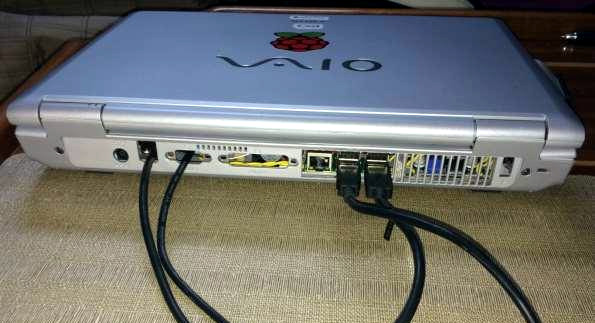
Early in November we took a look at a one of the best Raspberry Pi laptops we had ever seen, using the shell of a Sony VAIO. Laptops used to be hulking beasts, and that played into [Frank Adams’] hands as he got rid of the motherboard and had enough space to replace it with a Raspberry Pi and a few other support boards. This took advantage of the laptop’s screen, keyboard, LEDs, etc. But what’s a laptop without battery power? [Frank] hadn’t cracked that nut until now.

Adding battery power is trickier that it sounds, but [Frank] managed to get the Raspberry Pi to talk to the original Sony VAIO internal battery. His work on the project is shared, but this part of the story is best found starting on page 29 of his PDF project details.
Using the original battery is a good move since it’s designed to fit and has a charger ready to interface with the port on the laptop case. But these batteries have logic inside them, and there’s the rub. Communications use the 2-wire System Management Bus (SMBus) which is well documented. But the when trying to use the Pi’s I2C [Frank] couldn’t figure out to send a repeated start command.
He ended up writing his own C program that bit-bangs the communications he needed and now has the Pi speaking to the battery and listening to what it hears coming back. Reading through his description of this is fun since he includes his observations from a logic analyzer captures. He suspects an occasional bad read is due to Linux interrupting code execution. He watches for and catches these bad reads in software and can now reliably read all the battery vitals.
The hack leaves him with a system that functions in much the same way the original computer did: plug it in and it charges. He did add some hardware that lets him take a voltage reading from the battery using an ADC on the Teensy that was already present to control the keyboard and case LEDs. This adds a small constant draw on the battery, but for now he doesn’t leave the battery connected when the laptop is not in use.
If you’d like to read our original coverage of this laptop, here it is.


>But the when trying to use the Pi’s I2C [Frank] couldn’t figure out to send a repeated start command.
Blegh. Peripherals. You’d think something like the Raspberry Pi would have this sort of thing worked out, but you never know where you’ll find quirks and small hardware errata. It seems like it’s always the peripherals where those end up.
Hey, does this sound familiar? “Errata: In order to , must be set.”
Huh, it ate my pointy brackets. Well, fill in the blanks: [I2C/SPI/USART] \ [Completely unrelated bit in some random-ass register]
Well done… at least now he has working I²C. The I²C master on the Raspberry Pi is an idiosyncratic beast, so I wouldn’t be surprised if the chip isn’t “doing it right”.
Maybe now that he got it to “work”, optimising using the
i2c_gpiokernel driver might be the next logical step:https://raspberrypi.stackexchange.com/questions/37796/how-to-use-i2c-gpio-with-raspberry-pi
It funny But it does seam like The I2c,SPI and all the other special I/Os systems all have major Problems.
You would think that they would be working by now.
Me my self I really like using I2C. But on the PI it is a real pain in the behind. one way or another.
Nice work here. I will be looking more closely at what you did with the I/O’s to get them to work better.
I was think of using a DAC interface for voltage readings as well, But I had the same problem of it eating up battery power as well.
Why? The Pi is not designed or advertised as a mobile platform. My desktop computer doesn’t have the hardware to read the state of an attached battery either, but I wouldn’t expect it to either.
When you’re selling these things for as low as $5, adding unnecessary chipsets/hardware is simply a no-go.
Well, other than USB and hdmi there isn’t much on the pi that needs 5v.