Back before we all pirated FruityLoops, before ProTools, and before VSTs and DAWs, audio recording was much, much cooler. Reverbs were entire rooms. Sometimes they were springs. Sometimes, in the high-end music studios, reverbs were plates. These plate reverbs were simply a gigantic sheet of metal mounted in a box about ten feet long, four feet high, and a foot thick. Inside, you had some transducers, some pickups, and not much else. Send a signal into the plate reverb and it will bounce around on this flexible membrane, and emerge through the output in a suitably reverberant form.
Of course, very few places have a plate reverb anymore because they’re gigantic and expensive and software effects are small and cheap. That doesn’t mean a plate reverb is made of unobtanium. [Leo] just made his own plate reverb out of Ikea shelves and some simple electronics.
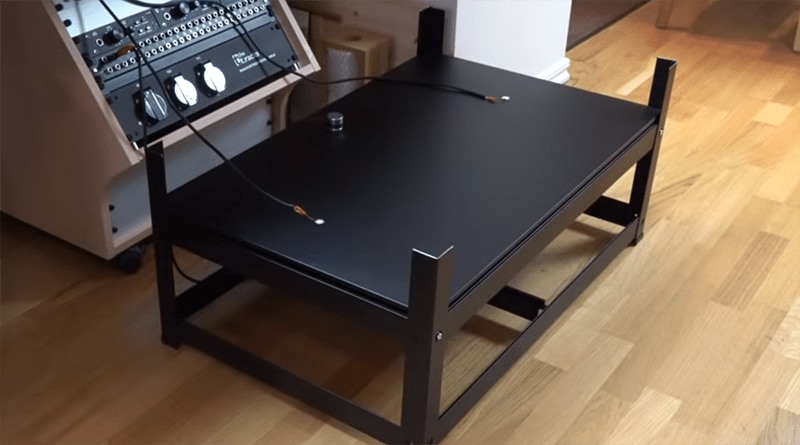
This build used an Ikea Bror shelving unit that cost about $50 sans meatballs. The electronics are a surface transducer and two piezo pickups. Total cost was about $100. That’s all that’s needed to put this plate reverb together, but the real trick is making it work as a reverb.
The plate is driven by the audio output of [Leo]’s computer, through a battery-powered amp, and into a transducer. The transducer is then simply placed on the metal shelf. The two piezo pickups are placed on either end of the shelf, with one going to the right channel of one input, the other going to the left channel of the same input. From there, it’s a simple matter of using this Ikea shelf in an effects loop.
From the video below, the setup absolutely works. [Leo] is playing a few drum loops through the reverb, and the results sound like they should. There’s also a neat trick in using a shelf as a reverb; by placing a rag or a cardboard box on the shelf, the reverb is dampened allowing you to ‘mix’ this reverb in real time.


Plate reverbs also never sounded all that good. Best electromechanical reverb I have ever heard was the AKG BX20 with it’s torsion spring and servo controlled damper.
Yeah, this sounds to me like exactly what it is: banging on a thin metal shelf.
I mean lo-fi has a deserved place in the world. We’re not all playing Bach on our harpsichords here.
Awesome! Banging metal!!!
A properly-tensioned EMT plate reverb sounds pretty sweet – lots of “sheen” and sparkle, decently long reverb time. Better than any spring I’ve ever heard, including the BX.
Nonetheless, the OP is a pretty neat experiment, and it really adds life to some digitally-generated sounds.
All the springs I’ve seen are torsion driven by a cylindrical magnet. Most are voltage driven some are current driven which sounds much better. Lookup “hot springs reverb radio-electronics”. I’ve made a few with Acutronics units pulled from many junked organs. Currently putting a pair of three spring units in a small studio board. Carvin did it right, I copied the existing one for the other channel.
See also: SAW filter.
About 1974, Elementary Electronics had a reverb project, of note because they used a garden hose, a speaker at one end, a microphone at the other. I suppose some of these things worked because the output wasn’t used alone, but mixed with the original signal, presumably just a small portion of the delayed signal mixed in.
Of vourse, the catalogs carried reverb springs for the car, I never saw comment on how they were isolated from jolts from the car.
Michael
Plates were the top sound in many a hit in the mid century. A spring reverb is mono, kinda oxymoron. Even more hits were made this way though. Two spring reverbs do not make a single stereo “hall”, but 2 or more pickups (quadraphonic!) on a single plate can be a lush stereo complex of sound reflections. I tried once to drive a cheap spring unit with a third center magnet and poles and the two end transducers being stereo out. It wasn’t too bad of a stereo image but too short of a delay overall and it had magnetic direct coupling straight thru.
The sound of this is like a tom or a snare less snare drum. Not bad on it’s own. Get a fresh undamaged sheet of mild steel unpainted and suspend it vertically with holes near the edges on lengths of piano wire in a frame where there is little damping and no rim damping. Go to a sheet metal fabricator around you, damage and wrinkles will kill the sound. That’s why they score an X onto broad sections of ductwork, to stop spooky furnace reverb effects. Then there are fridge racks and oven racks of welded wire construction for alternate reflective devices to experiment with, oh! and a big tub of Goop the hand cleaner. The Goop has a gel and mass that shrinks things from chamber size down to hand sized, we could get into 3D space here not just a plate!
I would use electret condenser mics as they work well as a contact mic and have less mass (as small as pencil eraser end) and full range response. Piezos are caps and have a rising response, nil bass just tinny sound. To drive the plate take a speaker apart and glue the voice coil onto the sheet. It has little mass to dampen things compared to the magnet and steel half. The trick is suspension of the sheet which includes wires on the sides and bottom. Then the magnet end is X and Y adjusted to not rub on the coil whilst driving it. You could also try driving it the way the old iron diaphragm headphones worked, planar drive. No contact just close but flat with both poles at the plate surface. It takes a U or m shaped core and a polarizing magnet or 2-3 on each pole in series with the core field. Saw or separate into E’s and I’s an old speaker transformer or a wall wart and use the low voltage winding, little disc magnets on the ends of the E and go.
Look up “hotsprings reverb” for the best way to drive an inductive load, it’s sigma drive. The driver coil is in the – feedback path of a moderate power opamp. I did this and the sound is so much better than just driving the coil as an open ended load. Murky and boingy, versus clear and uncolored even on speech though in lush fullness even when totally a wet mix. It’s the thing that puts a vocal or solo in a good bed of it’s own making.
IIRC, back in the day when plate reverb was popular, it took a robust frame because the plate was under fairly high tension, and the thing wasn’t driven in “drumhead mode”; the signal was input and output in the plane of the metal sheet. There were reflections at the edges due to the impedance mismatch between the sheet and the air, enriching the effect. The pickups were rarely positioned symmetrically.
Thanks for posting this. I’ve always wanted to try a plate reverb, but was put off with the major welding job. I ended up using the Ikea metal frame attached to some plywood and suspended a 3×5 sheet of 26 gauge tensioned rolled steel inside. It sounds great! Here’s to experimental DIY.