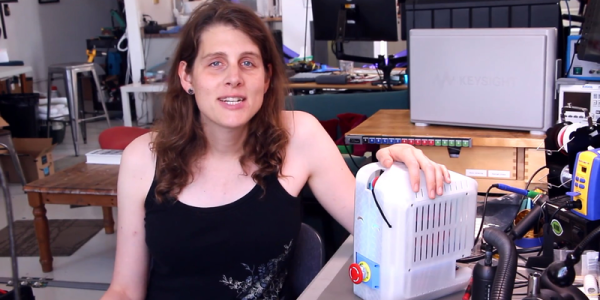
Stereo Recording Made Easy With A 3D-Printed Mount

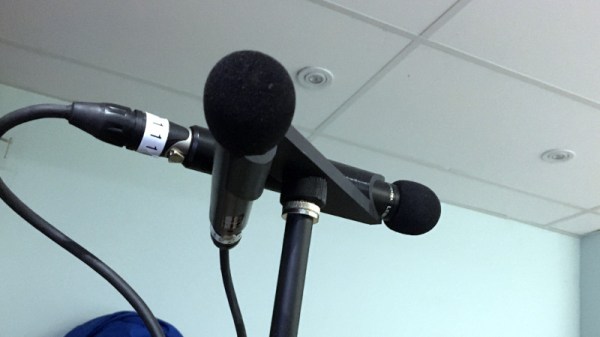
When making a recording it can be surprisingly difficult to capture a good stereo image. A well-known technique is the ORTF microphone arrangement in which two cardoid microphones sit at 110 degrees to each other and 17cm apart, and thus pick up a readily reproducible stereo separation. It’s something that we’ve been known to do in our student days with a pair of Shure SM58s and a stack of Post Office elastic bands, but [marsairforce] has done a much nicer job with a very neat 3D-printed microphone clip.

Designed in OpenSCAD, the first iteration printed on a resin printer proved to be too brittle for the task, so a second version was printed on an FDM machine. This incorporated significant strengthening, as well as a screw mount for a microphone stand. The result is an extremely useful and cheap addition to any recording set-up, and anyone who has wrestled with achieving a good stereo image will appreciate it. You can see some of what went into it in the video below the break.

If this is your field of interest, you might also wish to look at a binaural microphone.

Continue reading “Stereo Recording Made Easy With A 3D-Printed Mount”

Paper Cup Mic Is Fun And Functional

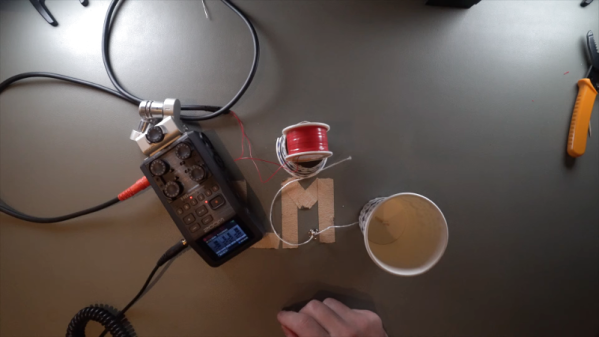
Any studio operator worth their Protools subscription will have a wide array of microphones to cover any conceivable situation. SM57s to cover guitar cabs, fancy gilded ribbon mics for vocal takes, and a variety of condensers to round out the selection. That’s all well and good for high-fidelity recording, but what if you want to go the other way? [LeoMakes] has just the thing, with his sub-$10 paper cup mic.

The basic concept is that of a dynamic microphone. A paper cup is attached to a taut string, upon which a magnet is affixed. Sound waves hitting the paper cup cause the string, and thus the magnet, to vibrate. The magnet is located within a coil, created from thin insulated wire wrapped around an old solder spool. This induces a current, creating the audio signal.

Results are as lo-fi as you’d expect, with the exact character of the sound changing depending on the tension of the string and the exact materials used. It’s a fun project that can be tackled with cheap materials, and there’s scope to create all manner of wacky mics by varying the parameters of the build. If you’re doing this more than once, however, you might want some help winding the coils — let this project be an inspiration. Video after the break.

Continue reading “Paper Cup Mic Is Fun And Functional”

Build A Plate Reverb From Ikea

Back before we all pirated FruityLoops, before ProTools, and before VSTs and DAWs, audio recording was much, much cooler. Reverbs were entire rooms. Sometimes they were springs. Sometimes, in the high-end music studios, reverbs were plates. These plate reverbs were simply a gigantic sheet of metal mounted in a box about ten feet long, four feet high, and a foot thick. Inside, you had some transducers, some pickups, and not much else. Send a signal into the plate reverb and it will bounce around on this flexible membrane, and  emerge through the output in a suitably reverberant form.

Of course, very few places have a plate reverb anymore because they’re gigantic and expensive and software effects are small and cheap. That doesn’t mean a plate reverb is made of unobtanium. [Leo] just made his own plate reverb out of Ikea shelves and some simple electronics.

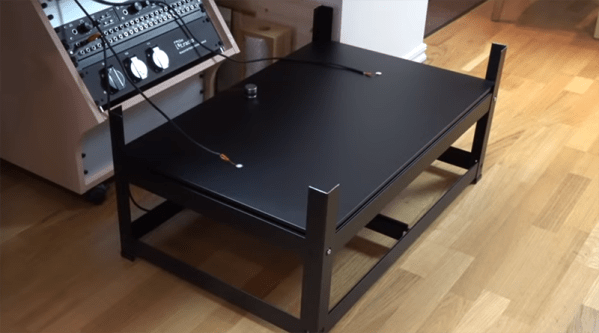
This build used an Ikea Bror shelving unit that cost about $50 sans meatballs. The electronics are a surface transducer and two piezo pickups. Total cost was about $100. That’s all that’s needed to put this plate reverb together, but the real trick is making it work as a reverb.

The plate is driven by the audio output of [Leo]’s computer, through a battery-powered amp, and into a transducer. The transducer is then simply placed on the metal shelf. The two piezo pickups are placed on either end of the shelf, with one going to the right channel of one input, the other going to the left channel of the same input. From there, it’s a simple matter of using this Ikea shelf in an effects loop.

From the video below, the setup absolutely works. [Leo] is playing a few drum loops through the reverb, and the results sound like they should. There’s also a neat trick in using a shelf as a reverb; by placing a rag or a cardboard box on the shelf, the reverb is dampened allowing you to ‘mix’ this reverb in real time.

Continue reading “Build A Plate Reverb From Ikea”

Winch Bot Records Hacks And Cats

Some people are better than others when it comes to documenting their hacks. Some people, like [Micah Elizabeth Scott], aka [scanlime], set the gold standard with their recordings. Hacking sessions with the Winch Bot have been streamed regularly throughout the build and this is going to lead to a stacking effect in her next projects because the Winch Bot was designed to record hacking sessions. Hacking video inception anyone? Her Winch Bot summary video is after the break.

The first part of this build, which she calls the Tuco Flyer, was [Micah Elizabeth Scott]’s camera gimbal hack which we already covered and is a wonderful learning experience in itself. She refers to the gimbal portion as the “flyer” since it can move around. The Winch Bot contains the stationary parts of the Tuco Flyer and control where the camera will be in the room.

Continue reading “Winch Bot Records Hacks And Cats”

Blue Ribbon Microphone

Edmund_Lowe_fsa_8b06653If you’ve ever seen an old movie or TV show where there was a radio announcer, you’ve probably seen a ribbon microphone. The RCA 44 (see Edmund Lowe, on right) had exceptional sound quality and are still valued today in certain applications. The name ribbon microphone is because the sound pickup is literally a thin strip of aluminum or other conductive material.

Unlike other common microphones, ribbons pick up high frequencies much better due to the high resonant frequency of the metallic ribbon. This is not only better in general, but it means the ribbon mic has a flatter frequency response even at lower frequencies. Another unique feature is that the microphone is bidirectional, hearing sounds from the front or back equally well. It is possible to build them with other directional patterns, although you rarely see that in practice.

Invention

In the early 1920s, Walter Schottky and Erwin Gerlach developed the ribbon microphone (and, coincidentally, the first ribbon loudspeaker). Harry Olson at RCA developed a ribbon mic that used coils and permanent magnets which led to the RCA Photophone Type PB-31 in 1931. Because of their superior audio response, they were instant hits and Radio City Music Hall started using the PB-31 in 1932. A newer version appeared in 1933, the 44A, which reduced reverberation.

Continue reading “Blue Ribbon Microphone”

A Pi Powered Recording Studio

In the mid-90s, you recorded your band’s demo on a Tascam cassette tape deck. These surprisingly cheap four-track portable studios were just low tech enough to lend an air of authenticity to a band that calls itself, ‘something like Pearl Jam, but with a piano’. These tape decks disappeared a decade later, just like your dreams of being a rock star, replaced with portable digital recording studios.

The Raspberry Pi exists, the Linux audio stack is in much better shape than it was ten years ago, and now it’s possible to build your own standalone recording studio. That’s exactly what [Daniel] is doing for our Raspberry Pi Zero contest, and somewhat predictably he’s calling it the piStudio.

Although the technology has moved from cassette tapes to CompactFlash cards to hard drives, the design of these four-track mini recording studios hasn’t really changed since their introduction in the 1980s. There are four channels, each with a fader, balance, EQ, and a line in and XLR jack. There are master controls, a few VU meters, and if the technology is digital, a pair of MIDI jacks. Since [Daniel] is using a Raspberry Pi for this project, he threw in an LCD for a great user interface.

As with all digital recorders, the money is in the analog to digital converters. [Daniel] is using a 24-bit, 216kHz, four-channel chip, Texas Instruments’ PCM4204. That’s more than enough to confuse the ears of an audiophile, although that much data will require a hard drive. Good thing there will be SATA.

Although you can buy an eight-channel solid state recorder for a few hundred dollars – and [Daniel] will assuredly put more than that into this project, it’s a great application of a ubiquitous Linux computer for a device that’s very, very useful.


Raspberry_Pi_LogoSmall

The Raspberry Pi Zero contest is presented by Hackaday and Adafruit. Prizes include Raspberry Pi Zeros from Adafruit and gift cards to The Hackaday Store!
See All the Entries || Enter Your Project Now!

Aquire Awesome Audio For BeagleBone

[Henrik Langer] put his powerful audio acquisition and output board up on Hackaday.io, and we thought we’d point it out to you. It’s one of those projects that used to be pro audio just a few years back, but is doable (and affordable) DIY today: dual stereo inputs and four(!) stereo outputs, all sampled at 24 bits and up to 192 kHz. It’s configured as a BeagleBone cape, and comes with a customized Linux distribution for the ‘Bone.

What would you do with such a thing? It’s essentially a recording studio in your pocket, with a computer attached. The video (linked below the break) demonstrates using the device as a real-time stereo delay effect unit, but that’s only making use of one channel. Between effects, recording, and then all sorts of much-better-than-CD quality sound synthesis and playback possibilities, it’s an open-ended audio playground.

And all that from what is essentially a (very well-done) breakout board for a fancy DAC/ADC chip from Analog Devices: the AD1938. We’d love to have one of these on our desktop. Check out [Henrik]’s GitHub for the PCB and build instructions and BOM and everything else you’d need to get started. Very nice job!

Continue reading “Aquire Awesome Audio For BeagleBone”