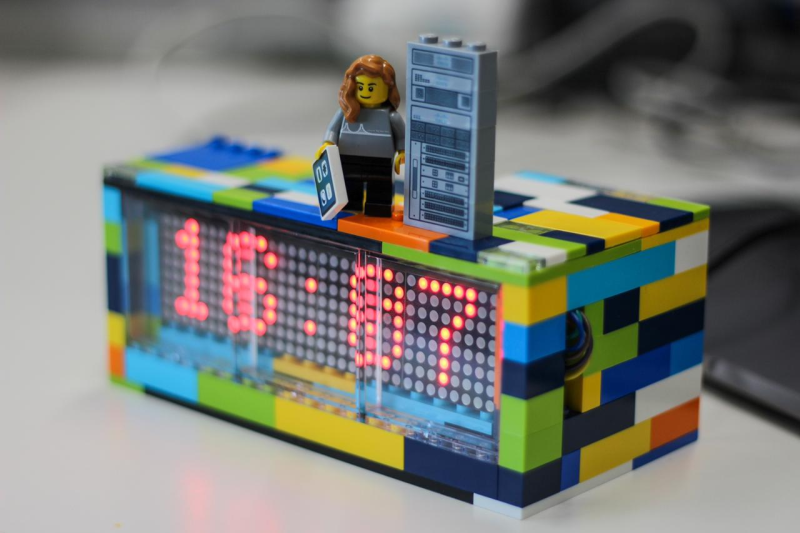
[Sofia] spent a lot of time looking around for the perfect LEGO clock. Eventually, she realized that the perfect LEGO clock is, of course, the one you build yourself. So if you find yourself staring at the same old boring clock, contemplating time and the meaning of time itself, why not spend some time making a new timepiece?
You probably already had the LEGO out (no judgment here). This build doesn’t take a whole lot of building blocks — just a microcontroller, a real-time clock module, some LED matrices to display the digits, shift registers if they’re not already built into the matrices, and a pair of buttons for control. [Sofia] used an Arduino Nano, but any microcontroller with enough I/O ought to work. Everybody needs a colorful new way to block out their time.
We love the way this clock looks, especially the transparent panels in front of the LED panels. Given the countless custom pieces out there from all the special sets over the years, we bet you could come up with some really interesting builds.
If your kid is too young to tell time, try building a kid-friendly clock to give them segmented structure.
Via r/duino


Nice work
I thought your making a moving analog clock from lego that would be more fun.
Also bread board it jumper cables look ugly.
I always wondering, why RTC is required for a simple Arduino (or PIC) clock project. The Arduino (or PIC) itself could count the time, setting an interrupt routine at 0.5 sec (1 sec would be enough, but 0.5 sec for blinking the colon :-)).
Does it keep time when unplugged ?
>simple Arduino
Note the demographic.
I prefer to write the RTC in firmware as it give me a bit of control and feature. I have implemented day light saving time, calendar with leap year and accuracy adjustment (using 24-bit NCO) in a couple of my clock projects.
They aren’t that big either as the firmware only takes up around 4kB.
https://hackaday.io/project/169509-a-very-accurate-led-clock
Some of my projects uses ARM microcontrollers with built-in RTC. Can’t beat the power consumption in power saving mode, but it gets more messy to have to add those extra features not supported by RTC across resets/power down.
In general using an external serial rtc is simpler in terms of the accuracy to effort ratio. Sure you could run an interrupt based rtc if the overhead is acceptable for the application and you can always tune to minimize drift/offset, but dealing with things like temperature variance and longer term aging of the main oscillator adds some complexity that is just already accounted for with most respectable external rtcs. In the end what path you go down really depends on the application and how taxing the rest of the software is on the available resources.
For instance say you have to bitbang video output on a low end micro so you really cant afford to periodically interrupt and miss sync pulses. In this case it’s much easier to just throw an external rtc and read/write to it in the front/back porch rather than juggling multiple interrupts that run asynchronously and must not interfere with each other for proper operation.
A simple Rpi Zero W that goes out and snags internet time works as long as there is internet connection. Power goes out, no display; power comes on, display comes on and time is updated. https://www.ai6xg.com/post/big-font-clock-relieve-for-old-eyes