Printed circuit board fabrication — especially in basements and garages — have been transformed by the computer revolution. Before that, people would use a permanent marker or little decals to layout circuit boards prior to etching. Sometimes, they’d do it on film and use a photo process, but they did make decals that you applied directly to the board to resist the etch. Now a team from Georgia Tech, University of Tokyo, Carnegie Mellon, and the University of Nebraska has brought things full circle. Their process inkjet prints silver traces on a substrate that they can then transfer to a circuit board — no etching required.
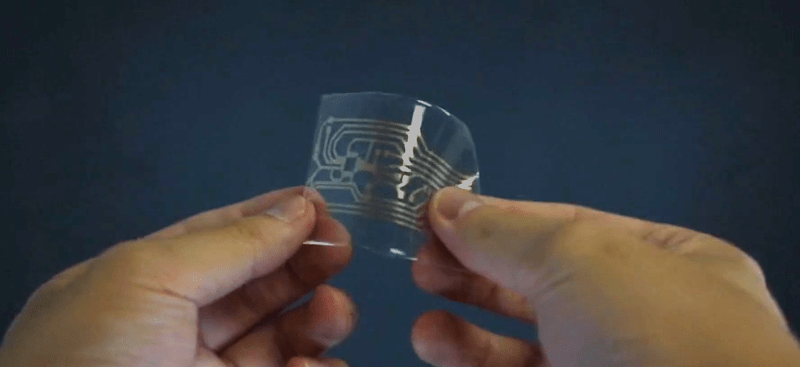
They start with a standard Epson inkjet with cartridges that have silver-bearing ink. The patterns print on a transfer paper that ensures the particles fuse so there’s no sintering step required to make sure the traces are all conductive. A sticky backing is applied and peels the pattern off the transfer paper. You can see more in the video below.
We don’t know what the cost of the ink is, but considering the excessive cost of regular ink we aren’t sure if we think it couldn’t possibly cost more even if the cost were astronomical. The paper talks about many different substrates depending on what you need. For example, they can transfer the pattern to Kapton.
We looked up the ink and found the following from the manufacturer:
Please note : Printing on other substrate such as glass, PCB, polyimide film other than Special media results in poor adhesion and no conductivity.
The trick, then, is in the paper. For the most part, the team used glossy photo papers from Kodak, Fujifilm, or Epson. They also printed on a PET film.
We’ve seen this ink before, but not using the transfer paper. You could also try your hand with homemade ink.


You laser print patterns onto tracing paper (not overhead film), then UV expose and etch as normal.
I’ve seen someone apply either baby oil or vegetable oil on a clean fr4 and place the paper circuit on the board. Press out the oil carefully then like you mentioned UV for about 4-10 minutes.
PET film… that is going to require low temperature solder, yes?
You just need to print it 10x the size and have 6 people frantically soldering it at once as it rapidly shrinks.
But it’s the transfer medium anyway.
How about shrink em first, then solder? After the shrinky dink is done, you should be able to solder onto thickened plastic for more than 1/2 second without melting a hole.
Getting the perfect enlargement first and shrinking them to correct size for component would be a challenge though
If this is just simple circuit you can use anisotropic tape, eg 3M 9703
Isn’t it going to be tough nowadays to find Commodore PET film?
Would Amiga film work as well?
Amiga film would work much better, but alas, poor marketing doomed it to an early death, only to be continually supported by a devoted cadre of retro film lovers.
The resistance will make it futile.
You’ll have to adapt, because of the uniqueness.
Woosh!!
🤣
Very promising. Will be interested to see it progress. How much for the ink though?
I’m honestly wondering when someone’s gonna simply outfit a shallow ‘3d’ printer with a conductive filament that is reliably printed, not $100 usd a spool, and can be forced through a sub mm sized nozzle with the gates wide open. I’ve seen some interesting attempts at this, but it always bugged me that PCB really isnt what the acronym claims. It just has to be possible.
I reckon it’ll happen when we no longer need heat to solder. Just stick the parts down with a conductive adhesive, possibly the same stuff used to print the traces, and wait to dry/bake dry/chemical dry or whatever.
This is already done commercially and presumably there will be some affordable dispensing system for this along the lines of the Volterra: https://www.masterbond.com/techtips/conductive-epoxy-replaces-lead-soldering
We have had trouble in the RFID world with the epoxies…Not totally there yet.
Here is one: http://www.fortex.co.uk/product-category/rapid-pcb-protoyping-centre/
PCB is precisely what the acronym says: you print the boards in the same way you print photographs.
Or screen print the resist on which is an old technique.
The ink is expensive – much more expensive than Epson tank ink. It’s the same kind AgIC was selling in 2014 and the results will be the similar – The nanoparticles aren’t sintered despite the abuse of terminology. Sintering requires heat or pressure. I used these inks for a while and noticed the traces can be quite resistive and the real problem is that the resistance goes up over time – even when they aren’t stressed. They are good for rough prototypes of touch sensors or antennas but not much else. AgIC gave up and pivoted. They now print the ink and then electroplate over the top: https://www.elephantech.co.jp/en/
*Electroless plating; a purely chemical deposition process instead of being driven electrically. I’ve used the process with a nickel catalyst.
“The ink is expensive – much more expensive than Epson tank ink.”
So, in other words, it is probably a lot cheaper than HP ink.
With some more research we can quantify this: $323 25ml https://www.sigmaaldrich.com/catalog/product/aldrich/901083?lang=en®ion=US or $70 for 30g of conductive polymer inkjet: https://www.ebay.com/itm/273107726912
It’s funny because these news keep resurfacing as something never seen before, but we had a kickstarter back in 2014 for a conductive inkjet cartridge and at least one company is selling conductive inkject cartridges (at about 120$ per cartridge).
I wish it WAS funny. Deeper research behind these articles is the answer. I have a book on screen-printed electronics from way back in the last century.
From my experience there is a lot of factors to consider. You also need specific PET foil to use with specific silver-ink not to mentiond the specific printer nozzle size. There is a company https://store.novacentrix.com/ which sells whole set that will allow you to start with PET printing. They have the cheapest ink I could find – 50g/250$
Huge amount of (mostly UHF) RFID tags are manufactured using this stuff.
THanks. That is the same ink from Mitsubishi that AgIC and most other folk are packaging. nanoparticle silver. Is it 50ml or 50g? I can’t be sure from their website.
FWIW: India Ink (the real colloidal-carbon stuff for brush work, not the dye-based fountain-pen faux-india-ink type) is quite conductive and moderately tough when dry. It’s pretty thin so you won’t be pushing an amp through it, but it’s excellent for signals and static shielding and guarding applications.
You can’t use it in an inkjet though, for the same reason you can’t use it in a fountain pen: It clogs the nozzle promptly.
Why silver? It oxidizes (tarnishes) far too readily. Perhaps the ink medium prevents that somewhat, but the note about about resistance increasing over time would seem to make that unlikely.
Because it’s significantly easier to create conductive nanoparticles of silver than copper, the properties of copper change at that scale, oxidation of pure copper particles isn’t a ton better than silver, and the lack of tarnishing in typical copper traces is due to specific alloys more than pure copper.
Reminds me of “Z80 on Glass” from ~20 years ago.
http://z80.info/sharp/z80_glas.htm
Somewhere in my basement, I have some multi layer old CMOS boards that were printed by running physical wires. You can see the traces are actually fine wires that were laid down on plastic and then apparently baked into a sandwich. I could envision using a 3D printer co-opted to do the same thing when outfitted with an electrically operated cutting device and spot welder that deploys fine wire in place of the usual heated nozzle. A sticky board with prefabricated SMT chip pads is placed on the printer bed, then then wires are run and and spot welded to the chip pads. When the circuit is done, place in an oven or maybe expose to UV light to set the sticky surface into hardens plastic.
Once you get a conductive trace, you can theoretically plate it to get a lower resistance trace. That extra step kind of kills it though, you might as well do UV and trasparencies if you’re willing to fuss with it..