Redditor [No-Championship-8520] aka [Eric Potempa] has come up with an interesting DIY take on the Continuous Liquid Interface Production (CLIP) process currently owned and developed by Carbon Inc.
The usual resin 3D printer you may be familiar with is quite a simple machine. The machine has only one axis, which is the vertically moving build platform. A light exposes a photosensitive resin that cures on and is then pulled up off of a transparent window, before the next layer is exposed.
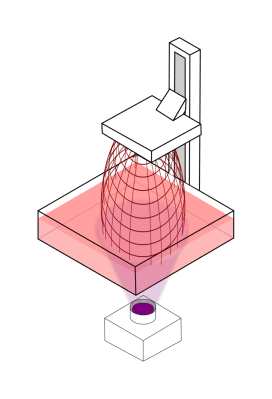
CLIP is a continuous resin printing process that speeds up printing by removing this peeling process. It utilises a bottom membrane that is permeable to oxygen. This tiny amount of oxygen right at the boundary prevents the solidified resin from sticking to the bottom, allowing the Z axis to be moved up continuously, speeding up printing significantly.
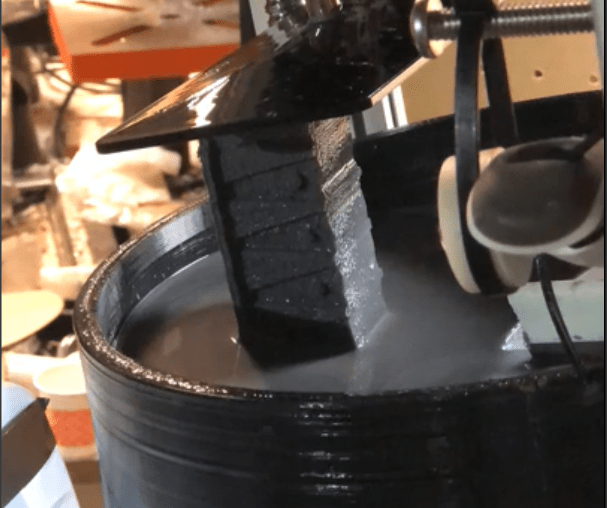
The method [Eric] is using is based around a continuously rotating bath to keep the resin moving, replenishing the resin in the active polymerisation zone. The bottom of the bath is made from a rigid PDMS surface, which is continuously wiped with a squeegee to replenish the oxygen layer. He notes the issues Carbon are still having with getting enough oxygen into the build layer, which he reckons is why they only show prints of smaller or latticed structures. His method should fix that issue. The build platform is moved up slowly, with the part appearing in one long, continuous movement. He reports the printing speed as 280 mm/hour which is quite rapid to say the least. More details are very scarce, and the embedded video a little unclear, but as one commentator said “I think we just saw resin printing evolve!” the next snarky comment changed the “evolve” to “revolve” which made us giggle.
Now, we all know that 3D printing is not at all new, and only the expiration of patents and the timely work by [Adrian Bowyer] and the reprap team kickstarted the current explosion of FDM printers. Resin printers will likely be hampered by the same issues until something completely new kickstarts the next evolution. Maybe this is that evolution? We really hope that [Eric] decides to write up his project with some details, and we will be sitting tight waiting to pore over all the gory details. Fingers crossed!


Love it! More innovation stories!
I wanted to do something a bit similar: put a resin printer plate on a 3 axes platform (read: a filament 3D printer) and pull the printed object in a spiral. The lateral movement would hopefully prevent sticking to the bottom, and the Z movement would be the normal resin printing Z move to pull the object. The idea was to move the LCD image with the rotation of the plate.
Sounds a bit like HARP.
https://youtu.be/DMWzMpjSJLM?t=1147
Some better links: https://en.wikipedia.org/wiki/High-area_rapid_printing https://3dprintingindustry.com/news/northwestern-researchers-develop-large-scale-sla-harp-3d-printer-with-record-throughput-163638/
In a nutshell, a nonstick “fluorinated oil” is circulated in a very thin layer over the build platform to prevent adhesion.
If there’s no discrete lift step then does that mean layer lines will be less noticeable?
BTW, the Wikipedia links are for the mobile site which doesn’t look right on desktop.
Hmm. How odd – I wrote this on my laptop. I’m pretty sure it looked fine at the time. Anyhow, I fixed it up. Thanks for pointing this out.
Theoretically yes. Though I suspect with a wipe mechanism there will be a bias of some kind that correlates in the direction of the wipe. Like linear uneven exposure on each layer. Theoretically later lines would be non-existent or look les like lines and more like curved transitions between layers under a microscope.
It was implied but not stated clearly: After exposing a layer, the new layer sticks to both the model and the bottom of the vat. Therefore, the new layer needs to be “peeled” off the vat bottom (which is usually a flexible material) by pulling it up much further than the layer height (until it has completely “popped” away from the bottom), before being lowered back to one layer height above the resettled bottom.
When watching one in action, you’ll see the build plate move up and then down for each layer.
Yes, that puzzled me the first time I saw it on video because I didn’t know about the adhesion. And that’s what makes it so slow.
why? “Sorry, this post has been removed by the moderators of r/3Dprinting.”
I love the typical reddit posts though basically all “lol my fdm can do that too but faster”. as if that’s the point