Drywall is common and ubiquitous in commercial and residential buildings today. Many of us barely think about it until we have to repair a hole smashed in it.
However, drywall has not been around forever, and actually took many years to establish itself as a popular building material. Today, we’ll look at how it came about, and why it went on to dominate the world of construction.
Before Drywall
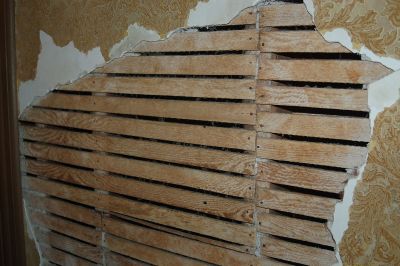
Before drywall existed, walls were constructed with a time-consuming process referred to as lath and plaster. This usually involved nailing up many thin strips of wood to the wooden structure of a house, to make up walls and ceilings. The wood strips, or lath, served as a substrate onto which skilled tradespeople would apply plaster.
The plaster was applied wet, and would take a significant amount of time to dry. Plastering walls was often impossible in cooler weather, and the job required significant skill to get quality results. Over the years, techniques and materials changed and improved, such as the introduction of metal mesh lath and quicker-drying plasters. However, the fundamental limitations of the process remained.
Quicker, With Less Mess
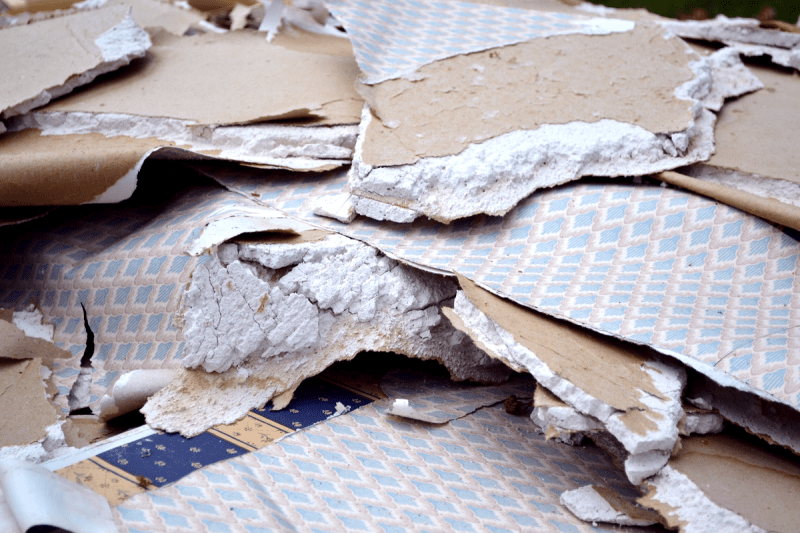
Various companies and individuals started experimenting with various methods of producing stiff, prefabricated boards of plaster in the late 19th century. The main root of modern drywall began when the Sackett Plaster Board company went on to develop SackettBoard around this time. It was made of alternating layers of plaster and wool felt paper, usually four layers thick.
Eventually, the Sackett operation was bought out by the United States Gypsum Corporation. The product was developed further, and was introduced to the market as “Sheetrock.” It featured a layer of compressed gypsum powder, in between a layer of paper on either side.
Some of these early products were used as lath, with small panels fixed to walls as a substrate for additional hand-plastering. However, the material was quickly developed into today’s large-scale drywall sheets.
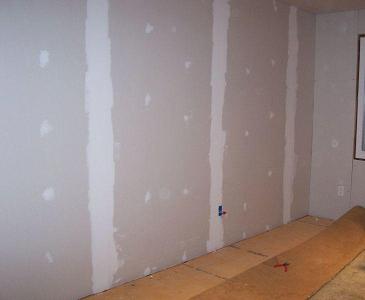
Drywall offered significant benefits over the traditional lath and plaster technique. The large boards could quickly be affixed to a wooden frame, covering huge areas of wall in a fraction of the time it would take to nail up lath and start applying plaster. The resulting walls offered good strength and fire resistance, too. No longer would construction have to stop for cold weather, or wait for weeks while the plaster dried. Construction could instead continue at a rapid pace as soon as the boards had been fixed down, a job which required only basic skills. The only hand-plastering required was to cover up the joints between boards, and techniques developed rapidly to make this as quick and easy as possible.
Despite the step-change improvement that drywall offered, it struggled to catch on. The building industry was set in its ways, and using drywall was seen as corner-cutting rather than smart business.
World War II changed all that, however, when the labor force was suddenly tapped out on the war effort and efficiency gains were badly sought across all industries. Drywall had found its moment, and by 1945, it was quickly becoming the dominant way to build in the USA. It slashed weeks off the time required to build a house, leaving little room for traditional building techniques to compete.
The Downsides
Drywall does have its own drawbacks, of course. It can be difficult to get a truly smooth finish on drywall, as the paper surface tends to make that difficult. It’s also quite easy to damage. If you’ve ever been casually tossing your hammers around a room, or had a punch-the-wall competition, you’ve found out how easy it is to knock a hole through drywall.
It can also be a haven for mold, thanks in part due to the paper layer acting as a food source. Its semi-porous nature means such occurances generally require complete replacement. Water damage is a drywall killer, as well, whether by flood or by plumbing leaks. It’s far less hardy in such conditions versus traditional cement-based plaster construction.
The Future
Technology rarely stands still, and there are many options these days for finishing walls. New drywall formulations focus on environmentally sustainable production, or cutting down on acoustic transmission for comfortable, quiet homes. The veneer plaster method uses special thin “blueboard” drywall, which is then given a coat of plaster over the top for a higher-quality, faster, yet more expensive finish. Other options like concrete, wood panelling, and brick interior walls are all viable, too. And, if you’ve got the money to spend, one can still hire a traditional lath-and-plaster tradesperson, which is a particularly popular option for old-school “country-style” builds and classic restorations.
As it stands, though, drywall’s dominance doesn’t look to be fading anytime soon. It’s still often the cheapest way to finish interior walls, and the industry is worth billions of dollars a year worldwide. Expect to see drywall dominating residential and commercial construction for some time to come.
Banner image: “drywall and wallpaper” by Jo Naylor. Thumbnail: “Applying drywall joint compound” by Georgia National Guard


“It can also be a haven for mold, thanks in part due to the paper layer acting as a food source. Its semi-porous nature means such occurances generally require complete replacement. Water damage is a drywall killer, as well, whether by flood or by plumbing leaks. It’s far less hardy in such conditions versus traditional cement-based plaster construction.”
We use a type of “green” backed drywall in the bathroom. Drywall also uses some fly ash as well.
https://en.wikipedia.org/wiki/Chinese_drywall
Shower cubicles are a particular problem. I have taken to replacing the last 6 inches where the plasterboard meets the tray, with aluminium sheet.
This keeps the plasterboard well away from moisture if it penetrates the tile grout at the bottom, or the silicone sealant, and it no longer wicks up from the bottom, keeping the mould down.
I just finished our master bath renovation a couple of months ago, and I used Schluter Kerdi with a cement board backer. The instructions say you can use drywall, but I didn’t want to worry about mold if it failed at some point in the future. I also used their Ditra underlayment on the floor. It’s pretty easy to work with, but it is a bit pricey. Although after pricing out the dry pack mortar and all that’s required to do it traditionally, it was within $100. And I didn’t want to mess with getting the mortar bed sloped correctly, the schluter pan does that for you. When done correctly, it’s 100% waterproof. I did a 48 hour water test in the pan and had no leaks, so I am assuming I did it correctly (I followed the manual that came with the kit). It did seem a bit weird to be using a piece of styrofoam for the pan and curb, but once I mortared it all in and installed the tile, it feels 100% rock solid. Pretty amazing system if you haven’t tried it. I ran the cement board and the membrane all the way up to the ceiling, since I was installing the shower head pretty high up the wall (I hate ducking under the shower head to wash my hair).
I had a house built in Plano, Tx about 15 years ago. I think the builder saved himself about 15 cents by putting the shower heads so low I had to bend over to wash my hair. The shower had ceramic tile, and of course, the builder didn’t seal it properly. In about 2 years I had the drywall behind the tile swelling up and tiles starting to come off. Another place the builder skimped was to use too small a pipe for the shower so I couldn’t get much pressure/flow. I ripped it all out, dealt with the mold, and installed a thermostatic mixer, body sprays, moved the shower head up to about 8′, increased the pipe diameter, and then used cement board. Finally covered it all with a black marble with quartz veins that looked really nice. I also eliminated the seat that took up about 1/3 of the shower, which meant I couldn’t use an off-the -shelf pan on the floor so I had to pour cement and slope it toward the drain, then cut a bunch of small pieces of the marble to cover the cement. I also used the same marble to replace all the floor in the bathroom (the builder installed carpet, including around the toilet- yuck!). The project took me about a year and a half but was gorgeous when it was done. The guy who cam in to measure for the glass for the shower wall/door said he could get me a lot of work if I wanted to do more of that sort of thing. About 6 weeks after I finished the project, we moved and sold the house.
I haven’t done anything that ambitious since, and probably never will.
Building houses is like making sausage. You don’t want to see what goes in- just the finished product.
I’ve never heard your analogy before. “Building houses is like making sausage. You don’t want to see what goes in just the finished product.”
I’m a seasoned Certified Professional Inspector (CPI). I laughed when I saw your analogy. Very clever, extremely correct. The average person is totally a current one comes to what it takes to the house and all the different products and tools that one would use to do it correctly.
Yes I’ve been using styrofoam sheets underneath a lot the foundations slabs since the 50s. Crazy enough they don’t use it near as much anymore because that’s an expensive upgrade . As it’s used as the first layer of insulation to a house. Unless you’re getting a custom build or spending a million plus it’s not a common practice to the cookie cutters they put up overnight these days.
Unfortunately it’s quantity over quality these days. They sure as heck haven’t decreased the price. Even though they have practically deleted a lot of the
professional tradesmen and can build a neighborhood and just a couple months compared to taking 6-9 months for one house.
Again your comment made me smile, thanks good luck in the future projects. It may have taken you a long time but it sure was rewarding It sounded like you took your time a did it.correctly.
RedGard is a brush or roll on membrane made for sealing showers before applying mortar or tile adhesive. Several professional shower builders have put videos on YouTube showing how to build a leak proof tile shower.
For the floor, there’s a kit which has several pieces of tapered plastic, that’s sort of like a trellis with lots of open space. Arrange them radially around the drain, cutting to length as needed to fit. They serve as depth guides when troweling in the cement base of the shower floor to get the perfect slope.
“it was quickly becoming the dominant way to build in the USA.”
But not over here. When a house is built over here, vertical walls are made of stone covered with plaster.
Over where?
Germany
europe in general
Not in Sweden. Here inner walls are almost always build with a wooden or steel frame and covered with drywall. Sometimes with a layer of OSB behind the drywall if you are want to hang heavy stuff on the wall (cupboards for example).
I don’t know what they’re doing in Australia these days, but in the mid-60s in South Australia the top-level construction was “cavity brick”: inner and outer walls of brick with metal ties between them. Next was “brick veneer”: brick walls surrounding a timber frame. Last was asbestos-cement paneling over a timber frame — but I only ever saw it in older homes.
Yes… My home: all walls are cement over brick… As are the 90% of all houses in this country… In the countryside stone is the prefered material. Old houses with 1 meter wide stone walls are routine.
And I will huff and I will puff and I will,,,,,, oh nevermind!
Though it is not plaster – it is various cement mixtures
also – are you really building houses from stone in Germany? i always thought most of Europe use either red or concrete bricks
This might actually be a language thing here. If you translate stone to German you get Stein. Translating brick to German gets you Ziegelstein or Backstein, so some sub-type of Stein/stone. Stone – like boulder – is not really used any longer.
Sorry, mistranslation, of course bricks, made of concrete or fired clay, both often porous, or sandlime.
Can’t speak for the rest of Europe, but here in the Netherlands houses start with a concrete skeleton, and walls are typically made of cellular concrete blocks (though I’ve lived in one appartment that had drywall inside walls). Bricks (typically red or yellow) are only used on the outside.
No concrete skeleton in the UK for normal (ie, cheap) housing.
This is fairly typical, an inner skin of concrete block and an outer one of brick. All self-supporting:
https://images.app.goo.gl/bHsYSMB9sEXBjzAW8
Stone, or partition bricks like those from Poroton®.
Where is the insulation or is just the thermal mass depended upon?
I suspect the use of wood frame construction in the US is historically and even currently related to the vast forested areas providing lumber unlike heavily populated areas like Europe. BTW, that population density lead to the US creation of the tactical neutron bomb during the cold war because German population centers were “only a few kilotons apart.”
People either use porous bricks or they attach insulation from the outside and protect that with nice looking bricks or render.
Concrete blocks (sometimes foamed concrete) with a layer of foam are used as the inside leaf, and then an outer leaf of brick or stone (or fake stone) is attached with ties)
https://www.jewson.co.uk/building-materials/bricks-blocks/concrete-blocks
My wife and I have a house here in North Carolina built in 1838. We have plaster on brick walls. Makes it hard to hang artwork.
I always considered solid walls _easier_ to hang things on. No need to look for studs, just drill through to the brick and put a wall plug in.
However, in an 1830s house, surely you have a picture rail to hang your paintings from? (Or, a good enough excuse to install one)
This is the first house that we’ve had this old. Yes we do have picture rails but they are 10ft up. At some point, we will learn how to use them. ( other priorities at the moment) Any pictures we have, sit on some of the trim that is waist high. My wife won’t let me drill into the brick. (I don’t blame her).
So you use the chair rail for pictures, it works.
In the UK I think that plasterboard is almost always given an all-over skim of finish plaster, rather than just having the joints filled and then paint.
But I could be wrong. I do know that all the walls that I have built from plasterboard have been done that way. Though given that in all cases other walls in the same room were plastered direct to stone, it just seemed to make sense to skim all walls the same way to finish.
That’s normal in the U.K. have it both on the OEM walls and my extension, and it’s how I’ve seen it all all houses I’ve lived in.
What variation we have is in what’s behind the plasterboard. My house has fireboard, studs, and brick in different places.
Agreed, I find it weird that the Americans don’t skim it. You get an extra tough layer that makes it stronger/less prone to damage. You also get a nice consistent finish and it takes a layer of paint well after you seal it. More work definitely, but I think it’s worth it.
In my experience drywall is skimmed in USA as well. There are several different levels of finish, level 1 or 2 is usually how a garage would be left, level 3 for interior walls that would be wallpapered, level 4 for painted rooms, and level 5 if you are using a premium finish.
Level 2 up will have an all-over skim, with each level effectively adding one more layer (and some sanding). Level 5 is some times called the skim layer, but other layers are also given an all-over covering of joint compound.
I did a kitchen last year. Taped the joints with self adhesive fiberglass mesh. Applied joint compound to the joints and to the screw heads. Sanded then applied more compound with a wider knife. Sanded then anywhere that still wasn’t smooth got another dose of compound and sanded again. Where I had to blend to the old walls I had to feather the compound out up to a couple of feet.
Roll on a satin finish paint with a roller that makes a slight eggshell texture and it’s perfect.
I didn’t go to such obsessive perfection on places the new cabinets covered since the only time that will ever be seen again is some time well in the future when someone might remodel the kitchen or demolish the house.
Another way to cover drywall is with a knockdown texture. Get a piece of 3/16″ thick aluminum and make a random array of holes in it. They can all be the same size or different sizes. Make enough holes to cover around 50% of the plate. The plate should be sized to fit all the way to the bottom of a 5 gallon bucket. A square that’s a bit larger than the bottom across the corners, then cutting off the corners to make it fit is ideal.
The center of the plate needs a handle attached, either weld one on or countersink a flathead screw through the middle to attach a wooden handle.
Stir up the compound to make it a bit thinner. Stick the plate down into the bucket to pick up a load of compound then smoosh it onto the wall or ceiling. Rotate the plate and smoosh again, slightly overlapping the first smoosh. Two, three, maybe even four smooshes can be done per load.
Cover a pretty good sized area then wash off the plate. Keep checking the applied compound and when it’s about halfway dried get out the 12″ or wider knife and partially flatten the texture, knocking down all the peaks. A lot of chunks will fall off so cover the carpets. Ideally, do this before the floors are finished. The result is a texture that hides any ‘sins’, doesn’t require perfection in joint and nail or screw head finishing, and is tougher than painting the paper finish on the drywall. The trick is in knowing how large of an area you can apply then knock down before it gets too dry to flatten. When it gets too dry it has to be sanded flat.
My father did this technique on a lot of drywall, and I learned it from him. I still have his drywall tools.
The problem with knockdown texture comes when you have to repair something and now you need to match the texture. And while I’m sure it’s easy for a skilled craftsman, DIY homeowners (and even many professionals at least here in NorCal) are not able to match it well.
I recently discovered texture in a can and that has been really helpful.
I personally also find the texture dated (in fact just ugly TBH) but that’s of course subjective. I know many people really like the look.
Same in the USA.
Mud is slopped by ‘painters’ though, so expect half assed, done while intoxicated, work. They’re almost as bad as flatwork ‘crete crews.
There might be exceptions for tract home built houses in the last 20 years. Nothing bad would surprise me in that space. e.g. Stucco over nylon straps, plastic sheet and chicken wire.
The proudest moments of my pot growing life have been when the Vietnam vet cried because Trainwreck (TW) reminded him of the stuff he smoked over there and when a union painter asked for something weaker, because he couldn’t do his job on TW. This is not an endorsement of current market TW, it’s not the same plant. TW was one plant with cuttings propagated up and down the west coast. Now it’s just inbred BS.
Well that was a journey
I from Long Island blend my drywall seems gradually together and leave just about an inch apart gives me a good idea where to sand usually 220 grit or if I did a really good job wet sand! Peace Dixon!
Plaster and lath walls in older houses in the US, (dating to the 1780’s) I’ve lived in often have horsehair mixed in to give it additional strength, particularly in corners.
As to fire resistant, if you’ve ever seen a balloon construction plaster and lath structure fire, you’ve seen a pretty intense conflagration. The fire shoots right up between the studs and the lath is nothing more than very dry, very flammable kindling. Basement to 3rd story roof in a matter of minutes.
I did wiring for wifi in a new apartment building, and they had to put firewalls between each unit. It was wood framed construction, and the firewall consisted of just doubling up the drywall on each side and filling any holes for plumbing, electrical, etc with special fire rated caulking.
Depending on what state and how big, the fire rating stuff on large wood frame apartment buildings can get rather complex beyond double drywall and fire caulking. Here in LA they build some 1000 unit wood frame buildings. There are actual UL tested and listed assemblies that can get to a 4 hour fire rating, with special metal clips that cause the side of the wall thats on fire to fall away from the rest of the structure.
Its really interesting. Sheetrock is gypsum board, and the type they use for fire rated walls has fiberglass to hold it together within the gypsum mix. The Gypsum has chemically bound water molecules (page 7 of 34 here https://nvlpubs.nist.gov/nistpubs/Legacy/IR/nbsir77-1265.pdf) and those have to chemically separate and then boil before the heat transfer can continue through the wall. This makes the product very good at resisting high temperature heat transfer.
The “Four Hour” rating described above is per ASTM E1105, where a wall has a fire of a specific time/temperature cure on one side of it (curve-https://www.researchgate.net/figure/Standard-time-temperature-curve-for-an-ASTM-E119-fire-exposure-6_fig1_241197950), and they measure the temperature on the other side. The wall for a four hour rating is sitting with about 1,000°C fire on one side for 240 minutes and 6.5 inches away it could be less than 37°C. https://www.usg.com/content/usgcom/en/design-studio/wall-assemblies/assembly-detail.30101.html is an example.
True of balloon framing, unless fire blocking has been put in. This isn’t much to do with the plaster and lathe, though the lathe is a fuel relative to drywall, as there is a ready source of oxygen once a breach happens at the bottom, and the chimney effect. Where I live, fireblocking is a mandatory retrofit. ANY work of several classes requires inspection and fitting fire blocking (I don’t recall the details and scope- it’s been ten years- but I opened holes in some interior walls to inspect knob and tube wiring and triggered it. Fine with me. Mostly was there from prior work, put blocks in where accessible, and injected where I had to).
Not just horse hair… and not necessarily that long ago… I had an interesting conversation with a drywall guy one time–a real old-timer–who told me that when he started his career, they were still collecting hair from barbershops to use in certain plastering jobs.
I think good ol’ asbestos was used too!
I could be wrong, but I think asbestos laced drywall was used up here in Canada until at least the mid 1970s.
I did a restoration job on my house, proper hazel laths and lime plaster (it’s listed).
The lime plaster had horse hair mixed in from the local stables, plus springer spaniel hair from my old dog, and a few clippings of human just for luck.
That sounds like what my house in Brisbane, Australia had in the living room and master bedroom (built in the early 1970s). The other rooms had textured hardboard.
Down here in the South Pacfic coconut fibers were used to make plaster board sheets. I’ve seen these installed as late as the mid-60s. Heavy as hell, they were cast to have one ‘nice’ side and the other rough. Fixed to the wall/ceiling with clouts (short flat head nails), they’re quite satisfying to try to remove as a single sheet.
Speaking of drywall nails, I’m yet to do a renovation to a wall that was built with drywall screws. I bet they’re a devil to remove, unlike nails
Drywall nails like to loosen and make bumps on the wall. :P I’ve patched up plenty of such walls by banging the nails back in then driving in some screws between them. Finish up by applying joint compound, sanding, then rolling on satin or semi-gloss paint with an eggshell texture roller to hide the patches because skim coating and sanding the entire wall for a few nail pops isn’t in the budget. Two coats of paint. ALWAYS two coats of paint because there’s no such thing as “one coat coverage” no matter what the can says.
Our house (Midwest US) was built in 1960 and has gypsum board lathe construction for the walls and ceilings. These are 18″ wide sheetrock panels with rounded edges that are plastered over with a skim coat. It’s held up well and makes for very good sound proofing. The plaster is almost like a concrete mix and in some places, the walls are nearly 1″ thick. Only problem is the plaster crumbles easily, so if you want to hang anything on it, you have to be careful.
ANOTHER ONE?!?!?!?!?!!? OMG I thought I was the only one who has that on their walls! (And people I tried to explain it to looked at me like I’d grown an extra head or something.) Central Arizona here, house built in 1961. the sheetrock on mine has a bunch of regularly spaces holds to hold the plaster on.
In my case, the builders also used chicken wire across the sheetrock panels to hold the plaster. The result? Chewed up drywall saw blades and a giant pain in the butt to work around (and through). The plumbers who re-did my house when I bought it in 2012 were pissed because the walls chewed up a bunch of brand new demo blades between the plaster and chicken wire.
No chicken wire, but all the corners (wall, ceiling, and floor in some cases) have expanded steel backing for reinforcement. Between that and the coarse, heavy plaster, demo is pretty brutal on tools. I’ve had sawzall blades with all the teeth chewed off without realizing it and wondering why cutting was going so slow.
Drywall lath with all the holes was a bridge between nailed lath and plaster and plain drywall. IIRC I’ve only run into that style once on a house.
The wire is probably old school guys not convinced a chemical bond would hold up. Old lath plaster has “keys” between the lath.
Hanging sheetrock requires more than just “basic” skills, I’ve seen some real butcher jobs that you can’t get anyone to spackle except hourly, when it’s normally by the sqft.
The old houses had fireblock cats nailed between studs to stop that fast fire travel.
Then they had “rock-lath” that was sheetrock with holes in it for plaster to grip to. “brown coat” would go on the lath first, then a thin layer of plaster finish. The brown coat had the horse hairs. This is a lost art, there’s not too many left who know how to do the plaster/lath.
“I’ve seen some real butcher jobs that you can’t get anyone to spackle except hourly, ”
If friends are helping you D-I-Y, Make sure they know; the one to cuts the drywall is the one who muds it!
“The old houses had fireblock cats nailed between studs to stop that fast fire travel.”
I bet the cats didn’t like that one bit!
It keeps evil spirits away, we used to brick them in, but times have changed.
I purchased a house in 1950 and it has a half inch thick coat of plaster over a half inch thick piece of gypsum board. makes the walls feel very sturdy and sound proofs well. it id make me hate the mudding/sanding part of my renovation though, I stopped trying to go for flat, just smooth.
My issue with drywall is the “old work” outlet boxes, they are only held in place by the drywall. The “new work” boxes attach to the studs and they are quite secure. I don’t know why the “old work” boxes have no provision to attach it to a stud, even as an option. I’ve seen “new work” boxes with a variety of attachment options for stud mounting.
Because new work boxes are for new construction where you have access to the studs. Old work boxes are for when you’re adding to something old and don’t want to tear down to the studs.
They make old-work boxes that have screws at an angle, which can be fastened to a stud from the front of the existing wall. Essentially, they attach to the stud the same as new-work, but they are compatible with having sheetrock already in place.
Having said that, I find that sheetrock is surprisingly sturdy and I have never had any issues with installing old-work boxes that have the spinny tabs. The important thing to note though is that this only works, if the opening is cut precisely. If you have an opening that was cut much bigger, then the old-work boxes have nothing to grip. And that’s when they fail.
Fortunately, an oscillating tools makes it trivially easy to cut openings that are precisely the correct size. And if there is an existing opening that is already torn out, then often it is an option to enlarge the opening from single gang to 2-gang. Alternatively, it is of course possible to repair an oversized opening, but that quickly becomes quite labor intensive.
There are parts of the world where plaster is still the norm?!?! Yuck!
Use drywall, don’t cover it in plaster and keep your house dry inside. Get the good stuff that is anti-mold for the bathroom.
I can’t imagine choosing to use plaster anywhere but maybe performing a small repair job on an old house. I wouldn’t even use it for period correctness. You are going to cover it in paint or wallpaper anyway!
It’s not about time, skill or money. It’s about practicality!
Stuff happens. It doesn’t take a professional to patch a hole in drywall. Just get some drywall clips and a tiny container of drywall compound. Matching the paint texture might be a pain (I love smooth walls for this reason) but patching drywall is easy. Plaster… It’s a great project for someone who is punishing themselves for something really terrible. Got skeletons in your closet?
Need to run an ethernet, cable, antenna, speaker, etc.. wire through a wall? Drill a hole in drywall and you have a hole. Drill a hole in plaster and you have a crater!
Want to hang a picture? Be VERY careful with plaster. Drywall? Piece of cake!
Life is too short for plaster.
Friends don’t let friends plaster their walls.
You need to use durabond in the corners & joints so they don’t shrink.
I would argue that both plaster & drywall are terrible, for all the reasons stated in the article.
My house uses thick 18mm plywood for all the walls. Easy to drive screws in, impossible to punch holes through. Easy to paint as well.
Plaster has superior insulation and sound deadening compared to drywall. It also gives character or life to dwelling, drywall is the vinyl village of wall coverings.
I’ve seen many do walls with drywall on top of plywood; study, smooth and flat, sound dead, some what fireproof, and you can put screws any where
i have all the feelings about this, as i live in a house with plaster and the few patches i’ve done have been a real pain and of very low quality (and i have very low standards; i am happy with my own drywall work!). on the other hand, i might be getting the hang of it. i’m looking forward to the next one.
but i just have to say I have not found the experience of plaster being delicate, especially when hanging things. you have to use correct technique, but that is true with drywall as well. but the range of techniques — screwing or nailing with pre-drilling, or nailing without pre-drilling — is pretty good, as easy as drywall and as powerful. it isn’t super strong if you don’t bother to find a stud but it tends to be stronger than drywall. if (big if!) there isn’t already a long crack right where i cut into it, it doesn’t tend to deteriorate around cuts either. and my idiot patches, while unsightly, have not deteriorated.
i think the best thing about drywall is that you don’t cry when someone rips a big bunch of it out by trying to hang something even slightly heavy away from the stud…you know it was cheap to install and cheap to repair. but i’ve never done any damage remotely like that to any of the plaster walls.
it did come to pass that i had to demolish a plaster wall in someone else’s house, and it was astonishingly difficult work. it looked superficially like it was cracking to hell all over, not worth repairing. and maybe it wasn’t worth repairing. maybe it was just all downside that it was a big job to remove it once its service life ended. but man! we beat on that with a 20oz hammer for ages. you would have it all busted into little pieces and think a light breeze would blow it free but you’d still be busting out the lath from behind just to get big chunks of the plaster, because each fragment was still keyed into the lath.
You sound like me on the pex vs copper debate. Gimme the stuff I can fix in 5 minutes any day.
“Eventually, the Sackett operation was bought out by the United States Gypsum Corporation. The product was developed further, and was introduced to the market as “Sheetrock.” It featured a layer of compressed gypsum powder, in between a layer of paper on either side.”
So that’s why it’s called Gyprock.
Lath and plaster seems like a big improvement over wattle n’ daub!
Oath!
As the son of an nth generation ( n >= 4 ), who has done some of my own plastering, I find some of the comments here interesting. Most of what I saw growing up was, commercially, was veneer plaster on blue board. This can be done faster than drywall because there is no sanding. My dad’s home is a mix of lath and veneer plaster. My last home was rocklath with walls I added as veneer plaster.
When I worked with my dad, we did one farm house restoration where he called all his old buddies to help. It was a lath job and it was really interesting to see the process. Not all of those guys are still around and the ones that are probably can’t hold a hawk and trowel up for very long.
Good drywall is good enough but you still see the joints. Good plaster is a monolithic unit, which is why it cracks. My great grandfather traveled doing decorative plaster – stuff that might be done with molds now. All of the crown molding in my grandfather’s house is lime plaster. Try that with drywall.
One reason no one mentions driving the change to drywall is lumber. Old building’s, in my experience, weren’t framed very straight. It didn’t matter. Finish carpenter’s put in straight grounds and the plasterers filled the wall with basecoat to meet the grounds. You drag the wall with a straight edge. It makes straight walls with some thick sections.
If you have a “punch-the-wall competition” use a stud finder first (important safety tip).
On a more serious note: my first house was built in 1947 in SW Virginia. Aside from some interesting wiring, it seemed to have used some form of plaster board that was similar to what I laid down for floor tile. It was still in sheets, but was extremely hard. I had to purchase a special hole blade (Carbide grit) as it removed the teeth of my initial blade when making holes to blow in insulation.
Like a fiber cement board, as you say for tile underlay. Bet it contained asbestos.
My house and the one next door are identical. I watched the house next door get gutted both floors. The plaster and lath filled a 20foot high wall skiff. Then he had foam sprayed on the outside walls. Now comes the interesting part. He had drywall put up afterward. The drywall scrap filled to the top the same 20foot skiff!!!
In the 1880’s there might have been part of a barrel of plaster left over but it went to the next job. 100% used up. With lath short pieces got used in places where needed.
Numbskull labor now, hurry and fill the dumpster.
Both our houses had only one coat on the lath, everyone papered then. I’ve stripped some off and the walls show a rippling that the more expensive houses don’t with a finish coat. I can mix up a batch of dry and get good results on repairs, no need for premix.
I guess it depends on the type of plaster. From what I’m told, during that period, plaster would be mixed in what looked like a big trough with a hoe then carried with a hod to the mortar board ( to then be transferred to hawks ). That was the base and scratch ( brown ) coats. I’ve heard a few different ways of doing lime, but I think that evolved with the practice of using gauging plaster in the lime. Generally, though, you’d only mix as much as you need because it will set and be useless. Pure lime plaster takes years to set – and there was a time when that was used – so maybe that’s what you mean. From what I understand, this was mixed well in advanced and buried in barrels in the ground for a year or so before use so that it was closer to set when it was removed. I was told by some gentlemen of fairly advanced age that my great great grandfather would burn limestone in his backyard to make lime, but I know nothing of the process.
Over here in Australia no one would ever say the words “drywall”. No one. Those words do not exist.
The name is Gyprock. And gyprock only.
And, FWIW, almost universally “Plasterboard” in the UK.
(It’s not really a dry walling technique here. As I said, it nearly always serves as a base for a finish coat of plaster)
Is it a one coat or two coat system? Lime based?
Plasterboard is typically a single layer. The joints are taped / skrimmed and then a single layer of finish plaster.
If plastering direct to blockwork (or to stone, in an older property) a lighter plaster (“Browining”) can be used. Because it is lighter it self-supports thicker (ie a few tens of mm). Often then there will be a bonding coat between the Browning and finish coat. These are all gypsum plasters.
Traditional lime plasters are making a comeback, especially for period properties where things like breathabilty and elasticity are valued.
If you are interested in traditional UK building techniques, then this house restoration I helped my dad with about 30 years ago might be of interest: http://www.bodgesoc.org/slaithwaite.html
That was built in around 1450 using stones and clay collected from the surrounding area.
In the US we’ve long called it Sheetrock.
I was under the impression that here in the midwest USA, sheetrock was the regular gypsum-paper stuff that has no mold resistance, and “drywall” was specifically the green stuff with anti mold properties/treatment.
I was always told drywall for bathroom and kitchen, and then you could just sheetrock everywhere else. Drywall everywhere doesn’t hurt though.
Sheetrock is a brand name of Drywall from United States Gypsum (also Canadian Gypsum). USG makes all kinds of Drywall, (the standard stuff and mold resistant and different thicknesses), and other wall sheathing materials like cement and mineral fiber board. There are other companies that make the same stuff as well. Any gypsum based sheathing from USG is sold as sheetrock, you just have to pick the right product based on where it’s being installed.
Thanks for the clarification!
Yep, lots of different names around the world.
“Biscuits” in Australia and America are very different things.
Another way to do the wood lath was split in place. Wider boards were used, from trees that had straight grain which would split easily. Hold up a board then drive in some pretty fat nails with large heads. Splitting was desired to make the gaps to squish the plaster through to make it hold to the wall.
In the late 70’s and early 80’s my family lived in a house that was built in 1917. Before we bought it, someone tried to burn it down for insurance money. The main floor heavily damaged and the stairs to the second floor were just gone, burned and collapsed into the basement.
All the walls and ceilings were lath and plaster, with a rough, sandy surface texture. Dad ripped it all out of the main floor to repair the structure as needed, then did drywall topped with knockdown texture. He also rewired the whole house so all the circuits were capable of 20 amps, and used 20 amp breakers. The inspector was impressed that dad had gone above and beyond the code minimums.
The upstairs walls and ceilings were fine, just a little smoke dirty which washed off.
We had a wood heating stove and it took us several years to use up all the removed lath for kindling.
Post WW2 during the house building boom, there were some houses built on the extra cheap. Instead of lath and plaster or drywall they were finished inside with Cellotex board and a skim coat of plaster. Lightweight, low cost, some insulation value, somewhat resistant to minor bumps. But try driving screws or nails through it into studs and it wasn’t pretty. It’s even worse when someone has renovated by applying drywall over the cellotex rather than ripping it out to put the drywall directly onto the studs.
Such houses often got constructed with joists and studs and rafters on 2 foot centers, with the joists usually being 2×6 instead of 2×12, and this was when planed all sides lumber was displacing rough sawn so it wasn’t even full dimension lumber. Foundations were often exactly as thick as the width of a nominal dimension 2×4. Had to crank out those houses fast and cheap for all the soldiers and sailors coming home and needing a place for their new families.
There are lots of comments about sanding here. It has occurred to me that I don’t think that UK plasterers ever sand. I think that they would see that as a failure in their craft.
They put the skim coat on, and polish it flat with the float.
You sand drywall. You can’t sand plaster.
I am not seeing how you can sand drywall, doesn’t it make the paper all fluffy?
You only sand the areas you put the mud. It’s fairly tedious and messy.
Or you can use a damp flat sponge at just the right time and get smooth results and no dust to boot. This gets rid of spatula marks when filling holes, a requisite. No “squares” left visible at each tiny nail hole.
In Europe houses are built for eternity – in the US they only have to last until the next hurricane ;-)
Seriously – there’s a cultural difference behind it… in Europe houses cost a lot more money, are solidly built and usually have a real basement. A family often lives in it for generations. Europeans are not as mobile as Americans, who move within the country much more frequently. Both have their pros and cons, I would say.
Interesting. Every house I’ve lived in in the US, save for one in Florida, has had a basement. the house I lived in in the UK (N. Ireland) had no basement.
Historically, as has been pointed out by an earlier post, suburban houses in the US are historically built of wood due to the lower cost of wood. They are also generally further apart. When you get to more urban areas, even single family dwellings are often built of brick. Like Europe, this is after a lesson or two in fires in high density collections of wooden dwellings. In the city near where I live, you can look at the city from the air and tell where the Great Fire of 1862 burned almost a third of the city to the ground. The ‘newer’ sections are all stone, the older sections still have a fair number of wooden structures.
As you say, both approaches have their pros and cons.
When my friends were wanting a house built for them in Austin, TX, the quotes they received from contractors for houses with basements were exorbitant.
One contractor told them that’s because the ground there was very hard to dig.
Basements have to be done right so they’re not a problem child for the life of the building.
“less mess” is a relative term. drywalling can be pretty messy. say when you cut holes for outlets with power tools. when the mudding process starts all bets are off. especially when using a powered means of texturing.
I’m probably not going to change any minds here, but I find the entire wood-frame and sheetrock construction style to be pretty terrible over all. Everything built in this way will basically be torn down in 50 years.
In most of Europe drywall is only ever used really for interior partition walls, and even then it’s seen as inferior because, well, it is. It checks the “cheap” and “fast” corners of the cheap-fast-good triangle.
Our house is one the younger houses on the block. It’s coming up on 50 years now, and today is probably in better shape than at any time in its life. The neighbors’ houses are all around 80 years or older. Some of them probably have lath and plaster. But most of these houses are wood stick and sheetrock.
As long as you take good care of your house and the initial construction was done properly, it’ll live a long time no matter the materials.
Agreed, the cookie cutters that they built overnight or a whole neighborhood and a couple of months is quantity over quality. Yet the prices are ridiculous. I would never buy a house built before 2000. How much rather do all the fixes and changes myself as the other homes look pretty but their garbage in reality. IMHO
When my house was build, in 1911, here in the US the interior walls were clad in a material I’m told was called ‘stone board’. It was constructed like gypsum board, with paper on the inner/outer sides, but with a mixture of plaster and vermiculite as the core. It was nailed up and skim coated with plaster. Apparently my house, and many like it in my city, were built using this technique around that time, and had a lot of other innovations like linoleum floors and poured concrete foundations. It was pretty modern for being pre-WWI.
As if bricks were expensive?! I live in Thailand and houses are built cheap. No one would ever built a was without some sort of bricks.
Drywall is still used on interior walls even if the outside walls are brick, wood, stone, or something else!
1981, owned a house in Bellvue, Nebraska, outside Offutt, built just after WW II when demand was high due to returning soldiers.
I’ve asked house restoration magazines in the past, but no one has ever told me about the walls in that house. I’m assuming the rest around there have the same type. They were all built at the same time.
The walls were neither plaster nor drywall. One could not tell by looking at them, but they were very, very thin cardboard, maybe ⅛” thick. Rolled out cardboard, not like someone had used boxes. I don’t recall any seams anywhere, not even in the center.
I found it out when I tore out a wall to add insulation. There was none. (The studs weren’t centered at a set distance. –some were 16″; some were 18″, some were 23″.)
Curious, I picked up a small piece from the pile I’d made outside. Moved it away, lit a match, and watched that thing catch fire like a piece of birch bark. Holy death trap!
Hopefully, people in that part of Bellevue learned of the problem and have replaced their walls.
I know this is a bit old but I just encountered it, and I just want to add a note about choices for homebuilding; people express opinions about the virtues of different technologies. The thing is, different strategies work better in different locations: brick or stone would be wonderful and enduring in a place that never has earthquakes, but it is a deathtrap on the west coast of north america where all that weight is liable to get shaken off and drop on your head one day. Woodframe just flexes, and nails slide a little bit, and just shrug off the tremour. But you can’t get that benefit in a tropical earthquake zone, as wood is liable to rot and insect attack there; still you don’t want to use anything like the deadly weight of stone or brick. Recently folded galvanized sheet steel preformed studs and frames have been used instead of wood for commercial building – it is more expensive so rarely used for homes, but might be an option for tropical earthquake zones. It is typically used along with steel girder framing, but allows for drywalling interiors. It could save a lot of lives in places that get in the news for pictures of piles of brick and stone with people buried under them, but often those are the sort of places that can’t afford steel frame. There is plenty of room for new tech to be devised there.
Also, the term Gyproc: it comes from the Gyproc company, formed in the UK in 1933 and acquired by British PlasterBoard (BPB) in 1944. BPB exported the Gyproc tech and name when they started going international, and took it to Canada and Australia, beating USG by a few years, so drywall is called Gyproc in Canada, though there are several companies out there now including the Sheetrock brand.