Weaving is one of the oldest crafts in the world, and was also among the first to be automated: the Industrial Revolution was in large part driven by developments in loom technology. [Roger de Meester] decided to recreate that part of the industry’s history, in a way, by building his own desktop-sized, fully automatic loom. After a long career in the textiles industry he’s quite the expert when it comes to weaving, and as you’ll see he’s also an expert machine builder.
[Roger]’s loom is of a specific type called a dobby loom, which means that the vertical threads (the warp) can be moved up and down in various ways to create different patterns in the fabric. The horizontal wires (the weft) are created by a shuttle moving left and right, carrying a bobbin that unspools as it travels. A comb-shaped plate (the reed) then fixes the fresh weft in its place. [Roger]’s videos (embedded below) clearly show this mechanism in action, as well as the loom’s overall design.

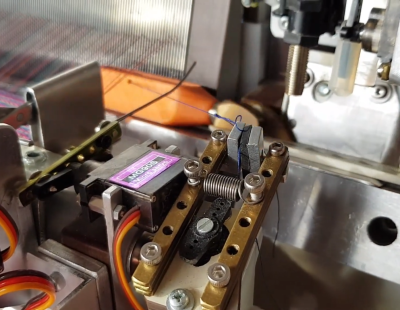
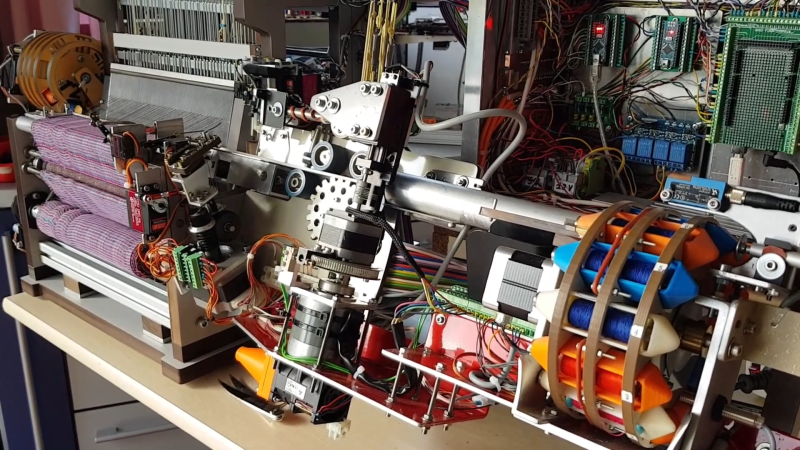
The 3D printed shuttle is moved back and forth through the warp by a belt-driven system that grabs the magnetic end of the shuttle. Revolving storage drums on either side of the machine enable the use of different thread colors for each shuttle run. Shuttles are exchanged by a robotic arm that picks them up and places them onto the track; there’s a clamp that grabs the end of the thread as the shuttle starts its run, and a wire cutter to detach it when the shuttle is up for replacement.
This intricate mechanical dance is controlled by a set of Arduino Megas and Nanos. They drive all the servos, DC motors, and steppers while reading out an array of sensors and switches. The system can even detect several faults: the weft is checked for proper tension after each cycle, shuttles with empty bobbins are automatically discarded, while a laser keeps an eye on the warp to ensure none of the threads have snapped.
The entire machine is of [Roger]’s own design; apart from 3D-printed and CNC-machined parts, he also re-used components from various pieces of discarded machinery. His ultimate purpose is to use this machine to make specialized fabrics for medical or industrial use: for example, it can use conductive threads to make fabrics with built-in sensors.
Although this isn’t the first DIY automatic loom we’ve featured, it’s definitely the most advanced. Previous examples, like this 3D-printed miniature version or this neat computer-controlled one can’t really compare to [Roger]’s 26 cm reed width and wide customizability. If you prefer to keep things a bit simpler, you can also use a 3D-printer to directly print certain fabrics.


I was a copy machine repair tech in college and I thought moving paper a sheet at a time was one of the hardest things a machine could do repeatedly in a hurry.
I humbly stand corrected.
Good thing it is automated, a person typically weaves much faster.
Person’s name: Boll.
This is a level of brilliance few will ever reach. I wouldn’t even know where to start to design something like this this is incredibly complex
The video says “demonstration speed”…. is that full speed?
Most industrial looms also have a creep speed and a running speed. You might see 10 RPM creep speed and 450 RPM run speed on a dobby loom with 16 harnesses.
can air jet looms even creep?
Jet looms can’t usually run at a creep speed as there are non-machinery linkages. It’d be more than a little like trying to have a bubble blowing machine stop mid-bubble
For something like this, demo speed is probably quite slow. The intent of a demonstration is to show how the machine works. Too slow is generally far less of a problem than too fast, and industrial autolooms can go fast enough that you wouldn’t really be able to follow the entire process.
I mean, I might be wrong, but if they are saying “demonstration speed” they probably mean it’s going significantly slower than max speed.
The max speed is about double the demonstration speed but the machine can run for hours without intervention.
What a fine machine,so fast,so clean
as a boy,I was taken to see nomadic weavers at work
the looms were built from tree branches and the weavers were boys and young men who would follow
the insrtuctions of an old man ,who sat amongst them
holding a wooden book from which he chanted and sang the knots to be tied and threads to be used
Yeah but check this out: https://www.youtube.com/watch?v=s5uGmOrrn_I
Rogers machine is not made for speed but specifically for specialized fabrics for medical or industrial use as it can make what most looms cannot do
It is amazing to live in an era where a dude with a basic understanding of stepper motors and a 3D printer can build an entire manufacturing process.in his or her home.
Honey, I need a washrag… Ok, I’ll weave one up on the desktop right quick…
I wonder how much this cost, and how much these would cost produced commercially. We keep miniaturizing technology to the point where it will fit on a desk in your home, and as prices come down, more and more manufacturing can be done in your own house. I feel like this is the beginning of yet another process reaching a scale and maybe even a price where it no longer needs to be centralized and might even become more economical to do at home in the long run (especially if transportation prices continue to stay high).
So next, we need more automated clothing fabrication systems, so we can feed the cloth from our autolooms into it and get finished clothing out, without ever leaving the livingroom! Need a prom dress? Download a model, buy the right thread, setup your machines, and set them running the day before the prom, and it will be done just in time! Have an idea for a custom hoodie?…
Clothes are so cheap we’re sending them to other countries.
https://youtu.be/bB3kuuBPVys
Most everything is recupeeated from other machines exept for 1 Arduino Mega, 2 mini’s a relay board and some stepper drivers.
I forgot to mention the filament for the printed shuttles.
Just use your home replicator…. It works on the same IsoLinear chips as your Transporter (just so you don’t replicate any red shirts… can cause early death by the wearer 😄)
Very cool! Do you have a parts list? I am particularly interested in tension sensing – which sensors and the control strategy using tension.
Lovely post and lovely maps – thank you! I was just wondering if you had any advice on the best way to export maps from R to keep them nice and crisp? Always a tricky one and particularly important for maps!