Earlier versions of the Arduino IDE made uploading files to an ESP32’s SPIFFS filesystem easy via the ESP32FS plugin. Sadly, that’s no longer possible under the rewritten Arduino 2.0 IDE. Thankfully, [myhomethings] has stepped up to solve the problem with a new tool that also adds some new functionality.
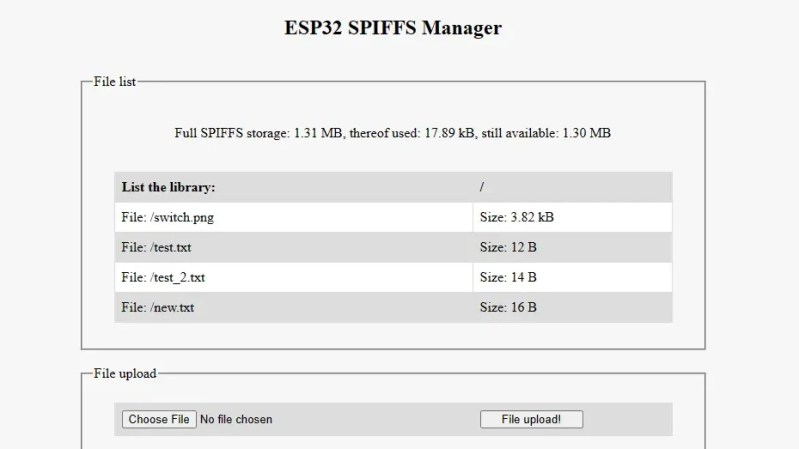
The tool in question is the ESP32 Web Updater and SPIFFS File Manager. It features a web interface courtesy of the ESPAsyncWebServer library. Simply dialing into the ESP32’s IP address will grant one access to the interface. Once connected files can be uploaded to the ESP32, or deleted at will. Text files can be created and populated through the interface as well, and the SPIFFS file system can also be formatted if required. Plus, as a bonus, the interface allows for handy over-the-air firmware updates. One need only export a compiled binary from the Arduino IDE, and then load the resulting *.bin file into the ESP32 via the web interface. It does come with the caveat that if new firmware is uploaded that doesn’t include the ESP32 Web Updater itself, there will be no way to do further firmware updates in this manner.
For those working on projects that may need regular file system management, the tool may be very useful. Alternatively, if you just need to do OTA updates on an ESP32, we recently featured a way of doing them through GitHub.


“Simply dialing into the ESP32’s IP address will grant one access to the interface.” I kept reading this like it only allowed a single access to the interface and could not understand why one would do such a thing. Perhaps “… will allow one to access the interface” would have been less confusing for me.
a comma would have been less confusing
Or you can switch to Platformio, wherein the original Arduino espota API still works fine from *within* the IDE to update firmware and the SPIFFS volume.
Wow Arduino 2.X has been out for almost six months and it’s still incomplete and buggy. Rui Santos of Random Nerd Tutorials in his definitive “Getting Started with the ESP32 Development Board” tutorial [1] is still saying this:
1. Don’t install the 2.0 (Arduino IDE) version. Select your operating system and download the software. For Windows, we recommend downloading the “Windows ZIP file“ (this is the stand-alone version, no installer).
2. If you’re just getting started with the ESP32, start with Arduino IDE. At the time of writing this tutorial, we recommend using the legacy version (1.8.19) with the ESP32. While version 2 works well with Arduino, there are still some bugs and some features that are not supported yet for the ESP32.
3.For beginners, we recommend using Arduino IDE. While it’s not the best IDE, it works well and is simple and intuitive to use for beginners. After getting familiar with Arduino IDE and you start creating more complex projects, you may find it useful to use VS Code with the Platformio extension instead.
He also says this:
To run Arduino IDE, you need JAVA installed on your computer. If you don’t, go to the following website to download and install the latest version: http://java.com/download.
Which in my experience is NOT true with the stand-alone .zip version of the legacy Arduino IDE which comes with a built-in stand-alone Java Run-Time Edition (RTE).
* References:
1. Getting Started with the ESP32 Development Board
https://randomnerdtutorials.com/getting-started-with-esp32/
Is there no security involved?
“You forgot, in your wisdom
The window to the ladies’ room
A whole new possibility
For a cat like me”
The way you put that brought up a memory of Studio killers – Ode To The Bouncer.
how can you upload entire folders to the file system? only individual files work here.
It worked but I had to find and manually install two libraries.
* me-no-dev/ESPAsyncWebServer
* bbx10/Hash_tng
Wondering if could work the same with LittleFS?
I was under the impression that LittleFS now supersedes SPIFFS.
Found simply replacing all reference to SPIFFS to LittleFS works fine.
…I spoke too soon. It is not working with LittleFS. Does update program.