
Not that it’s the kind of thing that pops into your head often, but if you ever do think of a cyanotype print, it probably doesn’t conjure up thoughts of modern technology. For good reason — the monochromatic technique was introduced in the 1840s, and was always something of a niche technology compared to more traditional photographic methods.
The original method is simple enough: put an object or negative between the sun and a UV-sensitive medium, and the exposed areas will turn blue and produce a print. This modernized concept created by [Gabe] works the same way, except both the sun and the negative have been replaced by a lightly modified resin 3D printer.
 A good chunk of the effort here is in the software, as [Gabe] had to write some code that would take an image and turn it into something the printer would understand. His proof of concept was a clever bit of Python code that produced an OpenSCAD script, which ultimately converted each grayscale picture to a rectangular “pixel” of variable height. The resulting STL files could be run through the slicer to produce the necessary files to load into the printer. This was eventually replaced with a new Python script capable of converting images to native printer files through UVtools.
On the hardware side, all [Gabe] had to do was remove the vat that would usually hold the resin, and replace that with a wooden lid to both hold the UV-sensitized paper in place and protect the user’s eyes. [Gabe] says there’s still some room for improvement, but you wouldn’t know it by looking at some of the gorgeous prints he’s produced already.
No word yet on whether or not future versions of the project will support direct-to-potato imaging.


Robert Murray Smith has also been doing this but without modifying his printer. Being British he also fixes the image (they eventually fade in the light) by the expedient method of dunking it in some tea. https://youtu.be/GluNgAFQVkY
cyanotype does not fade or need to be fixed, assuming you properly wash the print to a neutral or slightly acidic ph. same blue as in denim pants.
tea is used for toning, will change the blue to a more black/grey tone.
Cyanotypes absolutely do fade. Much work has been done on this for historical preservation https://resources.culturalheritage.org/pmgtopics/2003-volume-ten/10_02_Ware.html
Cyanotype blue is (mostly) Prussian Blue or close variants thereof according to the formulation used, but they’re generally iron/cyanide complexes. Denim is dyed with indigo, an organic molecule with benzene rings https://en.wikipedia.org/wiki/Indigo_dye
Tea stops the degradation of the cyanide by grabbing the iron and turning into a complex with tannin or tannic acid, which is the black substance used for centuries as legal ink. This is very permanent, but the side effect is that the paper goes, well, tea-coloured…
I believe the disagreement may have been around the word “fix”, since in photographic terms, this is usually referred to an image that would be lost within seconds to minutes if not chemically treated. Cyanotype’s unique printing out process normally reveals its final image in a water bath, developing the image without the need for an additional process.
They do fade with light but it is completely reversible! Pretty neat.
While they do experience fade, I can tell you it’s not something you need to do anything additional to prevent. I have cyanotypes I made 15 years ago that have always hung in my living room. I can tell no difference in the image. Now, a cyanotype hung in a gallery window receiving direct sun 12 hours a day or a 100+ year old one, that may be a different matter eventually.
It does pale a bit in sunlight but recovers in oxygen. So don’t keep air away from it or let sunlight on it for too much of the day, and it should be fine.
UVTools has a Lithophane generator and can directly generate the slices from an image file, no need to muck about with scripting or anything else.
Best to fix your contrast curve first in photoshop as cyanotype is rather non-linear. There’s also a minimum exposure so you want to adjust your very bottom layer to account for it.
To calibrate and linearize exposure it’s best to print some test squares, I did an 8×8 matrix so 64 squares and each 4 layers high which will map 0-255, then you linearize that and apply a curve on your image in photoshop. A lot to explain here but there are good guides to doing this with digital negs for alt printing, search for tools like Chartthrob to start down that rabbit hole.
I played with this a year or more ago now, works quite well – I got the idea from elsewhere else btw. so not my claim to fame.
If you figure out where you heard it from let me know! I’d love to credit them. I first got this working in May last year. I had seen people try to use them to make pcbs, but never for cyanotypes as far as I can recall.
I had a similar idea but using an iPad now with OLED and super high resolution screens that are so very close to the surface the definition of a print from the screen might be pretty good, I just need to figure how to make the iPad flash the negative imagine on a timed manner, from total black and back like an enlarger would do
I’m now wondering if I can replace the ink in an ink jet printer cartridge with the cyanotype chemicals, print a high resolution image and perhaps even modify a scanner to develop the image.
awfully complex, and tons of hurdles on the way. For example you mix the cyanotype chemicals just before use.
The easy recipe: use paper or fabric the size you want, sensitize it with cyanotype chemicals , then use a beamer (FullHD DMD for example) to shine your image on it until it´s developed. Rinse, voila.
Couldn’t you just put part of the formula on the paper, and the remainder in the cartridge? Printing would mix the two, and a full-page UV exposure would develop color in only the mixed pixels.
So it’s a precursor and an iron source. You can use one that releases its iron when hit by UV or you can just give it an iron salt directly. I’ve used iron sulfate because it’s cheap but there’s downsides; I’d like to try the chloride sometime. Anyway if you want the color to stick, you want the fibers to already be impregnated with the precursor, and for it to stay there while they react instead of getting washed out. Also calcium carbonate in super white printer papers isn’t great for it, art supplies have better paper options.
If you just wanted to turn an entire thing blue, you couldn’t dump the iron donor solution over it because a lot would wash out and it wouldn’t get as blue as it otherwise might and it could be uneven besides. You can gently spray the iron solution on letting it dry in between, and less will wash out. Sulfate tends to turn to rust and clog the spray bottle; I may need to add a touch of acid to fight that if I don’t replace it with a different salt. UV sensitive things don’t have that problem as you can mix the two, dry the whole thing, and only then begin to generate the blue. However, the blue blocks the UV as it begins to form, so exposure times can be longer that way. Not sure how well you could deliver either half with an inkjet process, but you can always just print transparencies and use them as masks over sheets that are already treated.
No, because that’s not how cyanotypes work in the slightest :)
No mention of Ben Krasnow’s leaves?
https://hackaday.com/2023/08/28/photography-goes-leaf-green/
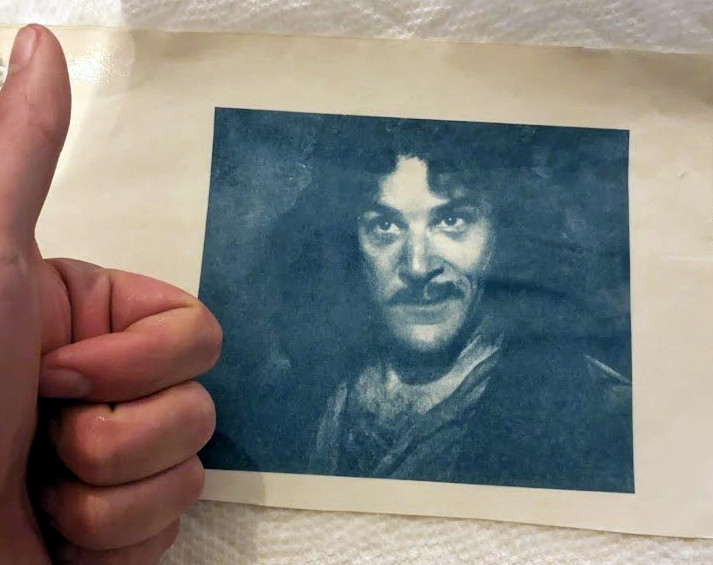
Is that example print with the thumbs up what I think it is? (“Hello, my name is Inigo Montoya, you killed my father, prepare to die.”)
This is an excellent resource for all things cyanotype – the cyanomicon, from mikeware. https://www.mikeware.co.uk/downloads/-Cyanomicon.pdf