3D Printing Antennas With Dielectric Resin

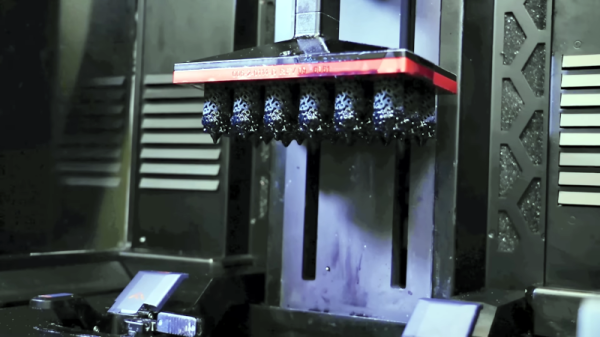
[Machining and Microwaves] has long wanted to use a 3D printer to print RF components for antennas and microwave lenses. He heard that Rogers — the company known for making PCB substrates, among other things — had a dielectric resin available and asked them if he could try some. They agreed, with some stipulations, including that he had to visit their facility and show his designs in a video. Because of that, the video seems a little bit like a commercial, but we think he is genuinely excited about the possibility of the resin.

Since he was in their facility, he was able to interview several of the people behind the resin, and they had some interesting observations about keeping resin consistent during printing and how the moonbounce feed he wanted to print would work.

Some of the exotic RF test equipment was interesting to see, too. The microwave lenses look like some kind of modern art. According to the Roger’s website:

Radix Printable Dielectric materials are a ceramic-filled, UV-curable polymer designed for use with photopolymer 3D-printing processes like sterolithography (SLA) and digital light processing (DLP) printing. These materials and printing processes enable the use of high-resolution, scalable 3D-printing for complex RF dielectric components such as gradient index (GRIN) lenses or three-dimensional circuits. The 2.8Dk printable dielectric is designed to have low loss characteristics through millimeter wave (mmWave) frequencies and low moisture absorption for end-use applications.

It isn’t clear to us that you could use this resin in your own printers, but they did look pretty similar to what we have hanging around except, perhaps, for the continuous circulation of the resin pool. We figured the resin wasn’t inexpensive. In fact, we found a liter online for $1,863. We don’t know if that’s the suggested retail price or not, but we also suppose if you need this material, you won’t be that surprised at the cost.

If you don’t need microwave frequencies, you might be able to get by with some easier techniques. Or, you can even do something slightly more difficult but probably a lot cheaper.

Continue reading “3D Printing Antennas With Dielectric Resin”

Injection Molds: Aluminum Or Resin?

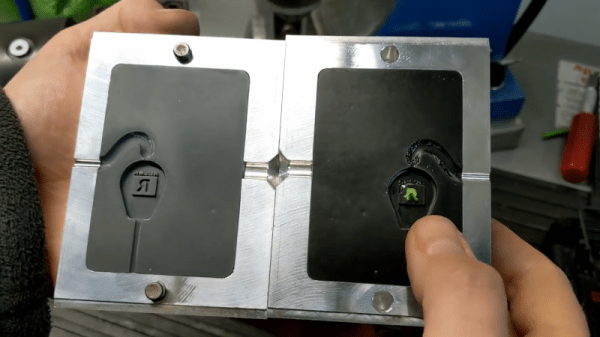
[JohnSL] and his friend both have injection molding machines. They decided to compare the aluminum molds they usually use with some 3D printed molds created with a resin printer. They used two different resins, one on each side of the mold. You can see a video of the results below.

One half of the mold used ordinary resin while the other side used a resin that is made to hold up to higher temperatures. As you might expect, the lower-temperature resin didn’t stand up well to molten plastic. However, the higher temperature resin did somewhat better. It makes sense, though, that an aluminum mold draws more heat out of the plastic which is helpful in the molding process.

The higher temperature — and more expensive — resin did seem to hold up rather well, though. Of course, this was just to test. In real life, you’d want to use the better resin throughout.

No surprise, the resin molds didn’t last nearly as long as a proper mold. After 70 shots, the mold was worn beyond what you’d want to use. So not necessarily something you’d want to use for a real production run, but it should be enough for a quick prototype before you go to the expense of creating a proper mold.

We wonder if there are some other tricks to get better results. A comment from [TheCrafsMan] suggests that clear resin UV cures better, and that might produce better results. In fact, there are a lot of interesting comments on the video from people who have varied experiences trying to do the same thing.

If nothing else, watching the mill cut through the aluminum around the 15-minute mark is always interesting to watch.  If you don’t already have an injection molding setup, you can always build one. We’ve seen more than one design.

Continue reading “Injection Molds: Aluminum Or Resin?”

Add-On Lets FDM 3D Printer Wash And Cure Resin Parts

The dramatic price reductions we’ve seen on resin 3D printers over the last couple of years have been very exciting, as it means more people are finally getting access to this impressive technology. But what newcomers might not realize is that the cost of the printer itself is only part of your initial investment. Resin printed parts need to be washed and cured before they’re ready to be put into service, and unless you want to do it all by hand, that means buying a second machine to do the post-printing treatment.

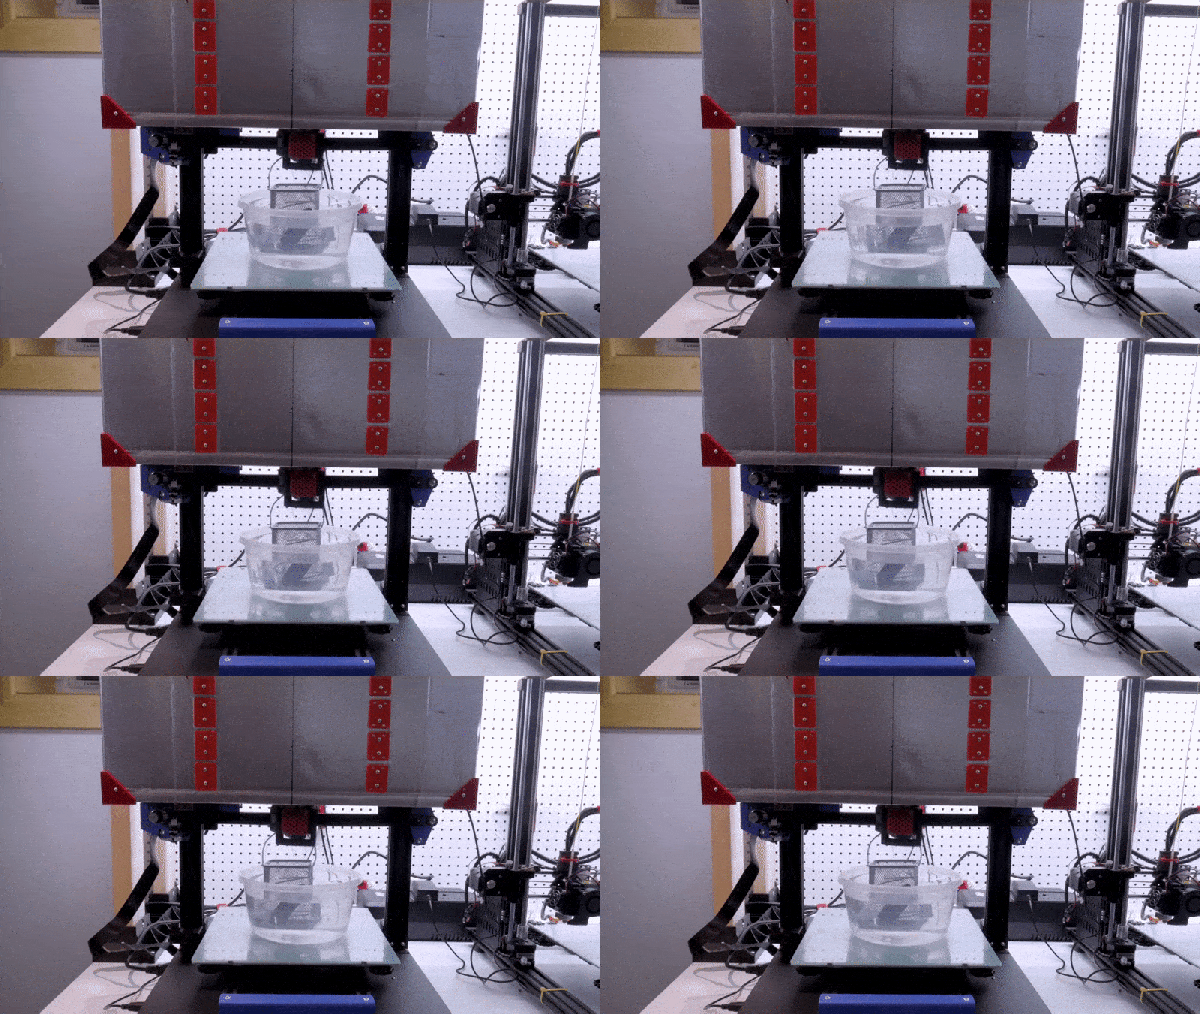
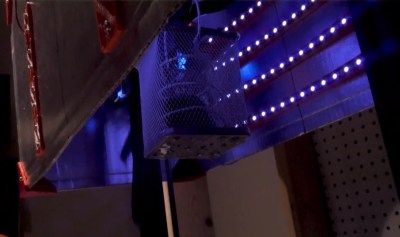
Not sure he wanted to spend the money on a dedicated machine just yet, [Chris Chimienti] decided to take an unusual approach and modify one of his filament-based 3D printers to handle wash and cure duty. His clever enclosure slips over the considerable Z-axis of a Anet ET5X printer, and includes banks of UV LEDs and fans to circulate the air and speed up the drying process.

Looking up into the curing chamber.

The curing part is easy enough to understand, but how does it do the washing? You simply put a container of 70% isopropyl alcohol (IPA) on the printer’s bed, and place the part to be washed into a basket that hangs from the printer’s extruder. Custom Python software is used to generate G-code that commands the printer to dip the part in the alcohol and swish it back and forth to give it a good rinse.

Once the specified time has elapsed, the printer raises the part up into the enclosure and kicks on the LEDs to begin the next phase of the process. The whole system is automated through an OctoPrint plugin, and while the relatively low speed of the printer’s movement means the “washing” cycle might not be quite as energetic as we’d like, it’s definitely a very slick solution.

[Chris] provides an extensive overview of the project in the latest video on his YouTube channel, Embrace Racing. In it he explains that the concept could certainly be adapted for use on printers other than the Anet ET5X, but that it’s considerable build volume makes it an ideal candidate for conversion. Of course it’s also possible to use the foam board enclosure by itself as a curing chamber, though you’ll still need to wash the part in IPA ahead of time.

This is perhaps one of the most unusual wash and cure systems we’ve seen here at Hackaday, but we appreciate the fact that [Chris] based the whole thing on the idea that you’ve probably got a FDM printer sitting nearby that otherwise goes unused when you’re working with resin. If that’s not the case for you, putting together a more traditional UV curing chamber is an easy enough project.

Continue reading “Add-On Lets FDM 3D Printer Wash And Cure Resin Parts”

How To Make Resin Prints Crystal Clear

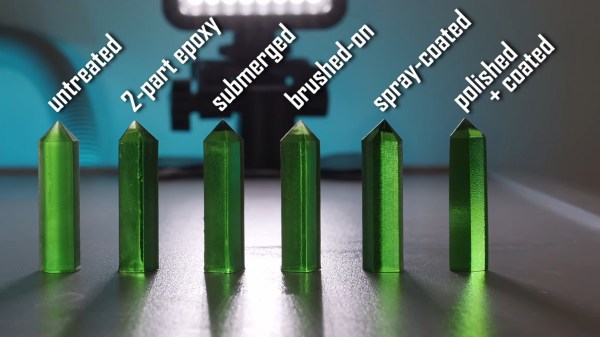
[Matou] has always been entranced by the beauty of natural crystal formations [and has long wished for a glowing crystal pendant]. Once he got a resin-based 3D printer, he was majorly disappointed to find out that although transparent resin prints look like delicious candy when they’re still wet, they turn cloudy and dull after being washed in an isopropyl bath and cured with UV light. There must be a way to either polish pieces back to clear, or keep them clear in the first place, [Matou] thought, and set about experimenting with some test crystals (video, embedded below).

As [Matou] found out, the dullness is caused by surface imperfections. Resin prints have layer lines, too, and although they may be super fine and invisible to the naked eye, they will still scatter light. The choices seem obvious — either polish the proud parts down with many grits of sandpaper, or fill the valleys with something to smooth everything out. As you’ll see in the video after the break, [Matou] tried it all, including a coat of the same resin that made the print. It’s an interesting look at the different ways to smooth out resin prints, though you may not be surprised to find that the one with the most work put into it looks the best.

We were hoping to see [Matou] try a green LED in the pendant, but it didn’t happen. If you’re dying to know what that looks like, you can get one of these pendants for yourself by supporting [Matou] on Patreon.

We think crystals are pretty cool, too — especially crystal radios. Here’s the hack-iest one of those we’ve ever seen, free of charge.

Continue reading “How To Make Resin Prints Crystal Clear”

Off-The-Shelf Parts Make A Tidy Heater For Resin Printer

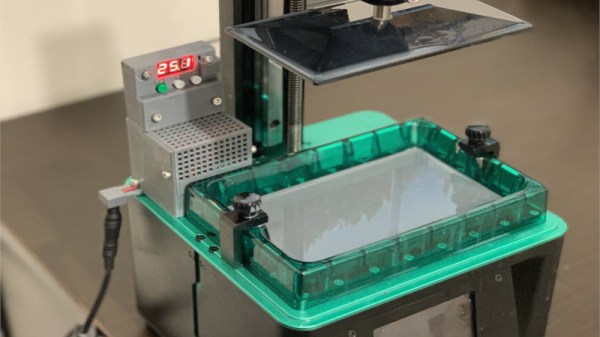
Resin printers can offer excellent surface finish and higher detail than other 3D printing technologies, but they come with their own set of drawbacks. One is that they’re quite sensitive to temperature, generally requiring the resin chamber to be heated to 25-30 degrees Celsius for good performance. To help maintain a stable temperature without a lot of mucking around, [Grant] put together a simple chamber heater for his printer at home.

Rather than go for a custom build from scratch with a microcontroller, [Grant] was well aware that off-the-shelf solutions could easily do the job. Thus, a W1209 temperature control board was selected, available for under $5 online. Hooked up to a thermocouple, it can switch heating elements via its onboard relay to maintain the set temperature desired. In this case, [Grant] chose a set of positive-temperature coefficient heating elements to do the job, installing them around the resin chamber for efficiency.

The heater can preheat the chamber in under fifteen minutes, much quicker than other solutions using space heaters or heat mats. The time savings will be much appreciated by [Grant], we’re sure, along with the attendant increase in print quality.  If you’re still not sure if resin printing is for you, have a read of our primer. And, if you’ve got your own workflow improvements for resin printing, drop us a line!

Inspire Dev Kit Drops Price Of MSLA Printer To Just $30

Over the last couple of years, we’ve seen massive price reductions on consumer 3D printers based on masked stereolithography (MSLA) technology. As the name implies, these machines use a standard LCD panel to selectively mask off the ultraviolet light coming from an array of LEDs. Add in a motorized Z stage, and you’ve got a simple and cheap way of coaxing UV resin into three dimensional shapes. These days, $200 USD can get you a turn-key MSLA printer with resolution far beyond the capabilities of filament-based FDM machines.

But [JD] still thinks we can do better. His project aims to produce a fully-functional MSLA printer for $30, and perhaps as low as $15 if manufactured in sufficient quality. He believes that by making high-resolution 3D printing more accessible, it will allow users all over the globe to bring their ideas to life. It’s no wonder he’s calling his machine the Inspire 3D Printer.

A test fixture for the LCD module.

This isn’t just some pie in the sky concept rolling around in [JD]’s head, either. You can order the Inspire Development Kit right now for just $30, though he makes it clear what you’ll receive isn’t quite a functional MSLA printer. By leveraging a common LCD module, the ESP32, and several 3D printed parts, he’s proven his price point for the kit is achievable; but there’s still plenty of work that needs to be done before the machine is ready for the general public.

For one thing, he’s still working the kinks out of the Z movement. The current design is 3D printed, but [JD] says he’s not quite happy with the amount of slop in the movement and is considering replacing the entire thing with the linear actuator from an optical drive. We’ve already seen these parts reused for accurately positioning lasers, so there’s certainly precedent for it. The firmware for the ESP32 is also in its infancy, and currently only allows the user to print from a selection of simple hard-coded shapes as a proof of concept.

We’ve seen DIY attempts at resin printers in the past, but they’ve often been based on more complex techniques involving projectors or UV lasers. Masked stereolithography is much more approachable for the home gamer, and projects like the Inspire 3D Printer show just how little it really takes to pull solid objects out of a puddle of goo.

Adding Remote Control To The Elegoo Mars Pro

Recent price drops put entry level masked stereolithography (MSLA) resin 3D printers at around $200 USD, making them a very compelling tool for makers and hackers. But as you might expect, getting the price this low often involves cutting several corners. One of the ways manufacturers have made their machines so cheap is by simplifying the electronics and paring down the feature set to the absolute minimum.

So it was hardly a surprise for [Luiz Ribeiro] to find that his new Elegoo Mars Pro didn’t offer WiFi connectivity or a remote control interface. You’re supposed to just stick a USB flash drive into the printer and select the object you want to print from its menu system. But that doesn’t mean he couldn’t hack the capability in himself.

Monitoring a print with Mariner.

If this were a traditional 3D printer, he might have installed OctoPrint and been done with it. But resin printers are a very different beast. In the end, [Luiz] had to develop his own remote control software that worked around the unique limitations of the printer’s electronics. His software runs on a Raspberry Pi Zero and uses Linux’s “USB Gadget” system to make it appear as a flash drive when plugged into the USB port on the Elegoo Mars Pro.

This allows sending object files to the printer over the network, but there was a missing piece to the puzzle. [Luiz] still needed to manually go over to the printer and select which file he wanted to load from the menu. Until he realized there was an exposed serial port on control board that allowed him to pass commands to the printer. Between the serial connection and faux USB Mass Storage device, his mariner software has full control over the Mars Pro and is able to trigger and monitor print jobs remotely.

It might not offer quite the flexibility of adding OctoPrint to your FDM 3D printer, but it’s certainly a start.