A Raspberry Pi in an enclosure, connected to a stepper motor controller and a UMTS stick

2024 Home Sweet Home Automation: SMS Controlled Heating

Hackaday.io user [mabe42] works during the week away from their home city and rents a small apartment locally to make this life practical. However, the heating system, a night-storage system, is not so practical. They needed a way to remotely control the unit so that the place was habitable after a long winter commute; lacking internet connectivity, they devised a sensible solution to create an SMS-controlled remote heating controller.

The controller runs atop an old Raspberry Pi B inside a 3D-printed case. Seeing such an old board given a real job to do is nice. Connectivity is via a USB UMTS stick which handles the SMS over the cellular network. The controller knob for the heater thermostat (not shown) is attached via a toothed belt to a pully and a 28BYJ-48 5V geared stepper motor. Temperature measurement is via the ubiquitous DS1820 module, which hooks straight up to the GPIO on the Pi and works out of the box with many one-wire drivers.

The software is built on top of Gammu, which handles the interface to the UMTS device. Daily and historical temperature ranges are sent via SMS so [mabe42] can decide how to configure the heating before their arrival. The rest of the software stack is in Python, as per this (German-language) GitHub project.

While we were thinking about storage heating systems (and how much of a pain they are), we came across this demonstration of how to build one yourself.

A raspberry pi-based digital readout above an old lathe

Roll Your Own DRO With An Added Twist

When using a manual machine tool such as a lathe or milling machine, there can be a lot of pressure to read the position and feed the axes at the correct rate. That’s why modern machines typically have some form of digital read-out (DRO). [Stefano Bertelli] has created a simple Raspberry Pi based DRO with an additional twist, that of a linked motor drive output.

A view of the custom RS485 interfaced DRO readout and motor controller
Realtime encoder position reading and motor control are best done with a dedicated microcontroller, ideally with a proper RTOS.

The axes that need to be monitored should be mechanically attached to a position sensor like a linear encoder or a rotary type. Using a linear sensor with a linear axis instead of a rotary encoder on the downstream dial is better. For the readout unit, [Stefano] used a WaveShare 7-inch touchscreen module with a Raspberry Pi 3 for the UI of the readout unit. The Pi has a custom-designed HAT, that performs power conditioning and provides a robust RS485 interface. Connected via that RS485 link is another custom PCB based on an STM32F411 with a few supporting power supplies and interfacing components. The job of this board is to interface to the position encoders, reading positioning pulses using interrupts. There is an additional stepper motor drive courtesy of a ULN2003 Darlington driver to allow the control of a single motorised axis. An additional motor driver module is required, which should be no surprise since driving a milling machine axis will require a fairly beefy motor. This GitHub repo contains the FreeRTOS-based firmware for this board. This motor drive has the ability to be connected to a measuring axis in a programmable way, enabling one axis to be adjusted to follow or jump in controlled steps with another. This feature can significantly simplify certain types of machining operations, as [Stefano] elaborates in the video.

Lastly, the Raspberry Pi runs a simple Python application with Kivy for the GUI. As [Stefano] explains in the video below, this makes debugging and modification quite simple.

Adding DROs to an older machine is an obvious but valuable hack. Here’s another way to do it. If that’s too much work, then you could just hack a digital readout calliper in there.

Continue reading “Roll Your Own DRO With An Added Twist”

Pager Lives Again Thanks To Python And Mastodon

Pagers were a big deal for a while there, even if they never quite made it into the pantheon of excellent sitcom plot devices like answering machines did. Anyway, [Finnley Dolfin] had some pagers and gave them a refresh for the modern era, using them to receive message alerts from Mastodon.

The project is laced together with a bunch of Python code. It uses the Mastodon library for interacting with the social media website. When it detects an incoming direct message, it hooks into DAPNET – the Decentralized Amateur Paging Network.  Via this network, a message is sent out over the airwaves to [Finnley’s] pager, serving as a notification that someone’s reached out to chat on Mastodon.

It’s neat that the amateur radio world is keeping pagers alive, using distributed base stations to share messages. Unfortunately, given the existence of smartphones, we don’t quite see pagers catching on again any time soon. And yet, [Finnley’s] setup has a certain level of old-school cool that no modern phone could match.

We’ve seen only a handful of pager hacks over the years, but they’re still pretty neat. If you’ve got your own cooking up in the workshop, drop us a line, yeah?

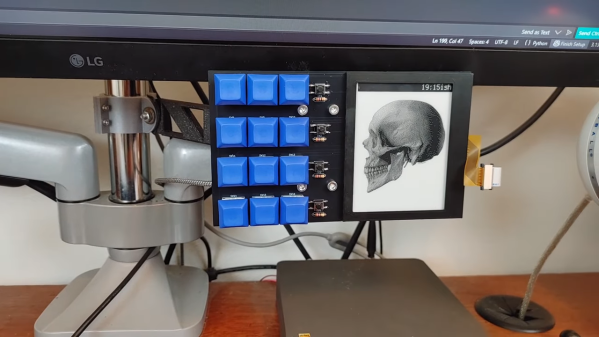
Streaming Deck Removes Need For Dedicated Hardware

Streaming content online has never been more popular than it is now, from YouTube to Twitch there are all kinds of creators around with interesting streams across a wide spectrum of interests. With that gold rush comes plenty of people selling figurative shovels as well, with audio mixing gear, high-quality web cams, and dedicated devices for controlling all of this technology. Often these devices take the form of a tablet-like device, but [Lenochxd] thinks that any tablet ought to be able to perform this task without needing dedicated, often proprietary, hardware.

The solution offered here is called WebDeck, an application written in Flask that turns essentially any device with a broswer into a stream control device. Of course it helps to have a touch screen as well, but an abundance of tablets and smartphones in the world makes this a non-issue. With the software running on the host computer, the streamer can control various aspects of that computer remotely by scanning a QR code which opens a browser window with all of the controls accessible from within. It has support for VLC, OBS Studio, and Spotify as well which covers the bases for plenty of streaming needs.

Currently the host software only runs on Windows, but [Lenochxd] hopes to have MacOS and Linux versions available soon. We’re always in favor of any device that uses existing technology and also avoids proprietary hardware and software. Hopefully that’s a recipe to avoid planned obsolescence and unnecessary production. If you prefer a version with a little bit of tactile feedback, though, we’ve seen other decks which add physical buttons for quick control of the stream.

Atopile Wants You To Code Schematics

We’d wager that, if you’re reading Hackaday, you’ve looked at more than a few circuit diagrams in your day. Maybe you’ve even converted a few of them over to a PCB. It’s a workflow that, at this point, is well-understood. But as designs become more complex, the schematics are harder to create and maintain. That’s why Atopile wants to treat hardware design more like writing code.

We can see some real benefits to this but also some possible drawbacks. On the plus side, reusing chunks of PCB description should be easy. On the other hand, detecting certain errors on a schematic or PCB layout is easier than spotting them in code. Of course, there are probably types of errors that are easier to catch in code, too, so maybe that’s not a problem. Certainly, if you can spit out a schematic from your code, you could — potentially — have the best of both worlds.

Continue reading “Atopile Wants You To Code Schematics”

Need A Serial Data Plotter? Better Write Your Own

When you’re working with a development team, especially in a supporting capacity, you can often find yourself having to invent tools and support systems that are fairly involved, but don’t add to the system’s functionality. Still, without them, it’d be a dead duck. [Aidan Chandra] was clearly in a similar situation, working with a bunch of postgrads at Stanford, on an exoskeleton project, and needed an accurate data plotter to watch measurements in real-time.

This particular problem has been solved many times over, but [Aidan] laments that many solutions available seem to be too complex, hard to extend, or just have broken dependencies. This happens a lot, and it simply leads to yet another project to get going, before you can do the real work it supports. Based on Python and PyQT5, serial-plotter is a new beginning, with an emphasis on correct data acquisition and real-time data visualization with a little processing thrown in. Think, acquire data, show the raw values as well as the mean value, and RMS noise all on the same windows side-by-side, all of which is easily tweakable with a bit of programming using Numpy and Matplotlib.

One particularly important point to highlight is that of the handling of time-stamping. [Aidan] needed to ensure samples were logged together with a local MCU timestamp so that when displayed and possibly later post-processed, it was possible to accurately determine when a particular value or event occurred. With the amount of buffering, data loss and multiple-thread shenanigans, it is easy to forget that the data might get to the application in a non-deterministic way, and just relying on local CPU time is not so useful.

If you need to visualize data transported over the serial port, we have seen many projects to help. Like the highly configurable Serial Studio, for one. If your needs are a bit more complex, especially with multiple data transport methods, then a Supercon 2022 talk by [Alex Whittemore] might be a jolly good place to start.

Seeing Fireworks In A Different Light

If you’re worried that [Roman Dvořák]’s spectroscopic analysis of fireworks is going to ruin New Year’s Eve or the Fourth of July, relax — the science of this build only adds to the fun.

Not that there’s nothing to worry about with fireworks, of course; there are plenty of nasty chemicals in there, and we can say from first-hand experience that getting hit in the face and chest with shrapnel from a shell is an unpleasant experience. [Roman]’s goal with this experiment is pretty simple: to see if it’s possible to cobble together a spectrograph to identify the elements that light up the sky during a pyrotechnic display. The camera rig was mainly assembled from readily available gear, including a Chronos monochrome high-speed camera and a 500-mm telescopic lens. A 100 line/mm grating was attached between the lens and the camera, a finding scope was attached, and the whole thing went onto a sturdy tripod.

From a perch above Prague on New Year’s Eve, [Roman] collected a ton of images in RAW12 format. The files were converted to TIFFs by a Python script and converted to video by FFmpeg. Frames with good spectra were selected for analysis using a Jupyter Notebook project. Spectra were selected by moving the cursor across the image using slider controls, converting pixel positions into wavelengths.

There are some optical improvements [Roman] would like to make, especially in aiming and focusing the camera; as he says, the dynamic and unpredictable nature of fireworks makes them difficult to photograph. As for identifying elements in the spectra, that’s on the to-do list until he can find a library of spectra to use. Or, there’s always DIY Raman spectroscopy. Continue reading “Seeing Fireworks In A Different Light”