This little audiobook player is a stellar example of the learning process behind a multifaceted project blending mechanical, electrical, and software design. [Mario] designed this audiobook player, dubbed Boxie, for his 3-year-old son to replace the often-used but flawed Toniebox.
The inspiration for Boxie was the Toniebox, a kid-friendly audiobook player. While functional, the Toniebox had drawbacks: it required internet connectivity, limited media selection, and had unreliable controls. Enter Boxie, a custom-built, standalone audiobook player free from web services, designed to address these issues with superior audio quality and toddler-friendly controls.
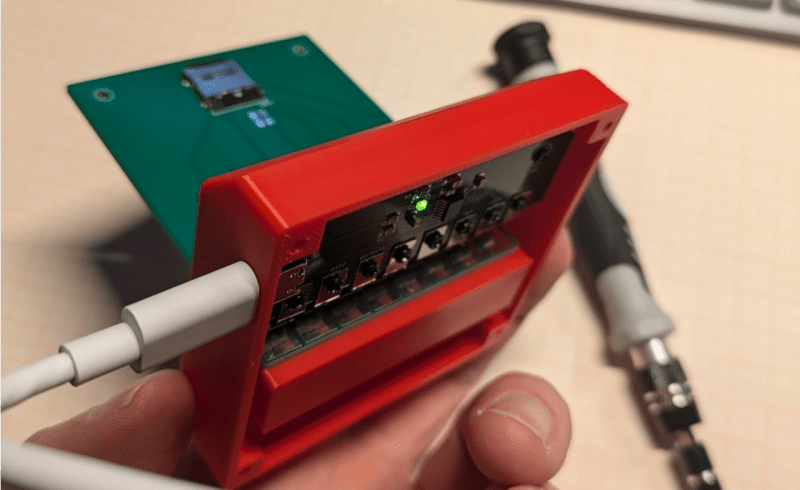
Boxie’s media is stored on microSD cards inserted into a slot on the device. To make this manageable for a toddler, he designed a PCB with a standard microSD card interface, ensuring easy swapping of audiobooks. The enclosure, crafted via 3D printing, is durable and compact, tailored for small hands.
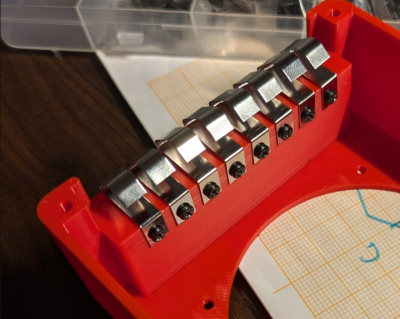
The cartridges slide into the body of the Boxie. This presented a problem, most cartridge media utilize edge connectors. Strictly speaking, his DIY cartridges didn’t have those and couldn’t use traditional cartridge reader components. First trying pogo pins, he ran into several issues, most notably the inability to hold up to the wear and tear of a 3-year-old. A clever hack to add robustness was achieved when he switched to using a series of battery springs to interface with the cartridge.
Inside the Boxie lives an ESP32-S3 microcontroller, which provides the smarts to read all the controls, play audio from the inserted cartridge. The main housing also contains the battery, DAC, amp, and speaker. Mario faced a fair number of new challenges on this project, including designing a battery charging circuit and building his own ESP32-S3 board with support for charging NiMH batteries.
All of the 3D designs, PCB files, and source code are available on his GitHub account. If you’re interested in making a Boxie for a young one in your life, be sure to go check out his detailed write-up. If you enjoyed this project, be sure to check out the other DIY audio players we’ve featured.


This is a fantastic project!
Maybe this project also works for people with high XP that are developing loss of skill, but are familiar with how the game-boy worked.
Nice project, and dad got a great stash of tools out of it too!
I wonder how well will SD cards handle connecting data pins before power pins. There’s a reason why power pins^H^H^H^Hpads are longer. And I guess teaching toddlers to insert the cartridge at a proper angle could be a bit challenging.
Probably just bending two of the battery spring could help. But a proper cartridge clearance and pad sizes on PCB would be a bit more robust. I guess.
Otherwise awesome project. I’d consider making it if not for the fact that my kids already learned to read.
The software waits for the card connected pin to go high, then waits another 500ms to start communicating over the data lines. Surprisingly, this works reliably and turned out to be toddler proof.
Oh, I had no idea that one of the data pins doubles as card detection. That’s actually pretty smart. And I appreciate the response to my nitpicking ;-)
Just a hint: If you want to build something like this, but don’t want to deal with all the hassle installing the compiler and using the esp-idf, you can do all of this (and many more things) with Annex RDS:
Annex is a Basic interpreter for ESP32, that can easily be installed via a web flasher, and already comes with a ton of features, like web editor with debugger, filesystem, AD card support, tons of displays and sensors, mp3 playback (even streaming), etc..
It even supports lvgl, so you can build professionally looking GUIs.
Thats actually pretty smart. How about an upgrade to some sort of data transmission via NFC or some sorts? Allowing to ditch the contacts completely and making it waterproof.