
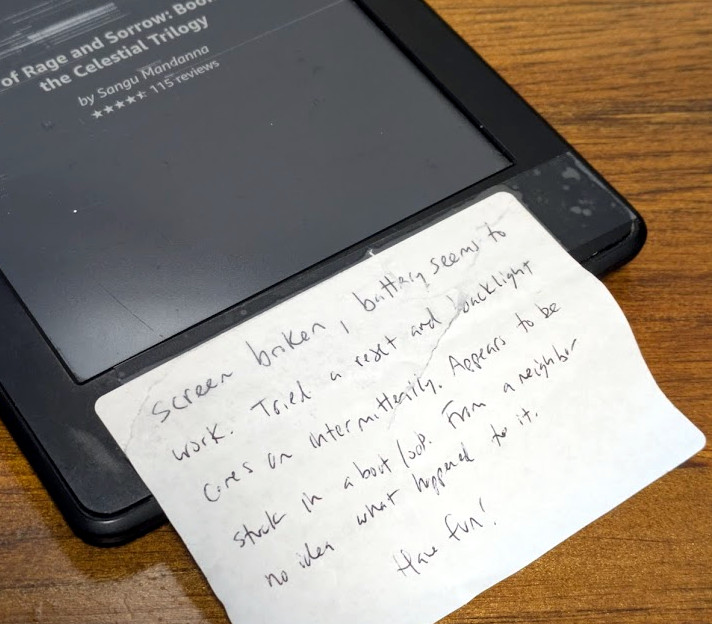
In the closing hours of JawnCon 0x2, I was making a final pass of the “Free Stuff for Nerds” table when I noticed a forlorn Kindle that had a piece of paper taped to it. The hand-written note explained that the device was in shambles — not only was its e-ink display visibly broken, but the reader was stuck in some kind of endless boot loop. I might have left it there if it wasn’t for the closing remark: “Have Fun!”
 Truth is, the last thing I needed was another Kindle. My family has already managed to build up a collection of the things. But taking a broken one apart and attempting to figure out what was wrong with it did seem like it would be kind of fun, as I’d never really had the opportunity to dig into one before. So I brought it home and promptly forgot about it as Supercon was only a few weeks away and there was plenty to keep me occupied.
The following isn’t really a story about fixing a Kindle, although it might seem like it on the surface. It’s more about the experience of working on the device, and the incredible hacking potential of these unassuming gadgets. Whether you’ve got a clear goal in mind, or just want to get your hands dirty in the world of hardware hacking, you could do far worse than picking a couple of busted Kindles up for cheap on eBay.
If there’s a singular takeaway, it’s that the world’s most popular e-reader just so happens to double as a cheap and impressively capable embedded Linux development environment for anyone who’s willing to crack open the case.
Getting Connected
We start with what’s essentially Hardware Hacking 101: the hidden serial debug port. It’s the sort of thing you learn to look for when taking apart a new gadget, and unsurprisingly, it’s also at the heart of Kindle hacking. While there’s plenty of software modifications you can do depending on the age and version of your particular Kindle, opening up the case and tapping into the serial port is always the most direct way to gain access to the system.


From my research, every Kindle (with the possible exception of the very latest models from the 2020s) have an unpopulated serial port on the board. In the case of this Kindle Paperwhite 2 from 2013, it’s even labeled. I simply soldered on some jumper wires and ran them out to a pin header to make connecting to it a little less fiddly. The only thing to watch out for is the voltage; it seems that the serial port on the majority of Kindles is 1.8 V, and connecting up a higher voltage USB-serial adapter without a level shifter could release the Magic Smoke.

With the hardware connected and my favorite serial communications tool running, it was easy to see what ailed this particular Kindle. As evidenced by the final few lines of the kernel messages, a failure of one of the voltage regulators in the MAX77696 — a power management IC designed specifically for e-ink readers — was preventing the driver module from loading fully. This in turn was triggering a reboot, presumably because some sort of watchdog routine was in place to bail out if any critical hardware issues were detected.
On the Hunt
Coming from the “normal” Linux world, the solution seemed easy enough. Since the screen was toast anyway, all I needed to do to get the Kindle booting was to prevent the kernel module from loading. That way I could at least use it for something, perhaps an energy efficient minimalist server.
But according to the MAX77696 datasheet, the chip was responsible for quite a bit more than simply driving the e-ink panel. If I pulled the kernel module entirely, there was a good chance I’d also lose features like the real-time clock and the ability to read the battery voltage as well. So I decided to change tactics: rather than keeping the driver from loading, I’d take out the watchdog that was forcing the system to reboot. But where was it?
Amazon makes it easy to manually download the latest firmware for each member of the Kindle family, and the aptly named KindleTool lets you manipulate them. In this case I used the extract function to pull out the root filesystem image, which I could then locally mount as a basic EXT3 volume.
That was refreshingly straightforward, but unfortunately didn’t get me where I needed to go. Using grep to search all the files within the filesystem for the string “failed to load eink driver” showed no hits. If the watchdog wasn’t in the root filesystem, then where was it?

Unpacking the firmware update with KindleTool also got me the kernel image, and running Binwalk against it showed there was a compressed filesystem at 0x466C. I reasoned this must be an initramfs — essentially a minimal Linux system that lives in RAM and gives the kernel a place to work as it brings up the rest of the system. If the system has some self-check capability, it’s reasonable to assume that’s where it lives.

After drilling down a few times with Binwalk’s extract function, I was able to get to the contents of the initramfs. Sure enough, another search for the error message revealed our sentinel: /bin/recovery-util.
New Kernel, Who Dis?
I had considered trying to simply remove the recovery-util program from the kernel image, but since I wasn’t 100% sure how the whole watchdog system functioned, there was no guarantee that would have worked without more trial and error. So, emboldened by how well this was all going for me so far, I took the nuclear option and decided to rebuild the kernel with my own initramfs.
It’s here that the Kindle software environment, and the community around it, really started to shine. Once again, Amazon made it ridiculously easy to get the source code for the exact firmware I was working with, and the community provided an actively maintained toolchain to build it with. A little more searching even pulled up some pre-compiled builds that were ready to use.
Actually building the kernel for the Kindle was essentially the same process as doing it on my desktop computer, with the notable addition of supplying the location of the cross compiler into each make command. But if I ever got off track, there were plenty of write-ups online to reference. I even found one that went over building a custom initramfs with BusyBox that doesn’t include any of Amazon’s programs.

But perhaps the best part was that, once I had compiled Amazon’s modified kernel and built my initramfs, installing it on the Kindle was as simple as using a modified version of Android’s fastboot command. There were no cryptographic hoops to jump through, you just give it the new kernel and away it went. It’s my understanding that newer Kindles might not be so understanding, but with at least the hardware of this vintage, there’s nothing stopping you from doing whatever you want.
Pocket Penguin Playground
With the source code, tools, and knowledge floating around out there, I was able to build my own kernel and initramfs that lets me boot into a full Linux environment on what was previously a non-functional Kindle. There are a few things I haven’t gotten to work yet, but I believe that’s largely because I’m still using the root filesystem provided by Amazon.
 Now that I know how easy it is to work with Linux on the Kindle, I’m looking to push further and put together my own stripped-down environment without any of Amazon’s frameworks installed. Given how ridiculously cheap early Kindles are on the second hand market — especially if they have a busted screen — there are all sorts of tasks that I could see them performing if I had a solid base to build on.
Make no mistake, I’m greatly appreciative of the fact that we now have mature single-board computers like the Raspberry Pi available for a reasonable cost. But taking what’s essentially consumer e-waste and turning it into a useful platform for learning and experimentation is the true hacker way. So whether you’ve got a Kindle collecting dust somewhere at home, or end up grabbing a few off of eBay for a song, I invite you to bust out the USB-serial adapter and start exploring.


I have a Kindle lying around and it is unable to boot I am able to see the NXP boot loader using lsusb but I am ensure of what to do from here on. I could not find any images of Kindle rom on the internet
I just revived a $30 ‘parts only’ Ebay video card (low profile GTX1050Ti)!
YAY ME!
I know to people who do this kind of thing every day it’s no big deal, but considering as of 48 hours ago I had no idea what ‘boardview’ meant, this feels… awesome.
The card was completely stone-a** dead. No voltage rails coming up, GPU cold, fan no spinny. No shorts on 12v/3.3v at the PCIe. After poking at things at random for way too long I finally found it. A capacitor (C569, 0402 22uF) on the back of the board had taken a whack and it showed less than 1ohm to ground on both sides. Removed the tiny little cap and checked it out of circuit, and it was still shorted. What ckt was that capacitor in? The 1.8v rail. What does the 1.8v rail run? The BIOS chip! (and probably some other stuff I don’t know who cares) Replaced the busted one with the only thing I had already on hand, an 0603 10uF, and the thing just works now! YAY!
(The only boardview files I could find were for full-height versions of the 1050 but despite not being very useful at all as far as the layout, they mostly had the same sorts of things doing the same functions, and the component numbering was mostly similar too.)
Congrats on the win!
On reflection, I think the capacitors were actually 0.22uF (original) & 0.10uF (my replacement). Because 22 & 10 don’t exist in those package sizes. Call-out in the boardview clearly states it as ’22U/6/X5R/6.3V/M’, and other caps in the list are called as ‘0.1UF’ and ‘4.7UF’, so they are aware of what a decimal is. Whatever. It works now. It would probably still work just fine with no cap at that location at all.
No – they DO exist in those sizes! OK. Weird I did not easily find them at Digikey (maybe they are still unhappy about my browser extensions/choice of OS/brand of deodorant, or whatever other thing they think is any of their business).
Congrats! I replaced a voltage regulator on an old 980ti not too long ago and I felt like a God so I know where you are coming from.
Would be curious to know how you went about it. Or a resource you could share to learn?
I have keyboard. it is no this same ;(
If it’s that simple to jailbreak, how is it don’t see much anybody doing it?
Gonna have to whack mine, now.
probably no one wants to bother with the hidden serial port :)
Would you know if they were? I did both of mine a few years ago and I think this is the first time I’ve bothered to mention it to anyone
In my opinion it’s because it’s a single purpose device that people treat them as disposable. They work well enough for a while, then people just get a new one. I don’t like that, personally, I don’t like the waste implicit in that approach to life.
If it’s that simple to jailbreak, how is it don’t see much anybody doing it?
Gonna have to whack mine, now.
I just want to tell you both, good luck. We’re all counting on you.
I’ve got a Kindle that died out of the blue years ago. Screen is still showing the page I was reading. Can’t imagine it’s going to show anything on the serial port, but having read this I’ve ripped the front off and found the pads.
Sounds like a level shifter is needed (luckily I just bought some that should work) but I can’t find a 1.8V source on the board yet. Found 1.35 so hoping that’s enough.
I’ve seen that behaviour when the USB ESD protection device was damaged, what happens if you charge it/do the hard reset?
Sorry, only just saw this!
Literally nothing. If I hold the power button for ages then the light goes off and it comes back on again when I release, but the screen’s never changed since the day it died.
No different without a battery in it (now I’ve got it open). Hopefully get around to trying the serial port this week.
Mind sharing what USB to serial adapter you used?
If you are not into hardwarehacks but want to check what else your kindle can do, check out https://github.com/KindleTweaks/KindleForge.
You may have just made my day. A friend has several Kindle’s that are having software/Amazon difficulties. This may resurrect them. Thank you!
I have two that no longer connect (thanks to being “too old”). They were just e-readers, so I might take a stab at this. Not really a software guy but those above would indicate that it’s not that tricky…
Various e-readers are commonly hacked by the sailplane / hang glider community as navigation devices, they can be rooted and have software such as xcsoar installed and the internal port is used for either a gps or a combined Vario / Gps module.
How about a BT GPS?
This was cool. I’m quite new to this so it will be interesting to try it out.