In the closing hours of JawnCon 0x2, I was making a final pass of the “Free Stuff for Nerds” table when I noticed a forlorn Kindle that had a piece of paper taped to it. The hand-written note explained that the device was in shambles — not only was its e-ink display visibly broken, but the reader was stuck in some kind of endless boot loop. I might have left it there if it wasn’t for the closing remark: “Have Fun!”
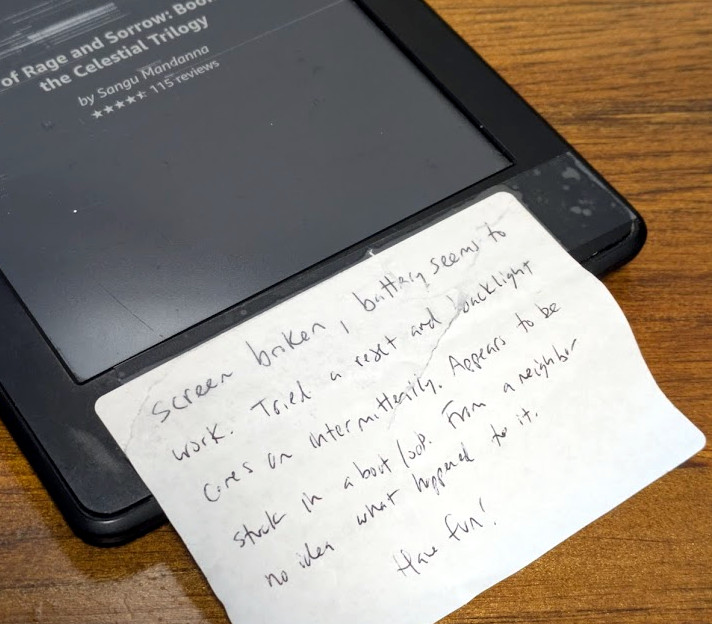 Truth is, the last thing I needed was another Kindle. My family has already managed to build up a collection of the things. But taking a broken one apart and attempting to figure out what was wrong with it did seem like it would be kind of fun, as I’d never really had the opportunity to dig into one before. So I brought it home and promptly forgot about it as Supercon was only a few weeks away and there was plenty to keep me occupied.
The following isn’t really a story about fixing a Kindle, although it might seem like it on the surface. It’s more about the experience of working on the device, and the incredible hacking potential of these unassuming gadgets. Whether you’ve got a clear goal in mind, or just want to get your hands dirty in the world of hardware hacking, you could do far worse than picking a couple of busted Kindles up for cheap on eBay.
If there’s a singular takeaway, it’s that the world’s most popular e-reader just so happens to double as a cheap and impressively capable embedded Linux development environment for anyone who’s willing to crack open the case.
Continue reading “The Unexpected Joys Of Hacking An Old Kindle”