The Hour Of The 3D Printed Clock Draws Nigh

clock_3d_printed_display_large

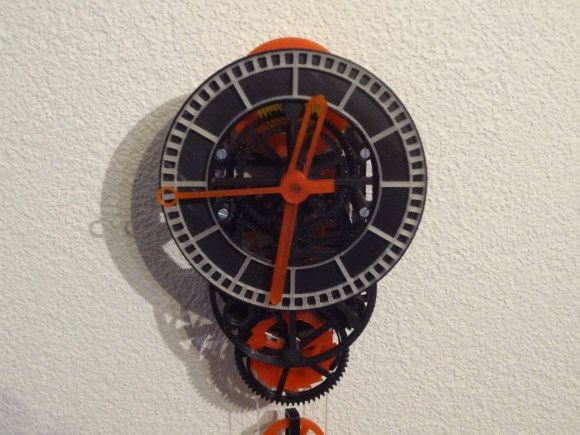
Many have tried, but [Christoph Laimer] has succeeded in designing a working, (relatively) accurate clock nearly completely from 3D printed parts. Every gear, pulley, wheel and hand of [Christoph’s] clock is printed. Only a few screws, axles, a weight, and a string are non-printed. Even the crank to wind the clock is a 3D printed part.

[Christoph] designed his clock in Blender. It took quite a bit of design work to create parts that would work and be printable. Even more work was involved in printing over 100 failed prototype parts.

One might think that [Christoph] is using the latest  printers from the likes of Makerbot or Utimaker to achieve this feat. It turns out he’s using a discontinued Rapman 3.2 printer. Further proof that even “older” printers are capable of great things! [Christoph] does run his printer rather slowly. Printing a single gear with 0.125 mm layers and a 0.4 mm nozzle takes him 2 or 3 hours.

Mechanically, the clock is gravity powered with an anchor escapement. Rather than a pendulum, [Christoph] chose to use a balance wheel and hairspring assembly to govern the escapement.  Even the spring is printed from standard PLA. The weight is suspended from a pulley block. The clock isn’t particularly efficient. 70cm of height will run the clock for only 2 hours.

[Christoph’s] clock has proven to be accurate to within 1/4 second per hour. He hasn’t provided temperature stability data – but being PLA, we’d suggest not getting it too hot!

Continue reading “The Hour Of The 3D Printed Clock Draws Nigh”

Designing And Building A Wooden Mechanical Clock

wooden-clock-prototype

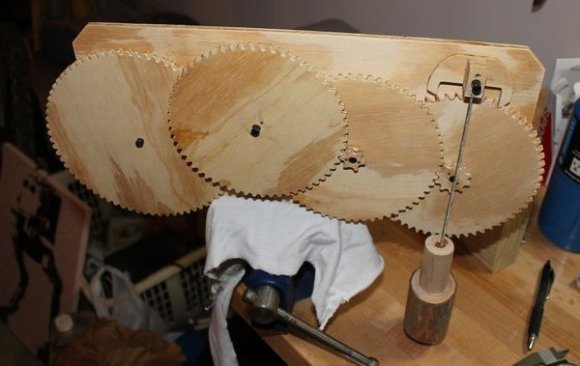
Electronics are undoubtedly the basis for our modern society. Leaving out transistor-based devices, and a mechanical clock would be one of the most intricate devices man has come up with. As a Mechanical Engineer, I thought it would be a fun challenge to design and build my own gear-driven clock.

Because clocks have obviously been invented, I wouldn’t be starting from scratch, and I don’t think I could have figured out an escapement on my own. I explain my initial clock escapement and gear reduction design thoughts in this post, and originally getting the escapement to work was my biggest fear.

As seen in the first video after the break, the escapement gear is still a big problem, but not really for the reason I expected. The shaft that the gear sits on seems to be bent, so it allows the escapement to “go free” for part of it’s cycle, losing any sense of accurate timekeeping. Be sure to also check out the second video, especially around 1:50 when I show what happens when an escapement gear goes much faster than a normal clock. Continue reading “Designing And Building A Wooden Mechanical Clock”

A Glorious Mechanical Seven Segment Display

If you’ve ever wondered why you’ve never seen a mechanical seven-segment display, now you know. They’re fairly complicated and most likely absurdly expensive, especially when a few light bulbs or LEDs would do the same job equally well. This didn’t stop [kiu] from completing his mechanical seven-segment clock he calls SevenBlocks, and for that we are thankful.

Each of the 28 segments in [kiu]’s clock is made of three layers of acrylic and a short section of a rack gear. Unlike every seven-segment display you’ve ever seen, tiny hobby servos provide the indication for each segment. For the electronics, An ATMega8 is used for the brains of the outfit with a 74HC595 shift register to expand the number of I/O lines. A DS1307 RTC module provides accurate timekeeping, and the dozens of servo outputs visible in the ‘guts shot’ makes you realize why you’ve never seen a mechanical seven segment display before – they’re really friggin’ complex.

If you want to build your own mechanical seven-segment clock, [kiu] put all the files up on Github. Everything is there, from the .DXF files ready to feed to a laser cutter to the schematic and board files for each of the three PCBs. A video showing this clock in action is sort of necessary, so you can check that out after the break.

Continue reading “A Glorious Mechanical Seven Segment Display”