You Can 3D Print A Working Reciprocating Steam Engine

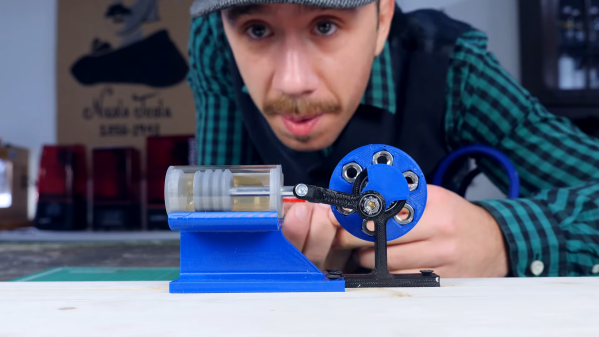
3D prints aren’t typically known for their heat resistance. However, [Integza] noted that using the right techniques, it was possible to 3D print parts that could handle steam heat without failing. Thus, the natural progression from there was to build a piston-type steam engine.

The sliding valve alternately feeds steam to each side of the piston.

Resin prints are key here, as the melting point of such parts is much higher than that of those turned out by typical FDM printers. Try this same build using PLA for the hot parts, and you’ll quickly end up with a pile of molten goo.

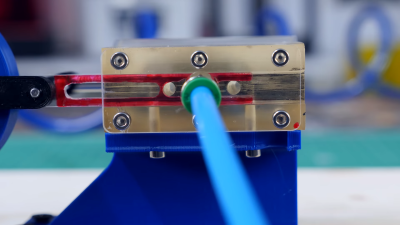
To make such an engine work, valves are required to allow steam to flow into alternating sides of the piston to let it reciprocate continuously. A simple slide valve is used, allowing steam to flow to one side of the piston and the other alternately, as driven by an arm coming off the flywheel attached to the engine’s output shaft.

Tested on compressed air and steam, the engine ran continuously, chugging away enthusiastically. However, steam performance was compromised by the low pressure output of just 1.5 bar from [Integza]’s pressure cooker. Similarly, the cooker’s steam capacity was low, so the engine ran for just 15 seconds.

However, it suggests that with a better supply of steam, the printed steamer could indeed run for some time. If you’re not into the wetter engines out there, though, consider extruding a Stirling engine instead. Video after the break.

Continue reading “You Can 3D Print A Working Reciprocating Steam Engine”

A Vacuum Chamber From A Pressure Cooker

[Allan] needed a small vacuum chamber to get all the air out of clear casting resin. Degassing is a simple step in casting that improves the finished product immensely. The problem, though, is building a vacuum chamber. [Allan]’s chamber seems easy enough to build, and pulls enough air out to get to 0.1 atmospheres.

After a hole was drilled in the side of the pressure cooker, [Allan] installed a 15mm “speedfit” plastic tank connector. The seal around the connector is neoprene self-adhesive foam. This foam was also taped around the lip of the pressure cooker for the top.

A thick-walled pressure cooker is more than capable of handling the outside pressure when under vacuum, but [Allan] cautions against using acrylic plastic for the top. Acrylic has the tendency to fail catastrophically, so he used a thick sheet of Lexan. Check out the demo video of [Allan] sucking the air out of shaving cream after the break.

Continue reading “A Vacuum Chamber From A Pressure Cooker”

Hacking A Better Pressure Cooker

This pressure cooker hack on [Dave Arnold]’s great cooking blog was sent into us (thanks, [techartisan]!). Most pressure cooker recipes are written for pressure cookers that can go up to 15 PSI or 250° F / 121° C. At these temperatures, a lot of interesting chemistry happens in the food. The popular Cuisinart electric pressure cooker doesn’t reach these pressures and temperatures, so [Dave Arnold] set out to make his Cuisinart better.

After measuring the temperature with a thermocouple, [Dave] deduced that the Cuisinart cooker only reached 237° F and 9 PSI. After having a look at the electronics, he realized that adding a resistor to the temperature sensor circuit would give him the pressure he wanted. After soldering in a trim pot, everything went swimmingly and the cooker was able to reach 15 PSI.

[Dave] isn’t sure how his modifications will hold up – he doesn’t know how the cooker will hold up to overheating (and there are a few concerns about non-stick pressure cookers in the first place). That being said, it’s a great mod to get some more capabilities out of a Cuisinart.