Vacuum Chamber Gets Automation

[Nick Poole] does a lot of custom work with vacuum tubes — so much so that he builds his own vacuum tubes of various shapes, sizes, and functions right on his own workbench. While the theory of vacuum tubes is pretty straightforward, at least to those of us who haven’t only been exposed to semiconductors, producing them requires some specialized equipment. A simple vacuum won’t get you all the way there, and the complexity of the setup that’s needed certainly calls for some automation.

The vacuum system that [Nick] uses involves three sections separated by high-vacuum valves in order to achieve the pressures required for vacuum tube construction. There’s a rough vacuum section driven by one pump, a high vacuum section driven by a second pump, and a third section called the evac port where the tube is connected. Each second must be prepared properly before the next section can be engaged or disengaged. An Arduino Pro is tasked with all of this, chosen for its large amount of ADC inputs for the instrumentation monitoring the pressures in each section, as well as the digital I/O to control the valves and switches on the system.

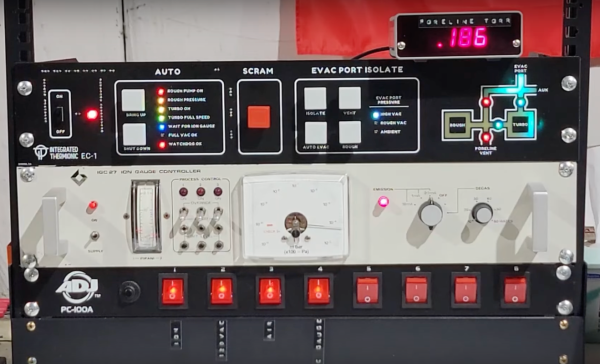
The control system is built into a 19-inch equipment rack with custom faceplates which outline the operation of the vacuum system. A set of addressable LEDs provide the status of the various parts of the system, and mechanical keyboard switches are used to control everything, including one which functions as an emergency stop. The automation provided by the Arduino reduces the chances for any mistakes to be caused by human error, allows the human operator to focus on other tasks like forming the glass, and can also react much faster to any potentially damaging situations such as the high-pressure pump being exposed to atmospheric pressure.

As you can probably tell, [Nick] is pretty passionate about this stuff — last year he gave a talk at the Hackaday Supercon that went over all the intricacies of building one’s own vacuum tubes.

Continue reading “Vacuum Chamber Gets Automation”

Solving Ultra High Vacuum Leaks Has An Elementary Solution

When we think of a vacuum leak we generally think of a car that just doesn’t want to run quite right. Most normally aspirated internal combustion engines rely on the vacuum created by the pistons to draw in the air fuel mixture that’s produced by the carburetor or fuel injection system. Identifying the leak usually involves spraying something combustible around common trouble areas while the engine is running. Changes to the engine speed indicate when the combustible gas enters the intake manifold and the leak can be found.

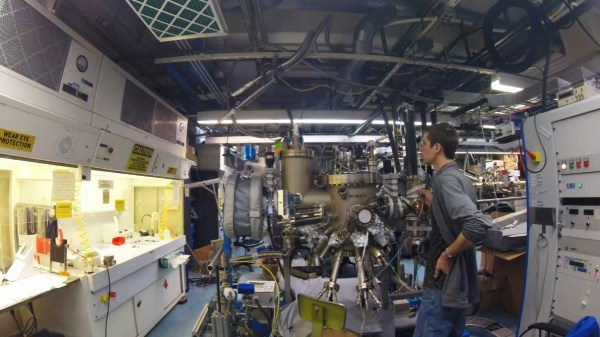
What if your vacuum leak is in a highly specialized piece of scientific equipment where the pressures are about 12 times orders of magnitude lower than atmospheric pressure, and the leak is so small it’s only letting a few atoms into the vacuum chamber at a time? [AlphaPhoenix] takes dives deep into this very subject in his video “Air-tight vs. Vacuum-tight.” which you can watch below the break.

Not only does [AlphaPhoenix] discuss how a perfect pressure vessel is sealed, he also explains the specialized troubleshooting methods used which turn out not to be all that different from troubleshooting an automotive vacuum leak- only in this case, several magnitudes more complex and elemental in nature.

We also enjoyed the comments section, where [AlphaPhoenix] addresses some of the most common questions surrounding the video: Torque patterns, the scarcity of the gasses used, and leaving well enough alone.

Does talking about vacuums get you pumped? Perhaps you’d enjoy such vacuum hacks as putting the toothpaste back in the tube in your homemade vacuum chamber.

Thank you [Morgan] for sending this one in. Be sure to send in your own hacks, projects, and fantastic finds through the Tip Line!

Continue reading “Solving Ultra High Vacuum Leaks Has An Elementary Solution”

Growing The World’s Largest Snowflake

Plenty of areas around the world don’t get any snowfall, so if you live in one of these places you’ll need to travel to experience the true joy of winter. If you’re not willing to travel, though, you could make some similar ice crystals yourself instead. While this build from [Brian] aka [AlphaPhoenix] doesn’t generate a flurry of small ice crystals, it does generate a single enormous one in a very specific way.

The ice that [Brian] is growing is created in a pressure chamber that has been set up specifically for this hexagonal crystal. Unlike common ice that is made up of randomly arranged and varying crystals frozen together, this enormous block of ice is actually one single crystal. When the air is pumped out of the pressure chamber, the only thing left in the vessel is the seed crystal and water vapor. A custom peltier cooler inside with an attached heat sink serves a double purpose, both to keep the ice crystal cold (and growing) and to heat up a small pool of water at the bottom of the vessel to increase the amount of water vapor in the chamber, which will eventually be deposited onto the crystal in the specific hexagonal shape.

The build is interesting to watch, and since the ice crystal growth had to be filmed inside of a freezer there’s perhaps a second hack here which involved getting the camera gear set up in that unusual environment. Either way, the giant snowball of an ice crystal eventually came out of the freezer after many tries, and isn’t the first time we’ve seen interesting applications for custom peltier coolers, either.

Continue reading “Growing The World’s Largest Snowflake”

An Affordable Home Made Vacuum Chamber

The term “vacuum” means many different things depending whether you are working on space equipment, scientific instruments, or even internal combustion engines. In our sphere it is so often used as a means to draw bubbles out of resin castings, for which it is a relatively easily achievable partial vacuum. It’s something [Fab] is using, in a vacuum chamber made from Plexiglass.

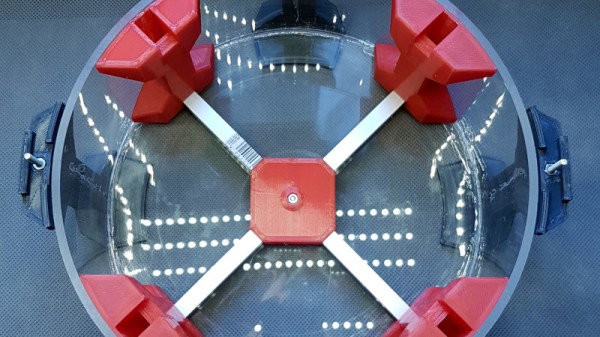
A simple Plexiglass box would collapse under the air pressure on its own, so to mitigate that it’s made from a piece of tube, and with an internal frame of aluminium extrusion with 3D printed joints to strengthen it from the inside. A pressure sensor allows regulation of the pump that drives the vacuum, and connections are made to the chamber using pneumatic hose connectors. It’s not immediately clear how it is sealed, whether there are nay gaskets or other sealant, or whether air pressure pushing the parts together provides enough of a seal.

We’ve featured a lot of vacuum chambers made for this purpose over the years, and we’d be interested to know what vacuum pump is being used here. If  you’re curious too and want to build your own, perhaps you could try a fridge compressor.

Build Your Own Vacuum Chamber For Degassing And More

A vacuum chamber can be a useful thing to have around the shop. It can be used for all manner of purposes, from science experiments to degassing paints and epoxies. They’re not something you’d find in every workshop, but never fear – you can always build one from scrap you’ve got lying around! (YouTube video, embedded below.)

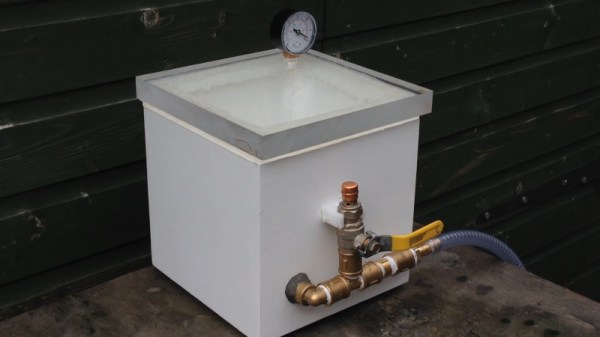
[VegOilGuy] begins the build with a simple plywood box, which gets screwed together and then tarted up with bodyfiller and paint. This helps to make the box airtight, as well as improving the aesthetics. A slot is then cut in the lid, and then filled with an excessive amount of silicone sealant. A flat plate covered in aluminium foil is placed on top, and the silicone is left to cure for several days.This is used to create a flat sealing surface for the lid to be placed on later.

Once the seal is complete, it’s a simple plumbing job to finish the chamber. [VegOilGuy] does a great job of demonstrating copper soldering and the proper way to install the necessary taps and check valves. Combined with an electric pump, the vacuum chamber passes its tests with flying colors, completely ruining some marshmallows in the process.

With a few dollars spent online for the special bits, it’s a build that any handy maker could throw together in a weekend. You can always go another route, though – like using an old fridge compressor to get the job done.

[Thanks to Keith O for the tip!]

Continue reading “Build Your Own Vacuum Chamber For Degassing And More”

How To Make Bisected Pine Cones Look Great, Step-by-Step

[Black Beard Projects] sealed some pine cones in colored resin, then cut them in half and polished them up. The results look great, but what’s really good about this project is that it clearly demonstrates the necessary steps and techniques from beginning to end. He even employs some homemade equipment, to boot.

Briefly, the process is to first bake the pine cones to remove any moisture. Then they get coated in a heat-activated resin for stabilizing, which is a process that infuses and pre-seals the pine cones for better casting results. The prepped pine cones go into molds, clear resin is mixed with coloring and poured in. The resin cures inside a pressure chamber, which helps ensure that it gets into every nook and cranny while also causing any small air bubbles introduced during mixing and pouring to shrink so small that they can’t really be seen. After that is cutting, then sanding and polishing. It’s an excellent overview of the entire process.
The video (which is embedded below) also has an outstanding depth of information in the details section. Not only is there an overview of the process and links to related information, but there’s a complete time-coded index to every action taken in the entire video. Now that’s some attention to detail.

Continue reading “How To Make Bisected Pine Cones Look Great, Step-by-Step”

Part Finder, Vacuum Attachment

Super Cheap Vac Attachment Helps Find Small Dropped Parts

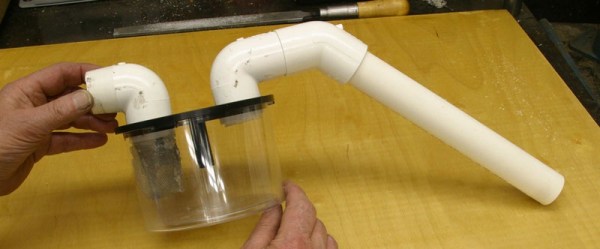
It’s pretty much guaranteed that when working with small parts, you will drop at least one. This phenomenon is just how the universe works, there is no avoiding it. Digging though a carpet or dirty shop floor usually results in frustration and subsequent scrambling for a replacement part. Tired of crawling around on his knees looking for runaway parts, [Frank] decided to do something about it. He made a vacuum attachment that helps with the search… and it’s made from stuff he had kicking around the house.

The idea here is to suck up and contain the part without having it making it’s way into the vacuum. To do this there would have to be an intermediate chamber. For this, [Frank] used a multi-pack CD container. This was a great choice because it is clear, allowing him to see what enters the container, and it unscrews quickly making it easy to retrieve the tiny part. The inlet and outlet connectors are made from PVC and are attached to the CD container’s base with adhesive. To keep the debris from getting past the CD container, an old kitchen strainer was cut up and the screen material was used to only let air pass. Once a shop-vac is connected to the outlet pipe, the sucking can begin. [Frank] shows that he has to sift through a bunch of shop-floor crud to find his dropped screw, but it works!