[Scot] Whips Up Breakout Board For His ARM Breakout Board

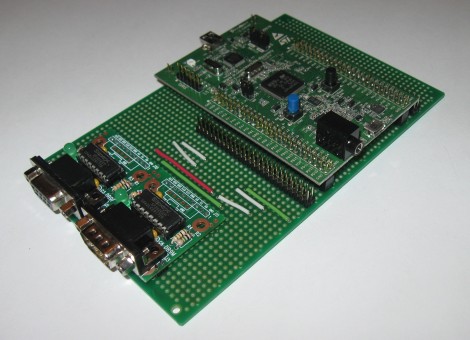
[Scot Kornak] got his hands on the new STM32 Discovery Board. He got his as a free giveaway, but at only $18 he probably would have picked one up anyway. His one complaint about the device is that he dual pin-headers which break out the ARM processor’s pins are not the most convenient for hooking up external components. He decided to make his own breakout board which would give him a more robust solution for the components he uses all the time.

The protoboard that he chose as a base is quite interesting. It’s made for interfacing DIL pin headers just like the ones on the STM32F4 Discovery board. Each row of the dual header is carried down the board perpendicular to those headers. [Scot] cut the traces underneath the STM32 board to isolate the right and left sides. He then added RS232 hardware to one side, while including another pair of DIL headers to break out the rest of the unused pins.

This is all he’s got so far, but there’s plenty of room on the base board to add more as the need arises.

A Vacuum Chamber From A Pressure Cooker

[Allan] needed a small vacuum chamber to get all the air out of clear casting resin. Degassing is a simple step in casting that improves the finished product immensely. The problem, though, is building a vacuum chamber. [Allan]’s chamber seems easy enough to build, and pulls enough air out to get to 0.1 atmospheres.

After a hole was drilled in the side of the pressure cooker, [Allan] installed a 15mm “speedfit” plastic tank connector. The seal around the connector is neoprene self-adhesive foam. This foam was also taped around the lip of the pressure cooker for the top.

A thick-walled pressure cooker is more than capable of handling the outside pressure when under vacuum, but [Allan] cautions against using acrylic plastic for the top. Acrylic has the tendency to fail catastrophically, so he used a thick sheet of Lexan. Check out the demo video of [Allan] sucking the air out of shaving cream after the break.

Continue reading “A Vacuum Chamber From A Pressure Cooker”

Snap Together Boombox Great For Taking Your Music On The Go

fab-boombox

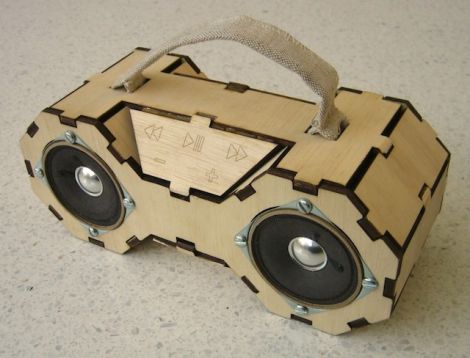
[Matt Keeter] wanted to take his music on the go, and wrote in to share a great looking boombox he built for under $100. His goal was to put something together that could be made in pretty much any hackerspace/fab lab, so his boombox was made using simple materials.

He first modeled the boombox using cardboard, later fabbing it from wood on a laser cutter. The design allows the stereo to be snapped together, though [Matt] says that some joints were glued as an extra precaution. Inside the boombox resides an custom PCB he built which incorporates an ATmega328, an MP3 decoder, and an SD card to store his music.

One feature we really like is the control scheme [Matt] built into the boombox. Each of the capacitive touch buttons are positioned on top of a copper pad, which are wired into the control board. He says that while good in theory, he had a difficult time getting the buttons to work properly, though they seem to do the job well enough.

If you’re looking for a portable music solution and have access to a laser cutter, be sure to check out [Matt’s] page for schematics and firmware.

Animated LED Buckyball

This animated LED buckyball has little to do with modeling a carbon molecule but a lot to do with adding some excitement to your party decor. [Tim] felt that the LED cube hacks had run their course, so took on the challenge of a sphere made out of pentagonal and hexagonal components instead.

As with many LED projects, finding a good diffuser is paramount. [Tim] decided to go with hot glue sticks, which do a great job of both diffusing, and piping the light from RGB LEDs. The unintended consequence of this choice is that the shape sags under the weight of 90 glue cylinders.

At the end of each glue segment you’ll find a tiny surface-mount RGB LED and controller combo. This is [Tim’s] own design and in bulk it gets the cost of each node down to about one dollar. With the help of a soccer ball as an assembly jig he finished off the construction and wrote some code to produce the eye-pleasing animations seen after the break.

Continue reading “Animated LED Buckyball”

Make Any Scrap Of Paper Sticky With 2000 Volts

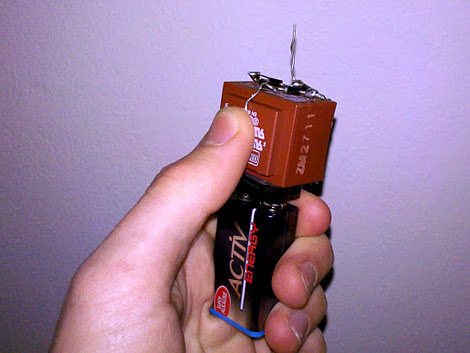
Who needs chemistry when a little bit of physics will do? Instead of brewing up a batch of weak adhesive to make his own post-it notes, [Valentin] built this handheld device to add an electrostatic charge to bits of paper. Just give them a couple of seconds to charge and they’ll stick to the wall with ease.

The charging circuit is pretty simple, involving a transformer, transistor, resistor, and four diodes for rectification. He walks us through the build process, free forming the circuit using the transformer housing as a base. Once the circuit is fully assembled, a 9 volt battery connector is added and the fragile parts are hot-glued in place. It boosts the output voltage all the way up to 2 kV, but it’s still safe because it’s at a very low current.

The concept is akin to the high-voltage bulletin board seen last month. We wonder how long the notes will stay in place without an active electrical connection to keep the charge?

Bitbuf Delivers Some Of The Best Chiptune Effects Around

Wow. And furthermore, WOW! Just looking at that clean prototype you know that a lot of work has gone into the project, but when you hear this chiptune MIDI device you’ll really be impressed. We know what you’re thinking, but really, you’ve got to hear this to appreciate the quality [Linus Akesson] achieved in this synthesizer. You can catch it after the break.

He does a great job of showing off the different waveforms that can be produced by the ATmega88 on this board. But there’s much more. It also serves as a 16 frame, 16 channel sequencer for creating and layering your own loops.

He mentions that eight oscillators are used for the waveform generation. We don’t see hardware for this on the board. Either we’re missing it, or these oscillators are being created with software? If you have an idea of how this works please clue us in by leaving a comment.

Continue reading “Bitbuf Delivers Some Of The Best Chiptune Effects Around”

Xbee Wireless Servo Control

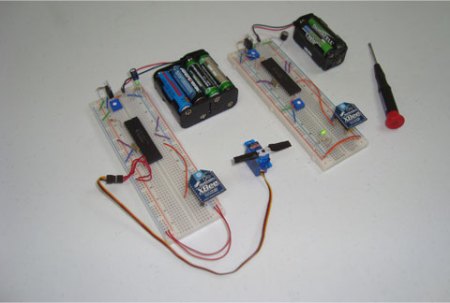
Servo control is good, but wireless control is even better. This hack by [PyroElectro Tutorials] shows you how to do this wirelessly using two Xbee modules. There’s also a great example in the video after the break of this “hacking platform” used to control an animatronic head’s eyes. (we’ve featured the eyes here before).

In this control scheme, communication is one way only. An Xbee module is used as the transmitter, and the other as the receiver. The tutorial does a great job of explaining the parts used and gives links for purchasing the components if needed. It even goes over some very basic servo theory and gives schematics as well as assembly pictures. Transmitter and receiver firmware files are also available to download, so there’s nothing keeping you from trying it! Join us after the break to see the working example.

Continue reading “Xbee Wireless Servo Control”