The old saying is if your data isn’t backed up at least twice, it’s not backed up at all. For those not wise enough to heed this adage, there are a number of options available to you if you wish your data to be recovered. Assuming the drive itself is just corrupted somehow (maybe a malicious attack, maybe a user error) and not damaged beyond physical repair, the first step is to connect the drive to another computer. If that fails, it might be time to break out the computer forensics skills.
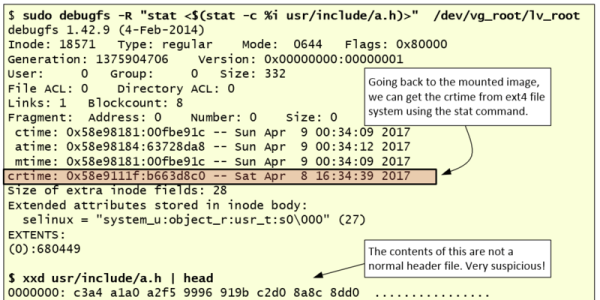
[Luis]’s guide is focused on Linux-specific drives and recovery tools, so this isn’t necessarily a general-purpose how-to. That being said, there is a lot of information in this guide such as how to mount the target drive’s partitions, how to set up various timelines, and which of the Linux system’s logs are important for the forensic analysis. This specific example in the guide also goes into detail about noticing which of the recent files had been accessed, what they might have done, and different approaches to piecing the mystery of this corrupted drive together.
[Luis] points out that the world of Linux forensics is much different from that of Windows, but for anyone looking to get started he suggests starting with a clean Linux install and going from there. There are many other avenues of digital forensics, as well; the field has as many avenues of exploration as there are different types of computers.


