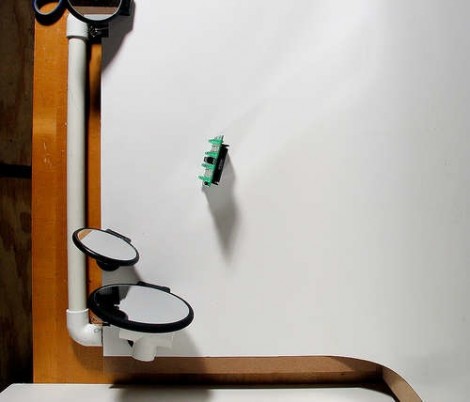
[PT] let us know about a fantastic guide to taking better photographs of your projects. It’s a hefty read but well worth the effort. Author [Johngineer] helps us understand how to use simple (and possibly inexpensive) tools like lights, mirrors, and a background material. He also gives some tips on how to recognize what your image processing software is telling your about your photography skills (get the correct camera setup and you won’t need correct your levels in The GIMP). There’s even some tips on photographing LEDs, a topic we’ve seen before, which you’re bound to find useful when trying to make that blinky thing you built into an Internet sensation.


Take this to heart! I usually try to get my photos on a white background with diffuse lighting. Maybe I should blog my hackety ligting rig.
This is more a Tutorial like “How to bulid your own home studio.”. lg
This is a brilliant tutorial on lighting (no pun intended.) I’ve long wanted to make a similar setup but wasn’t sure how to go about it. I’ve looked at light tents and not been impressed, especially given the costs. I already have a pair of lamps on tripods, but the stage is the part I didn’t understand before. And I was always afraid of the reflected light from mirrors being too harsh, I didn’t understood before that increasing distance softens their light.
I’m hitting the Home of De Poe for parts this weekend. Thanks, Johngineer!
That looks like a pretty basic photography set-up. Things to add are thin, rice-paper like sides to diffuse the light a little more; see any number of photography blogs on what what does to your lighting and shadows. The photo lamps are a great suggestion, as is finding the white balance option option on the camera. Just do not mix your bulb types unless you want different colored shadows. Xenon flash bulbs are around 5500K, not the same as the 3200K constant light bulbs that she recommends. Most DSLRs are going to have a tungsten and a daylight and maybe a separate flash white balance setting, pick the right one.
Only part I would disagree with is the wide-angle macro. I personally don’t like them for small projects because you either have too much white space on the side, or you are too close and get a slight curve to your straight lines. On a point and shoot, you don’t have much choice, but with an SLR I like a zoom macro. My favorite is my 300mm, 0.95 meter focus, but it was free.
personally, for electronics I like photographing against a graph-paper because it gives a sense of scale.
@ Quin and nave.notnilc
A really great way to combine your ideas is this:
Take white or black felt, whichever your project looks best on, and put half of it on a table, then drape the other half over a box. Place a piece of plexiglass/acrylic about 2-4x the size of your piece on the cloth, then light at about a 45* angle.
This gives you AMAZINGLY professional looking results. You can also place a quarter or dollar bill in the picture for reference.
(Other reference items are much prettier looking than graph paper in my humble opinion. Try the blades of calipers or a stainless steel micrometer and let me know how many more compliments your projects get.)
*Note, I just looked over the article and it looks like he goes over pretty much what I described. The acrylic and cloth really does give a softer light effect + a vivid reflection.
Cheers
I would skip the hot lights and go with some cheap slave strobes. Get them off ebay for cheap and they are good enough for small stuff. Cheap umbrella are less than $10 each too.
But I am spoiled with my Photogenics…
Is it just me, or does a PVC frame seam a bit excessive? I was talking to my buddy and he’s always found taping paper to a wall to be quite adequate. In my own experience, even the tape is unnecessary. Just lean the paper against a wall or some books.
On another note; a good trick I’ve found is photographing a well lit project against the night sky. You get a very good contrast and a nice even background.
Great post! Thanks.
this is great… I might snag a huge piece of board to take pictures of larger object that my light tent can’t handle.