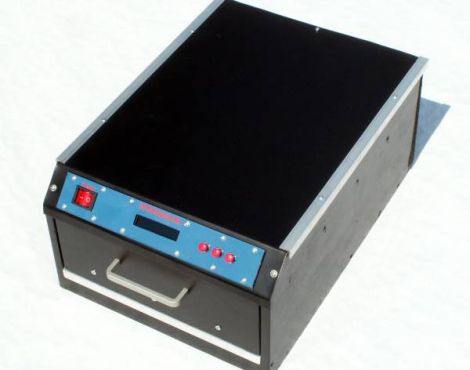
[Stynus] was frustrated with the fact that he would have to flip his PCBs over mid way through the exposure process, so he decided the best course of action would be to build his own double-sided PCB exposure box.
He scored some UV LEDs on eBay, and after waiting a few weeks for PCBs to arrive, he was ready to start construction. The box contains a sliding glass shelf, which is positioned between two sets of LED panels. The setup lets him simultaneously etch both sides of any PCB, up to 20cm x 30cm in size. The exposure box is run by a PIC 16F628P and features an LCD status panel as well as a small handful of controls. [Stynus] programmed the box to retain the length of the last exposure, making it easy to replicate his results time after time.
Towards the end of the build log he shows off some pictures of the completed exposure box, which looks very professionally done. It’s a great job all around, and we would gladly take one for our workshop in a heartbeat.


Nice job!
This is just the kind of thing your average Hackaday reader loves to see, a useful tool that you could make yourself for your workshop.
Keep them coming :-)
A friend once told me that all glass naturally provides some amount of UV absorption. Was he right? If he was, I’m making mine with a carrier ;)
“Ordinary window glass passes about 90% of the light above 350 nm, but blocks over 90% of the light below 300 nm” – http://en.wikipedia.org/wiki/Ultraviolet
Glass blocks most UVB (shorter wavelength, causes sunburn), but lets most UVA (longer wavelength) through.
I’ve not yet got around to looking at whether that’s actually an issue with photosensitive boards, I expect not.
Some glass lets UV pass, some doesn’t.
All in all, it’s a great job done!
physicist Richard Feynman claimed to be the only person to see the explosion without the dark glasses provided, relying on a truck windshield to screen out harmful ultraviolet wavelengths – http://en.wikipedia.org/wiki/Trinity_%28nuclear_test%29#Explosion
It probably just means that you will need a longer exposure than you would otherwise. But apart from the glass I love it.
An hexagonal LED pattern would have provided a more uniform light density.
Maybe silly question, but why does he need the upper glass? Does he need to protect the UV LEDs from board off gassing or something?
Think a little ! Its like your morning ham sandwich:
Led Arrey
Glass
Art Work
PCB upper side
PCB lower side
art work
Glass
Led Arrey