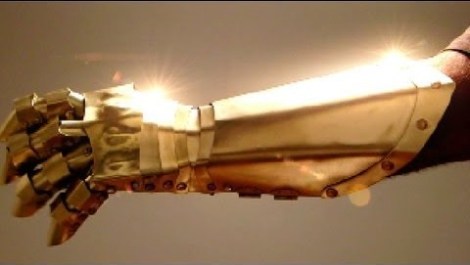
This is not photoshopped, it’s a real gauntlet made of brass. [David Guyton] crafted it for some promotional photos for his book. But he also took the time to put together a step-by-step build tutorial.
The process starts with paper templates. These are much easier to work with than metal stock so [David] spends quite a bit of time trimming each piece to fit correctly. They are hinged together using thumb tacks which he crimps with a pair of pliers. With all the templates tuned to perfection he uses an awl to scratch the outline in his brass stock (you can use the metal of your choice). All of the holes are drilled and a bit of hammering flattens the parts before he heads to the grinder to smooth the cut edges.
To make the curves [David] fabricated his own jigs from pieces of pipe and carved wood squeezed together with a bench vice. It’s time-consuming, but the skills needed should be rather easy to develop with a little practice. You can catch his entire build in the video after the break.


Okay, so who’ll be the first to follow the instructions and fit electronics in it?
Me … brb
Well, you’ll have one hell of a ground plane.
That looks pretty neat ! Nice job.
If he’s going to fight in those, he’s going to have some nasty problems.
Brass looks nice. It really does. It also bends easily under most forms of impact. Steel would have been much better. High carbon steel would have been what was used in the middle ages.
Secondly, the second joints on the fingers look horribly mis-sized. They should be on top of the first plate, and under the plate further out from the fingers (like a snake scale). The reason is that it’s harder to get something stuck in the plate.
Thirdly, the most common style gauntlets are the rounded plate on the back of the hand, with chain mail protecting the thick of the hand. This usually comes from the chain shirt coming down to the wrists. You would put your thumb through near the end of the chain shirt for hand protection.
I fight rapier in the SCA, and am also authorized to fight heavy (I don’t as much). I’ve also made a bit of my armor.
He probably built it just for the looks, and man did he get that right!
Did you even watch the video? One of the first things he says is that it’s a movie prop, and that you’d probably want to make yours out of stainless steel…
His construction method and design are sound. I’d have domed the knuckle plates a little more, and maybe gone for a smoother shape for the carpal and wrist plates, especially working with a soft material like brass (hammering 316 stainless is a major PITA), but angular may have been the look he was going for.
I would disagree that period armor was made from high-carbon steel, though. Most pieces, IIRC, were made from “bloomery” iron.
I was thinking Ironman.
And I knew the SCA comments would be coming
I love how this is next to the “how to convert a gas engine to steam” entry. Did someone declare Army of Darkness Day?
I think you may have something there!
Not open source? I’m done.
si is there een an open armour project?
lol, i was trying to say “so is there even an open armour project”
Does this count?
http://www.armourarchive.org/essays/
http://www.armourarchive.org/patterns/
Why not use a hole puncher and brass fasteners on the paper mock up? Brass fasteners aren’t going to hurt as much if you jab your finger, and you can reuse them later.
Nah, really…
it’s a nice try, and weldone for the efforts but if one of you really would like to learn some blacksmith techniques, he or she should watch the videos from Eric Dubé. Real medieval style armors with a blend of ancient techniques and modern tools…
And the videos are pretty cool !
http://www.youtube.com/user/SgtViktor
hope you’ll enjoy ;)
He has a new version that is MUCH better than this one.just look up diy gauntlet version 2. man is it awesome and its made with stainless steel and brass highlights.
Where can we get the paper template of this videos plz answer i really wanna make it
http://www.armortemplates.com